This is a great time of month to have a Halloween themed tutorial. In this tutorial I'll teach you how to create a Ghost Character using Adobe Illustrator. We'll be using various tools to create this character as well and learning how to create a custom brush to add in some finishing touches.
Final Result

Ghost Body
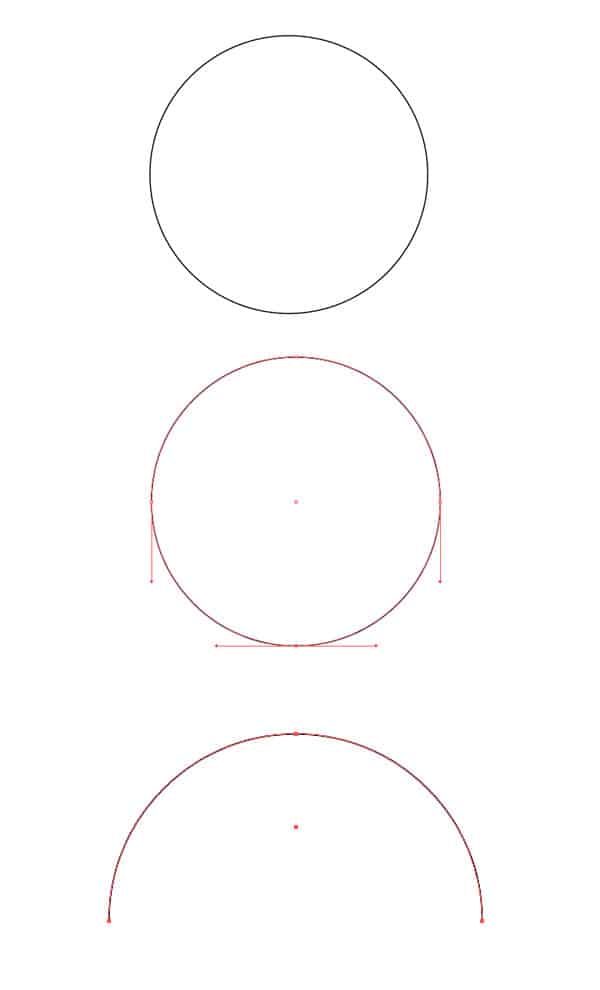
1. Create a new document and draw a circle using the Ellipse Tool with a fill color of none and a stroke of black. Select the Direct Selection Tool and click on the bottom anchor point of the circle and press the delete key – this will remove the bottom half of the circle.
Tip: Holding down the Shift key while drawing the circle will keep the shape perfect!
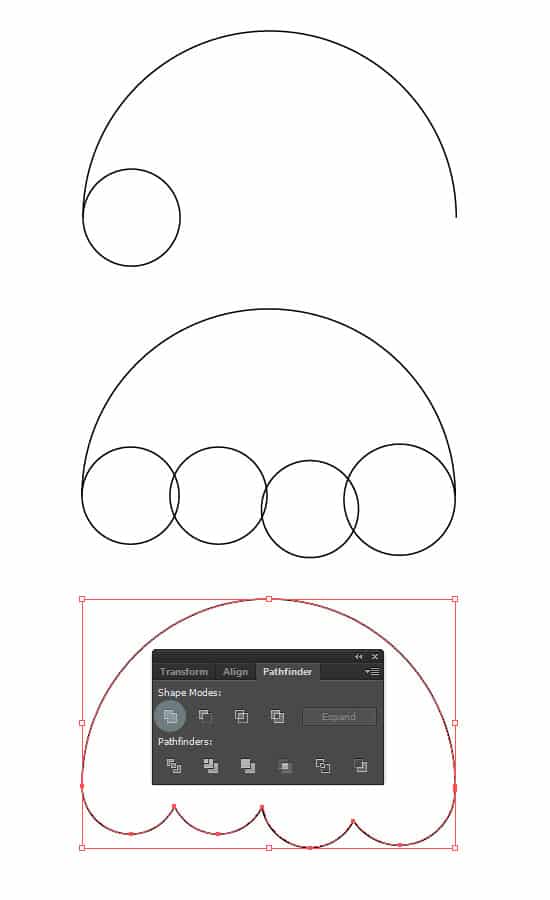
2. Using the Ellipse Tool again, draw a couple of circles like below for the bottom of the ghost. You can have the circles overlapping each other to create an uneven look. With the Selection Tool select everything and click on the Unite icon in Pathfinder to merge all the shapes into one.
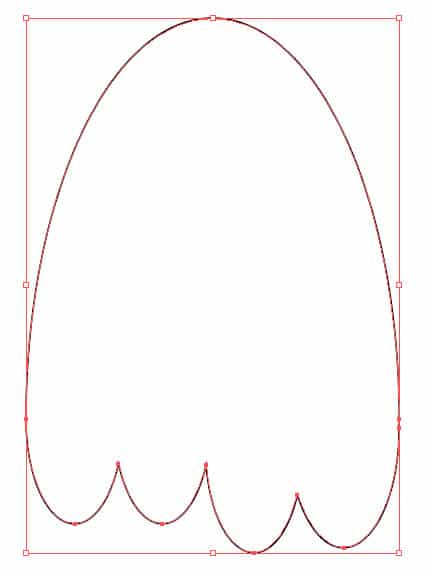
3. Select the shape with the Selection Tool and drag the top up to finish off the body shape of the ghost.
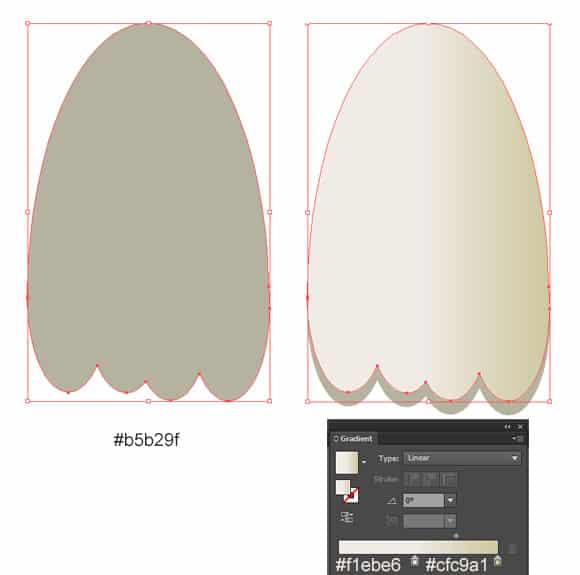
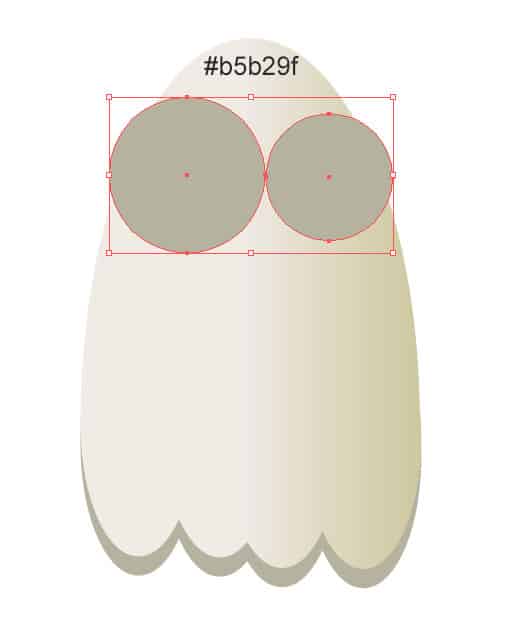
4. Duplicate of shape by holding down the Alt key and dragging the shape away. On the bottom shape, fill it with the color below. On the second shape place a Gradient and align the 2 shapes like below.
Eyes
5. Using the Ellipse Tool draw 2 circles like below for the eyes.
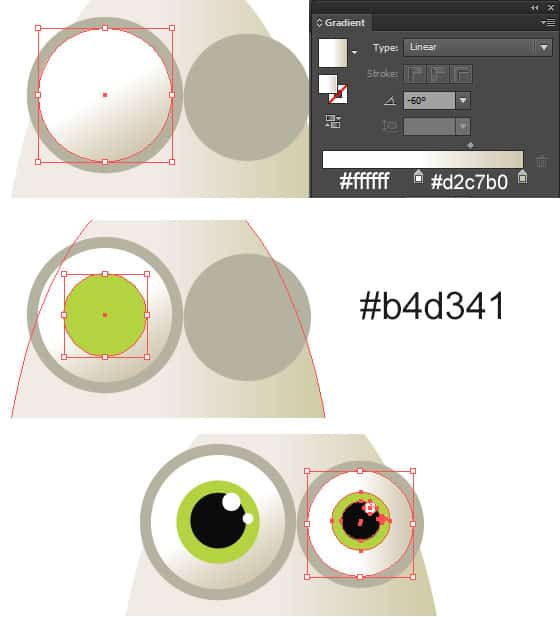
6. Draw a smaller circle for the first eye and put in the Gradient below. Draw a second smaller eye and fill it with the color of your choice, then draw a black circle and 2 smaller circles to finish the eye off. Using the Selection Tool, hold down the Alt Key and select all of the eye layers and duplicate for the following eye.
Mouth
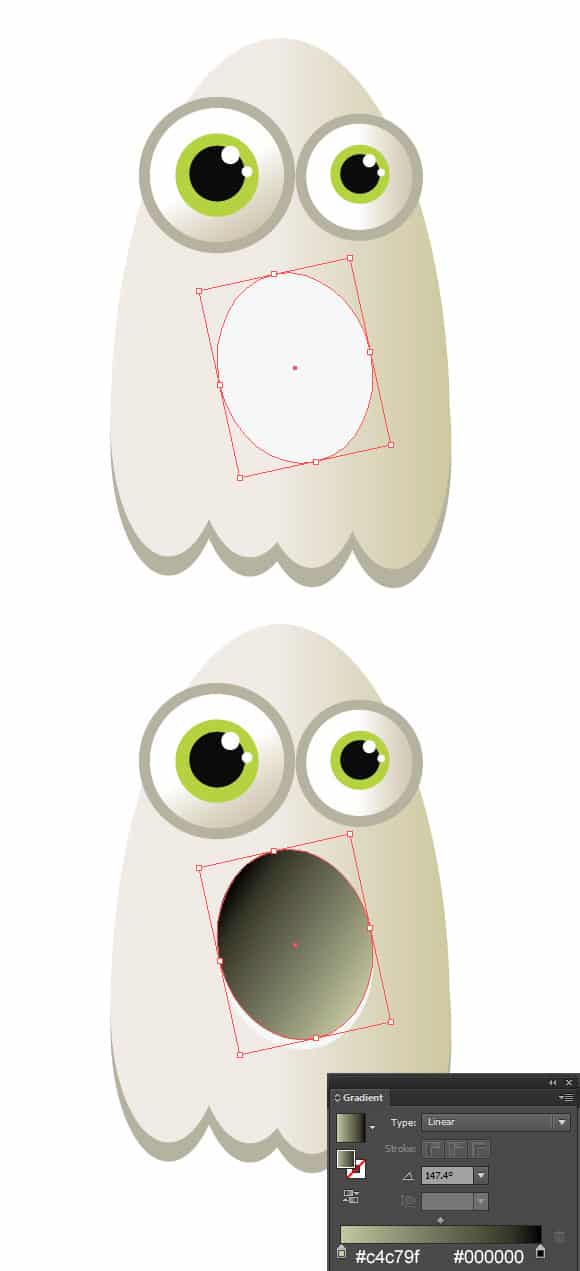
7. Draw a mouth using the Ellipse Tool, select it with the Selection Tool and Rotate it to look like below and duplicate the shape. Make the first mouth shape white and place a Gradient on the second shape. Move the second mouth shape up a bit so it looks like below.
Highlight Strokes
Next we will be creating a custom brush to add in some finishing touches on the ghost.
8. Using the Ellipse Tool, draw a black circle. Select the bottom anchor point of the circle using the Direct Selection Tool and drag it down like below.
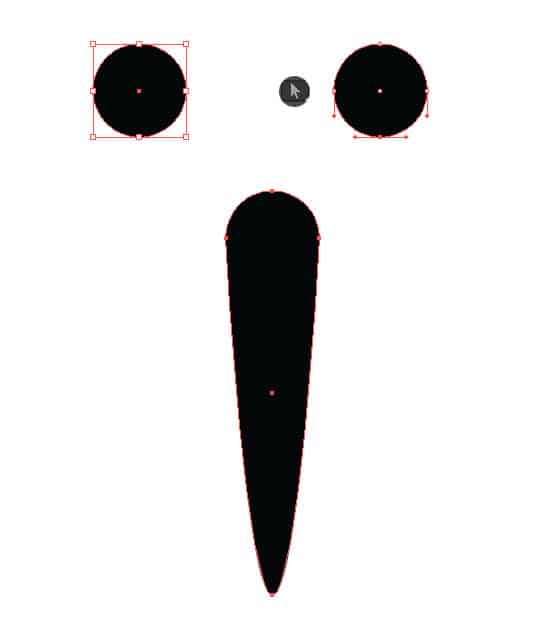
9. With the shape selected, go into the Brushes Palette and click on the New Brush icon and create the new art brush.
Tip: So we can add color to the new brush, we'll be making the Colorization Method Tints.
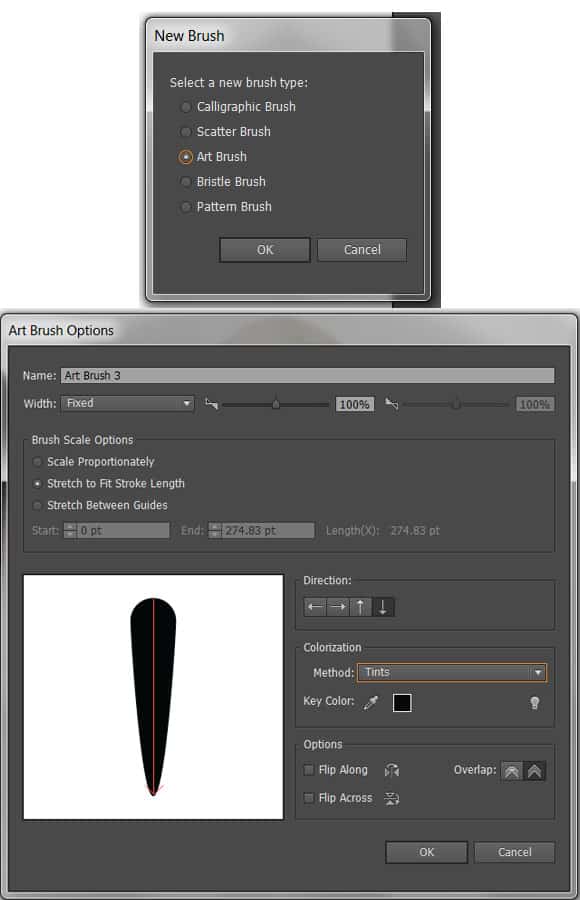
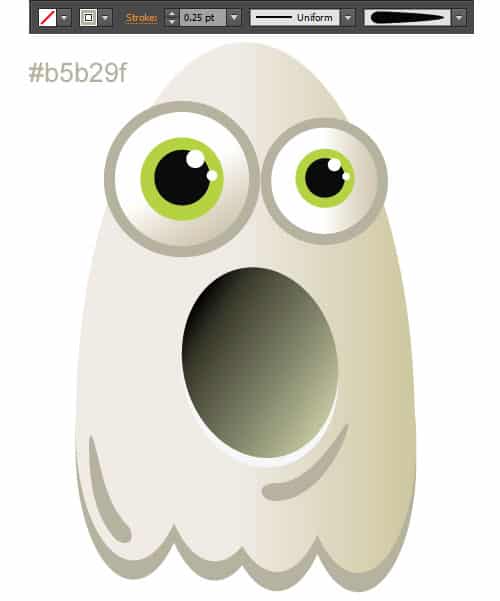
10. Now select the brush and add on some extra features onto the ghost using your new brush and the settings below.
Drop Shadow
11. Using the Ellipse Tool, draw a circle (with a stroke of none) and place in the Gradient below.
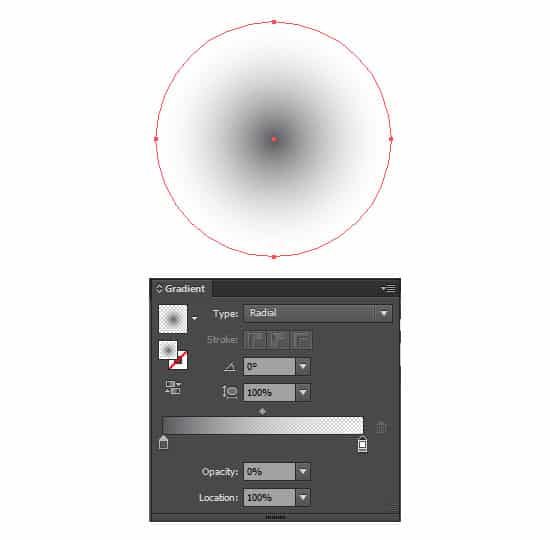
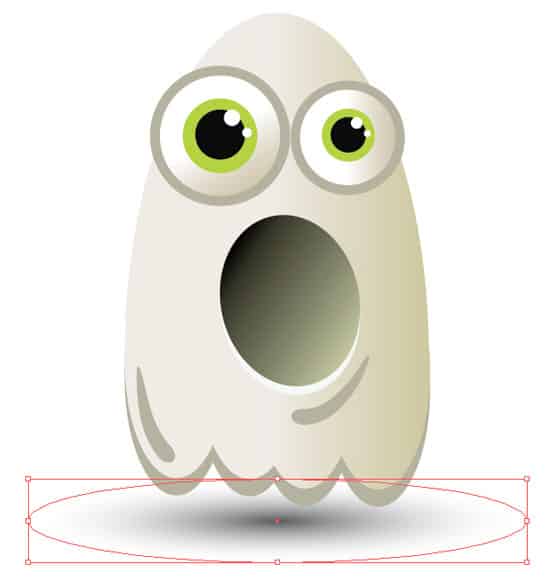
12. Squash the Gradient down a bit and place under the ghost for a shadow effect. If the shadow is over any of the ghost shapes, press CTRL + { a number of times to make it go behind.
Final Result

