In this week's tutorial we'll teach you how to Create a CSS3 Top Navigation Bar Tutorial packed with a beautiful icons, counters, and nice hover/active effects. We'll be learning how to Create a Top Navigation Bar Tutorial using CSS3 and HTML by taking you step by step through the code and breaking it down for you.
When designing a website, some designers tend to lose creativity when it comes to navigation menus. Here's a collection of impressive Menus which have been designed with creativity and style. These Drop-Down Menus stand out from the crowd, and help elevate the websites to a new level.
Top Navigation Bars can been seen on many websites, counters notifications and icons are usually seen on email provider websites or admin interfaces. Top navigation websites should always be visually appealing and easy to use. We'd like to say special thanks to Top Bar.
More Navigation Articles:
- Create a Pure CSS3 Drop Down Menu Tutorial
- 55+ Best CSS3 jQuery Plugin Menus
- Create a Vertical Accordion Menu using CSS3 Tutorial
- 32+ Impressive Drop-Down Navigation Menu Designs

The HTML Structure
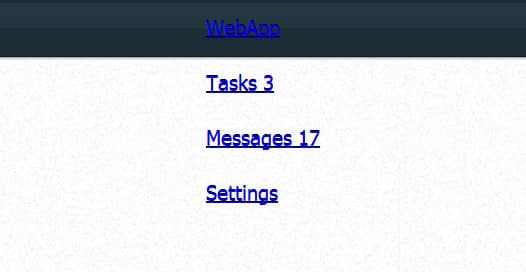
Let's begin with a quick html structure of the Navigation bar. We'll have the navigation as a header and place all the navigation contents in a container inside a <nav> id. The menu items are inside an unordered list. Each menu link will appear as an <li> with a nested anchor element.
<header>

    <div class="container">

      <h1><a href="index.html">WebApp</a></h1>

      <nav>

        <ul>

          <li><a href="index.html" class="icon tasks">Tasks <span>3</span></a></li>

          <li class="active"><a href="index.html" class="icon messages">Messages <span>17</span></a></li>

          <li><a href="index.html" class="icon settings">Settings</a></li>

        </ul>

      </nav>

    </div>

  </header>
MIT License
CSS Styling
Now we can begin styling this css3 notification menu. The bar itself will have a background gradient, bottom border and the position will be fixed. We've got the height as 37px and the width is automatically 100%.
header {

  position: fixed;

  top: 0;

  left: 0;

  right: 0;

  z-index: 2;

  height: 37px;

  line-height: 37px;

  color: #ddd;

  text-shadow: 0 -1px black;

  background: #243942;

  border-bottom: 1px solid #191919;

  background-image: -webkit-linear-gradient(top, #243942, #22373f 50%, #1d2e35 50%, #1b2b32);

  background-image: -moz-linear-gradient(top, #243942, #22373f 50%, #1d2e35 50%, #1b2b32);

  background-image: -o-linear-gradient(top, #243942, #22373f 50%, #1d2e35 50%, #1b2b32);

  background-image: linear-gradient(to bottom, #243942, #22373f 50%, #1d2e35 50%, #1b2b32);

  -webkit-box-shadow: inset 0 0 1px rgba(255, 255, 255, 0.1), 0 0 3px rgba(0, 0, 0, 0.8);

  box-shadow: inset 0 0 1px rgba(255, 255, 255, 0.1), 0 0 3px rgba(0, 0, 0, 0.8);

}
Hovers
Next we'll be adding in some hover effects, these are basic transitions and background colors.
header a {

  -webkit-transition: 0.1s ease-out;

  -moz-transition: 0.1s ease-out;

  -o-transition: 0.1s ease-out;

  transition: 0.1s ease-out;

  -webkit-transition-property: background, color;

  -moz-transition-property: background, color;

  -o-transition-property: background, color;

  transition-property: background, color;

}
Text Styling
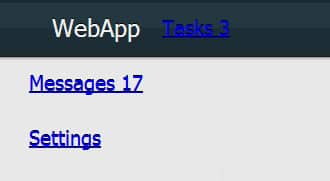
Next up in some text styling for the logo text which will appear on the left side of the menu.
header h1 {

  float: left;

}

header h1 a {

  display: block;

  padding: 0 15px;

  font-size: 16px;

  color: #eee;

  text-decoration: none;

}

header h1 a:hover {

  color: white;

}
List Styling
Now for the menu items, firstly we want the menu items to float to the right, under header nav, we've added in a float: right along with some border stylings. The link styling, link and hover styles are under a nav id.
header nav {

  float: right;

  border-left: 1px solid #2f4b56;

  border-left: 1px solid rgba(255, 255, 255, 0.05);

  border-right: 1px solid #111;

}

header nav li {

  float: left;

}

header nav a {

  display: block;

  padding: 0 15px;

  color: #d0d9de;

  text-decoration: none;

  border-left: 1px solid #191919;

  border-right: 1px solid #2f4b56;

  border-right: 1px solid rgba(255, 255, 255, 0.05);

  cursor: pointer;

}

header nav a:hover {

  background: #2f4b56;

  background: rgba(255, 255, 255, 0.1);

}
![]()
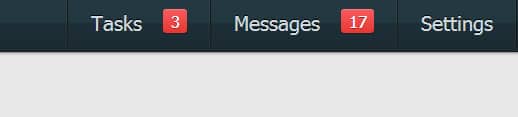
Notification Numbers
We want to add some red notification boxes beside each menu item, to do this we'll be creating a 'span' inside of the header nav id. The <span> tag is used to group inline-elements in a document.
header nav span {

  display: inline-block;

  vertical-align: text-top;

  margin-left: 10px;

  padding: 0 5px;

  line-height: 16px;

  font-size: 11px;

  color: white;

  text-shadow: 0 1px #902a27;

  background: #e93631;

  border-radius: 2px;

  background-image: -webkit-linear-gradient(top, #f65d5f, #e93631);

  background-image: -moz-linear-gradient(top, #f65d5f, #e93631);

  background-image: -o-linear-gradient(top, #f65d5f, #e93631);

  background-image: linear-gradient(to bottom, #f65d5f, #e93631);

  -webkit-box-shadow: inset 0 1px rgba(255, 255, 255, 0.2), 0 1px rgba(0, 0, 0, 0.2);

  box-shadow: inset 0 1px rgba(255, 255, 255, 0.2), 0 1px rgba(0, 0, 0, 0.2);

}
Active Menu
If you'd like to have an active menu style (say when a person is inside messages and you want the message link to be highlighted), you can add in this .active tag to the mix.
header nav li.active a, header nav a:active {

  padding-right: 16px;

  background-color: #1b2b32;

  border-right: 0;

  -webkit-box-shadow: inset 0 0 3px rgba(0, 0, 0, 0.7);

  box-shadow: inset 0 0 3px rgba(0, 0, 0, 0.7);

}
Icons
To make this css3 notification bar more eye catching lets add in some cool icons to go beside each menu item. First position the the icon under the a.icon tag with some padding and background positioning and a no repeat background. Lastly add in your icons in individual divs.
header nav a.icon {

  padding-left: 40px;

  background-position: 12px 11px;

  background-repeat: no-repeat;

}

header nav a.tasks {

  background-image: url("../img/tasks.png");

}

header nav a.messages {

  background-image: url("../img/messages.png");

}

header nav a.settings {

  background-image: url("../img/settings.png");

}