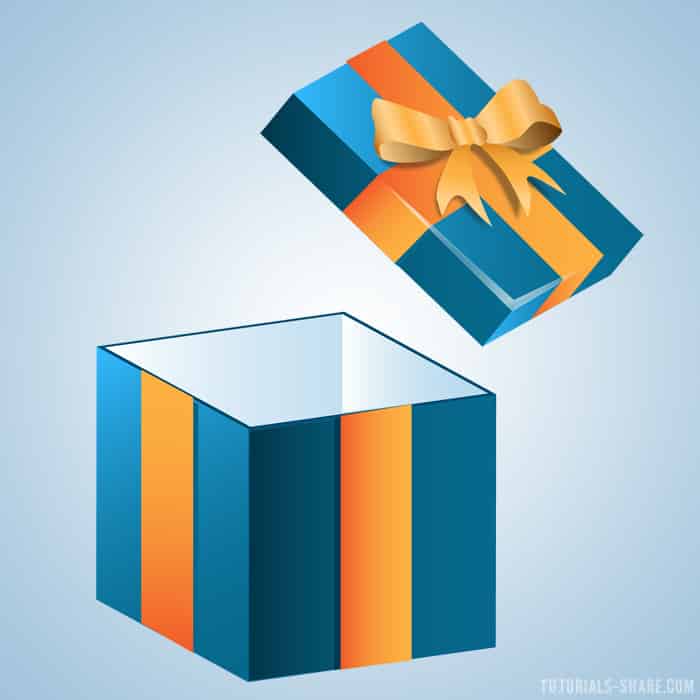
Learn how to create a 3D opened gift box icon in Adobe Illustrator. We’ll be using shapes, effect options and the Pen Tool to create this cute Gift Box Icon.
Final Result
Box
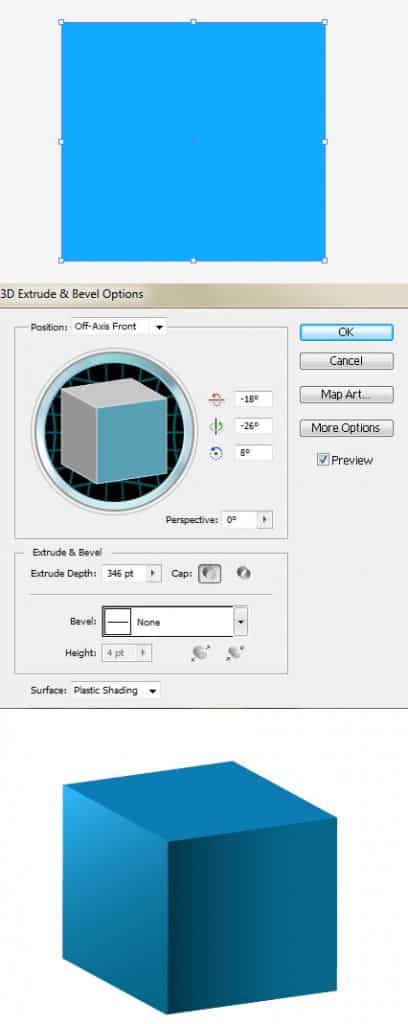
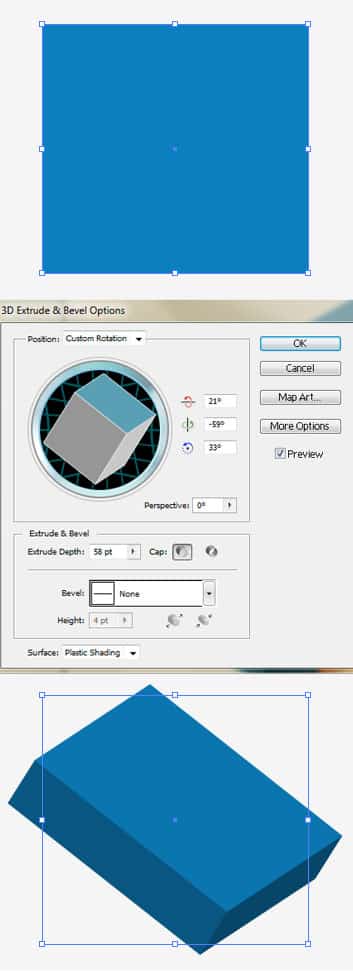
1. Create a new document that’s 600×600 pixels. Using the Rectangle Tool, draw out a square in a light blue. With the square selected, go into Effect > 3D > Extrude & Bevel and put in the settings below to create the main box shape.
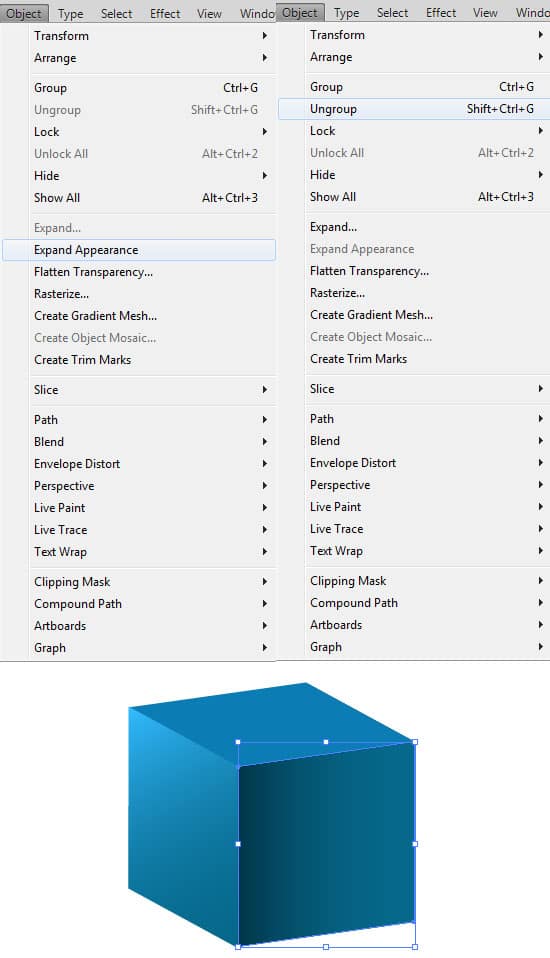
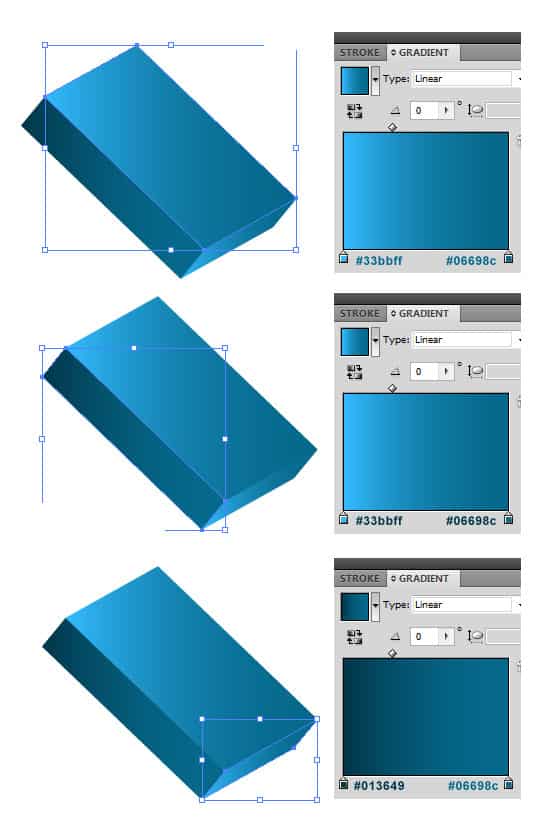
2. Â >Now we want to be able to select all the sides of the box individually to change the colours. To do this select the box, and go into Object > Expand Appearance. With the box still selected, go into Object > Ungroup (Shift+CTRL+G). Do this until all the sides of the box have been ungrouped.
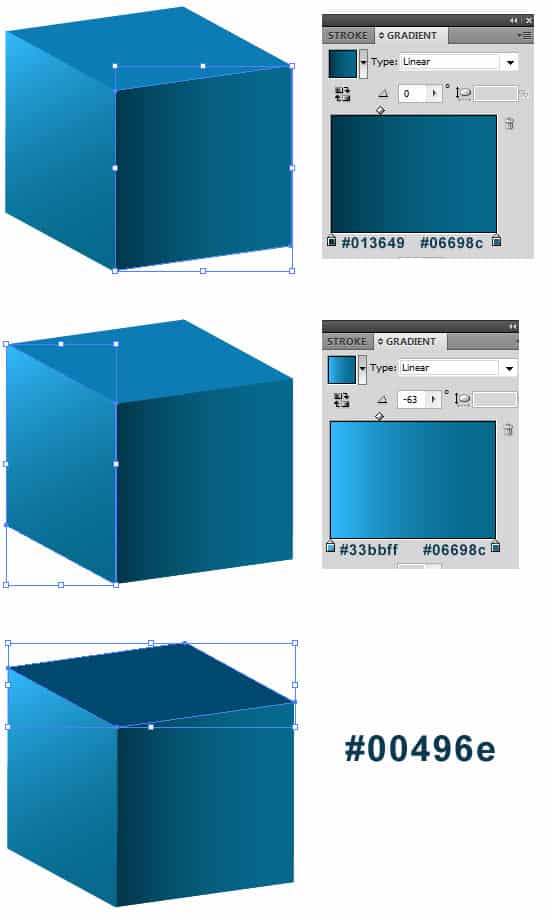
3. Next select each sides of the box, and put in the colours I have below (or any colour of your choice!).
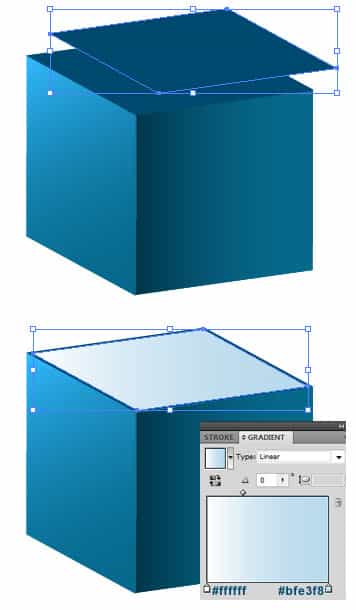
4. To create the inside of the box, duplicate the top shape by selecting it and dragging the shape out while holding down the ALT Key. Make the shape smaller, place it on top of the box and put in the gradient below.
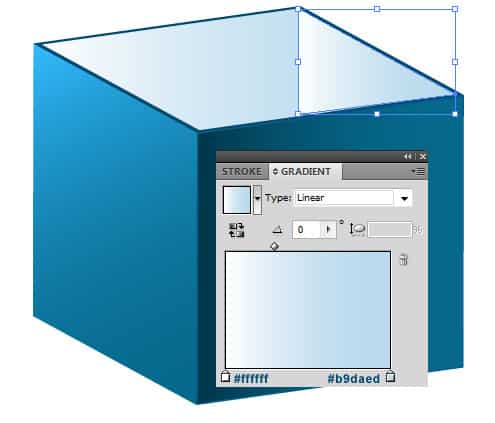
5. Using the Pen Tool, create the shape below and put on the Gradient below for more depth in the box.
6. Using the Pen Tool again, draw the ribbon shadow and ribbons on the sides of the box. To make the shapes more precise, draw them on the edge of the box first using the corners as a guide to make the shape straight & perfect.
Box Top
7. Next for the lid of the box, draw out a square that’s the same size as the square you drew earlier. Next go into Effect > 3D > Bevel & Emboss an put in the settings below.
8. Repeat step 2 for the lid then select each side of the box and put in the Gradient colours below.
9. Using the Pen Tool, draw the ribbons on the lid. To make them the same gradient as the other ribbons, select each shape, choose the eye dropper and click over a previous ribbon to place the gradient onto the new shape.
Ribbon
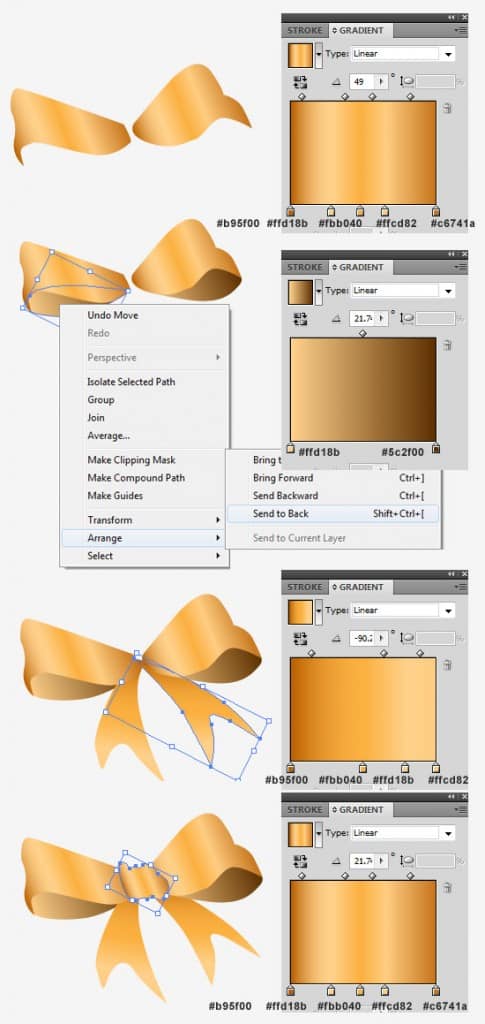
10. Elsewhere on the canvas, using the Pen Tool, draw out each feature of the ribbon like below using the gradient colours.
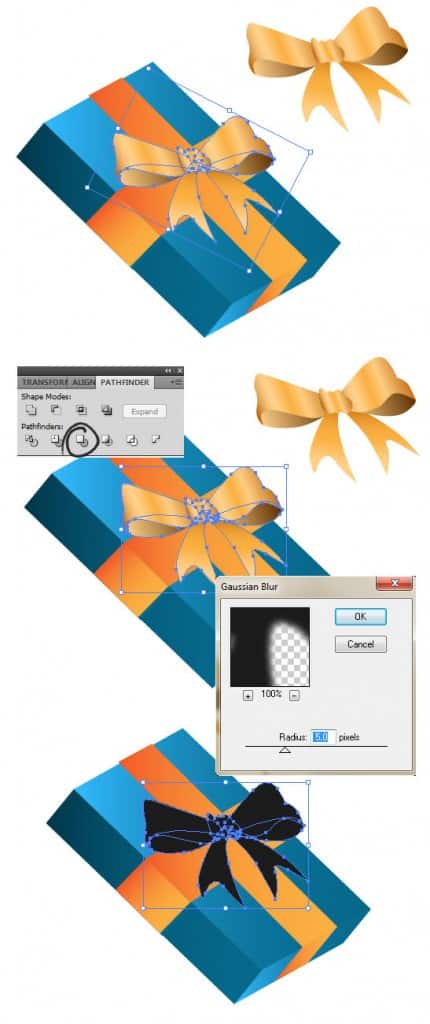
11. Select all of the ribbon shapes and duplicate. With the duplicated ribbon selected, place it on top of the box. With the shapes still selected, click on the Merge Icon in the Pathfinder Box to merge all the shapes. Next make the colour black, go into Effect > Blur > Gaussian Blur to make the ribbon shadow.
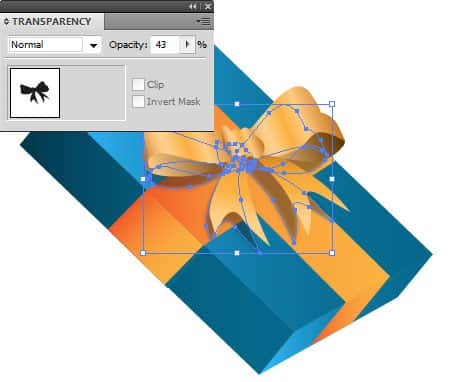
12. Select the Ribbon Shadow, go into the Transparency Box and make the Opacity 43%. Select the coloured ribbon and place it on the lid. You may need to move the ribbon shadow to get a better look.
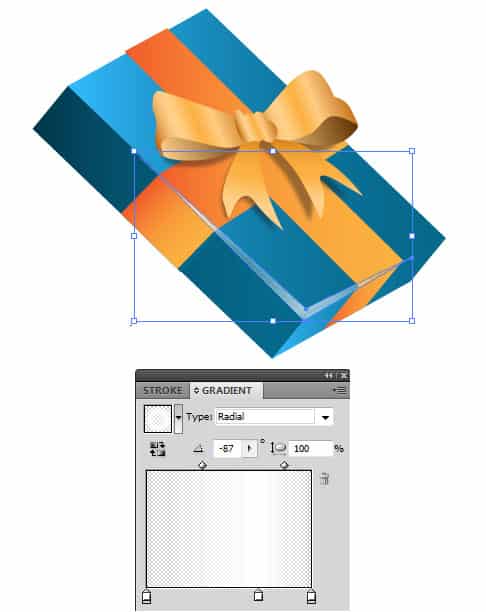
13. Lastly using the Pen Tool, draw the shape below on the box lid and put in a None > White > None Gradient. This will add a nice highlight to the box lid.

