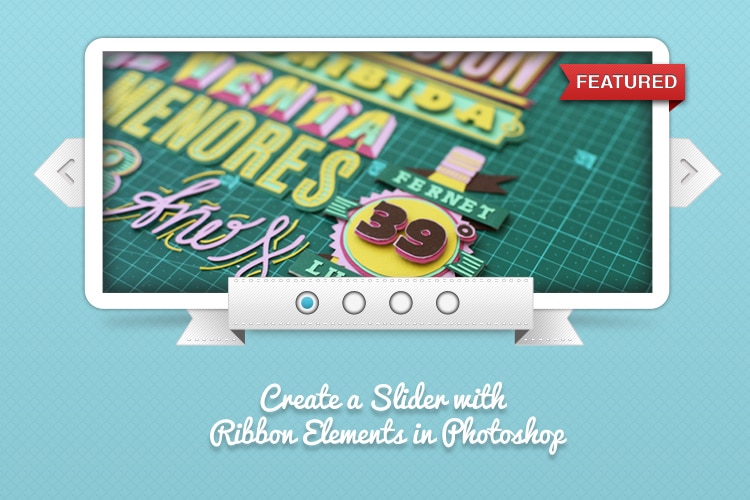
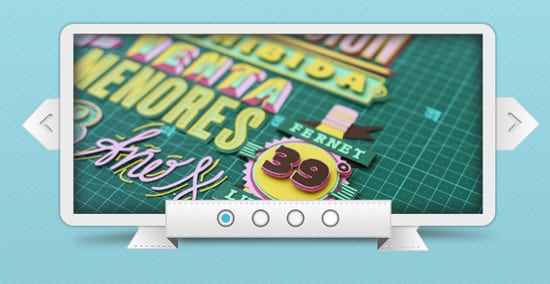
In this tutorial we'll learn how to design a slider with ribbon elements. Even though we're using Photoshop CS6, you can easily use other versions by adding in the Stroke setting in the Blending Options instead. We'll be using various methods and techniques to create this sleek slider! Let's get started!
Resources:
Final Result
Background
1. Create a new document using the size of your choice with a white background. Double click on the background layer to go into Blending Options and put in the first 2 options below. To add in a pattern effect, create a new layer and fill it white. Set the Blending Mode to Multiply so the layer's invisible. Double click into Blending Options and put in the Pattern Overlay below.
Slider Image Holder
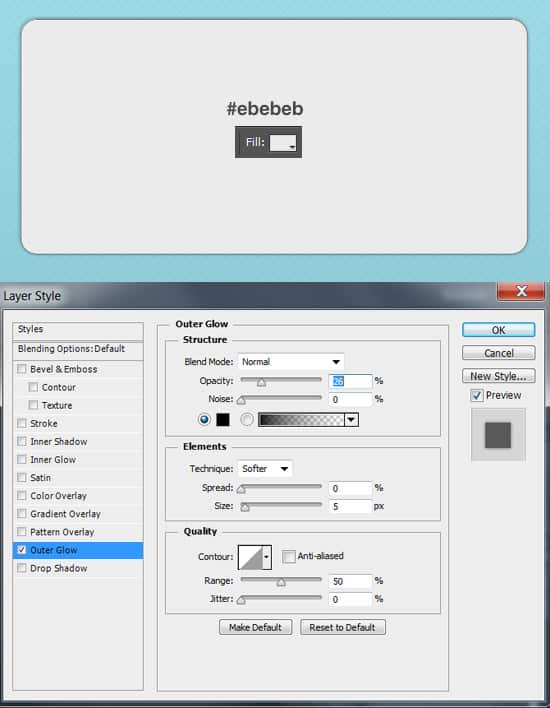
2. Select the Rounded Rectangle Tool and set the Fill Color to #ebebeb. Double click on the layer to go into Blending Options and put in an Outer Glow.
Hint: with cs6's new interface you can set the fill and stroke settings in the option bar without having to go into Blending Options
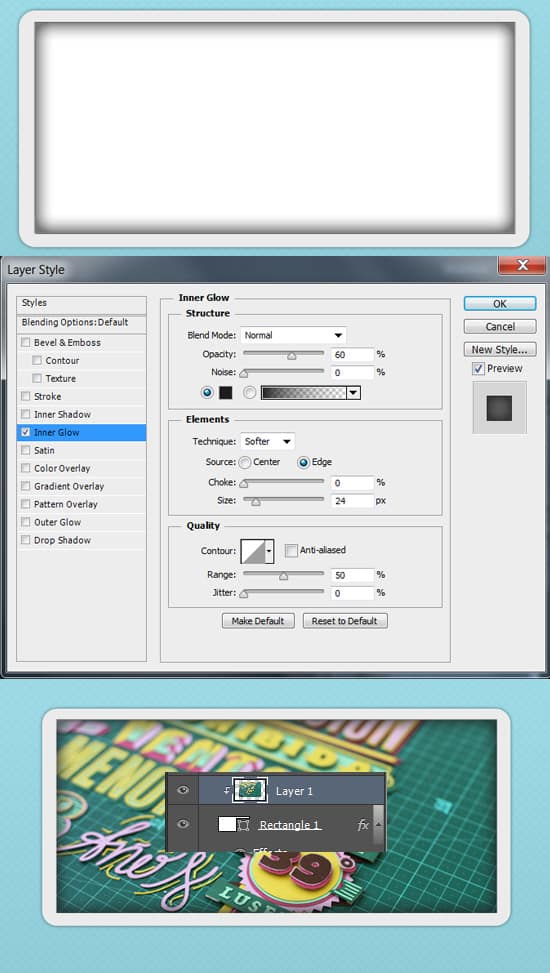
3. Now select the Rectangle Tool and draw the area where the image will be. Make sure to set the Fill color to White. Double click into Blending Options and put in an Inner Glow. Now select what image you'd like in the slider and copy/paste it over the white box layer you just created. Right click the image layer and choose Create Clipping Mask, this will crop the image down to the shape of the white box.
Ribbon Slider Controller
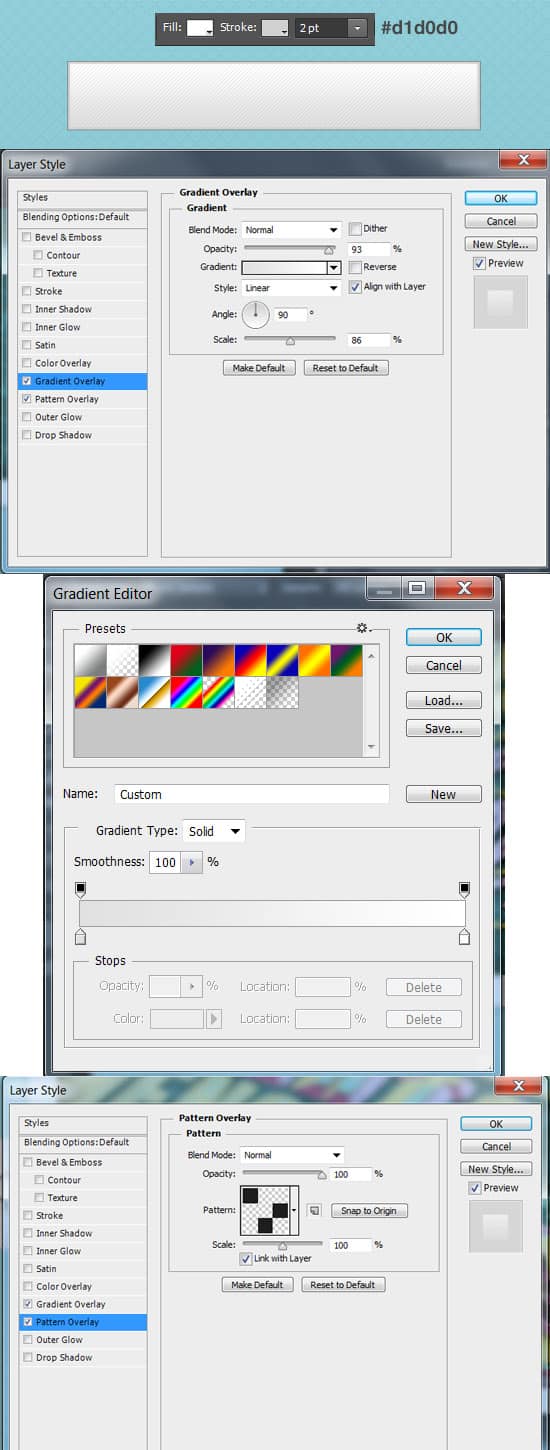
4. Using the Rectangle Tool again, draw the main feature of the first ribbon putting in the Fill & Stroke options below. Double click into Blending Options and put in the settings below.
Hint: You can only add in a fill or stroke option when you're clicked on the tool which you created the element in.
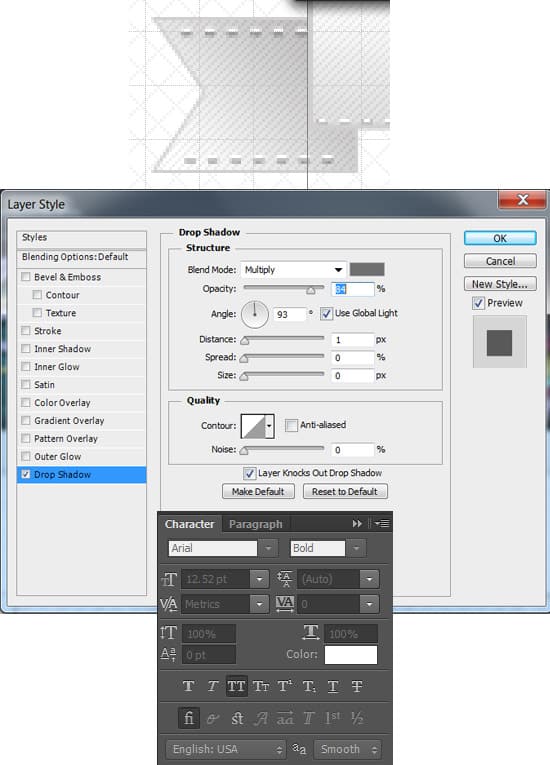
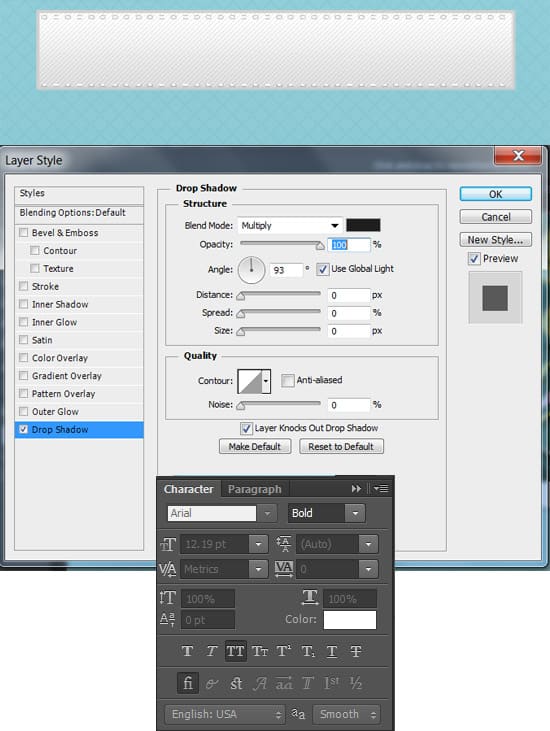
5. For the stitching effect, select the Text Tool and type in the minus symbol using the color white. Double click into Blending Options and put in the Drop Shadow.
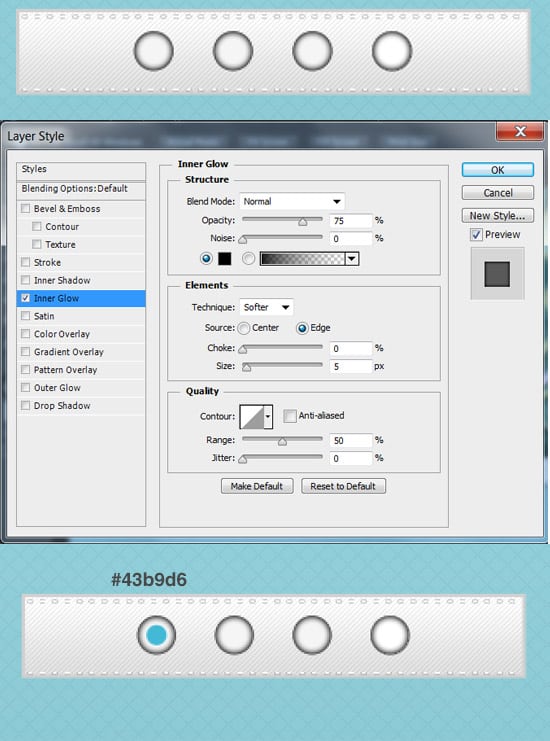
6. For the slider controls, select the Ellipse Tool and draw a small circle while holding down the Shift Key to keep the shape perfect. Duplicate the circle along the ribbon and draw a smaller circle using a color of your choice.
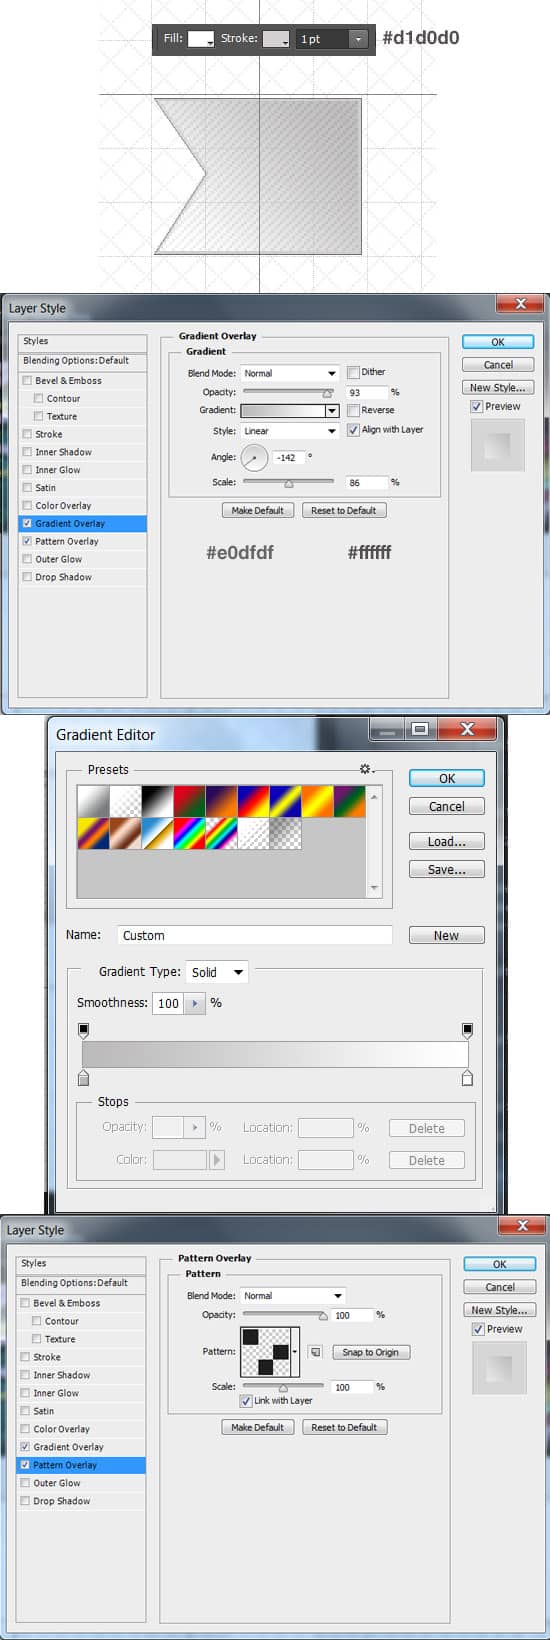
7. Now press CTRL+' to bring up the grid, we'll be using the grid as a guide. Using the Pen Tool, draw one side of the ribbon like below placing a fill and stroke into it. Double click into Blending Options and put in a Gradient Overlay and Pattern Overlay.
8. Repeat Step 5 and place some stitching on the Left side of the ribbon. Place the left side under the main ribbon section.
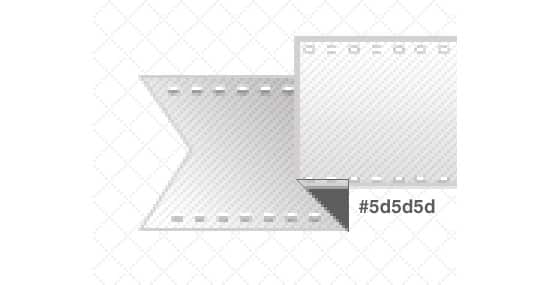
9. Using the Pen Tool, draw a shadow section on the Ribbon like below.
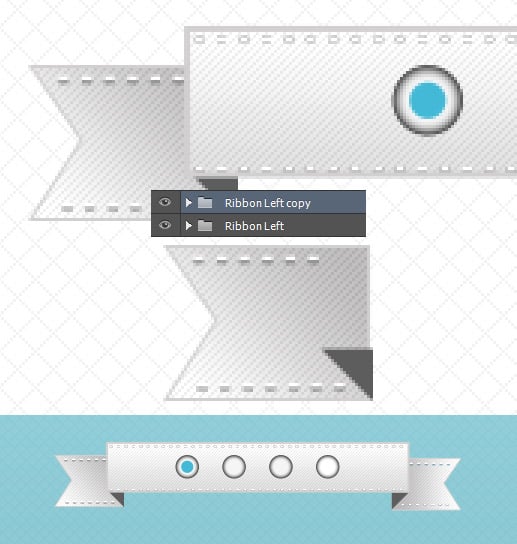
10. Hold down the CTRL Key and select all of the layers on the left side of the ribbon, drag into a new folder. Duplicate the folder and go into Edit > Transform Path > Flip Horizontal and place on the Right Side. You'll need to go into Gradient Overlay and reverse the direction of the Gradient.
11. Next place the main part of the Ribbon layers into a new folder. I've placed the right & left side of the ribbon layers underneath the slider image and placed the main ribbon section in front of it to add a nice touch.
Shadow
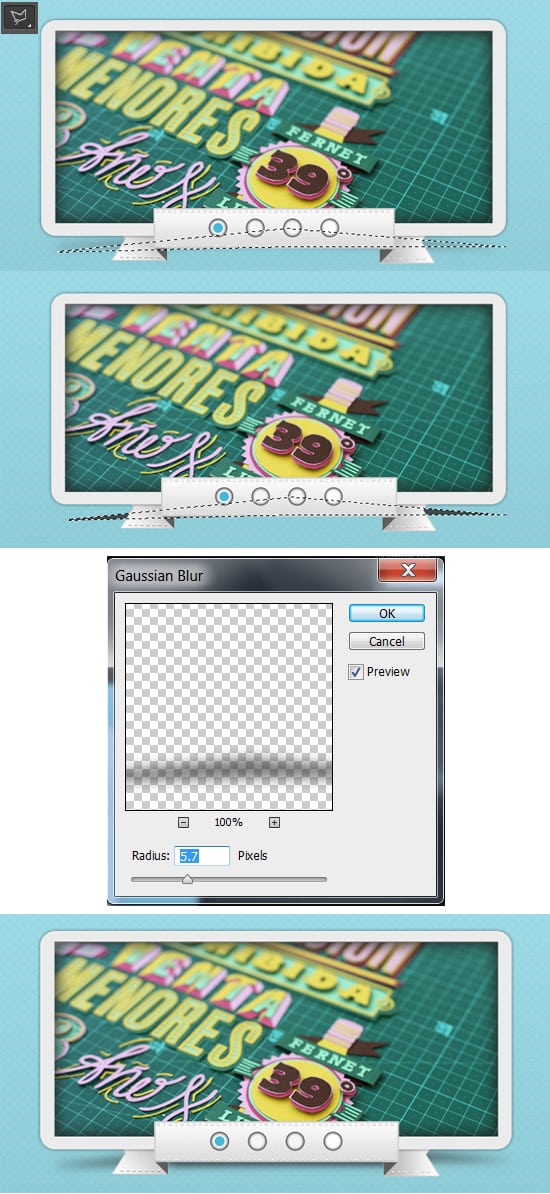
12. To create a shadow effect, create a new layer and select the Polygonal Lasso Tool and draw a shape like below & fill the shape a dark grey. Go into Filter > Blur > Gaussian Blur and put in 5.7 pixels to finish off the shadow.
Ribbon Arrow Elements
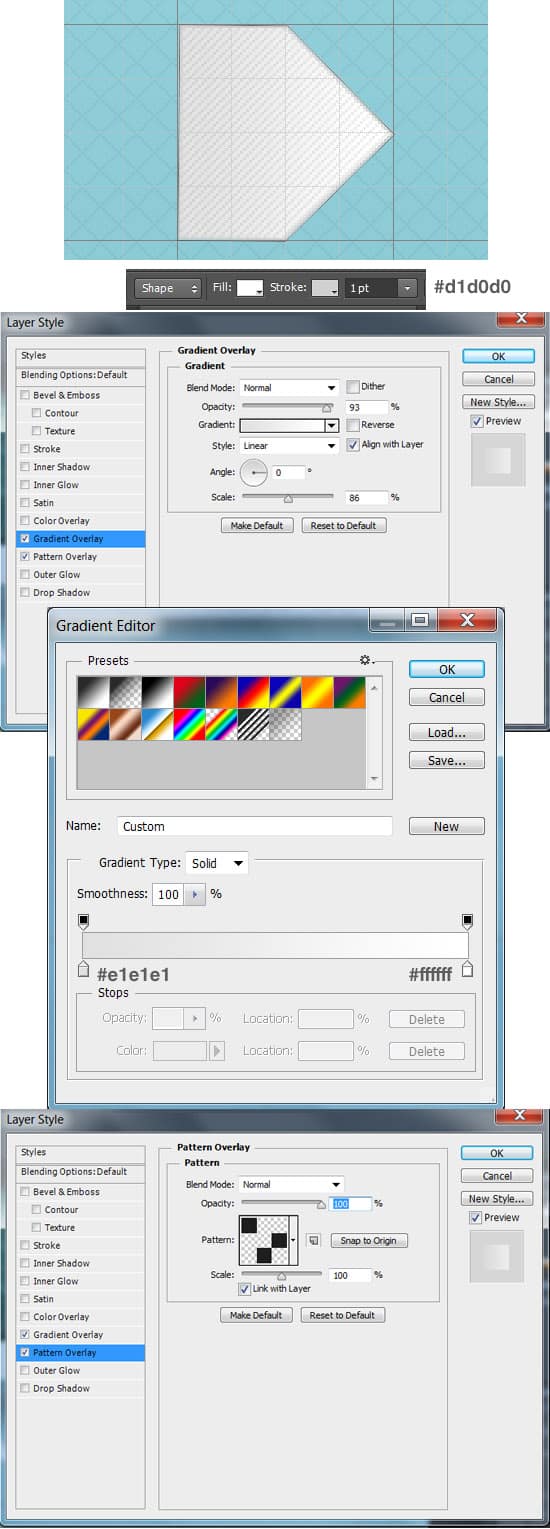
13. Bring up the grid again, and draw a shape like below using the Pen Tool. Set the Fill to #ffffff and the stroke to #d1d0d0. Double click into Blending Options and put in the settings below.
14. Now select an arrow shape and draw it using the Fill color below. Go into Blending Options and put in an Inner Shadow.
15. Like step 10, do the same process to create the opposite ribbon control.
Featured Ribbon Element
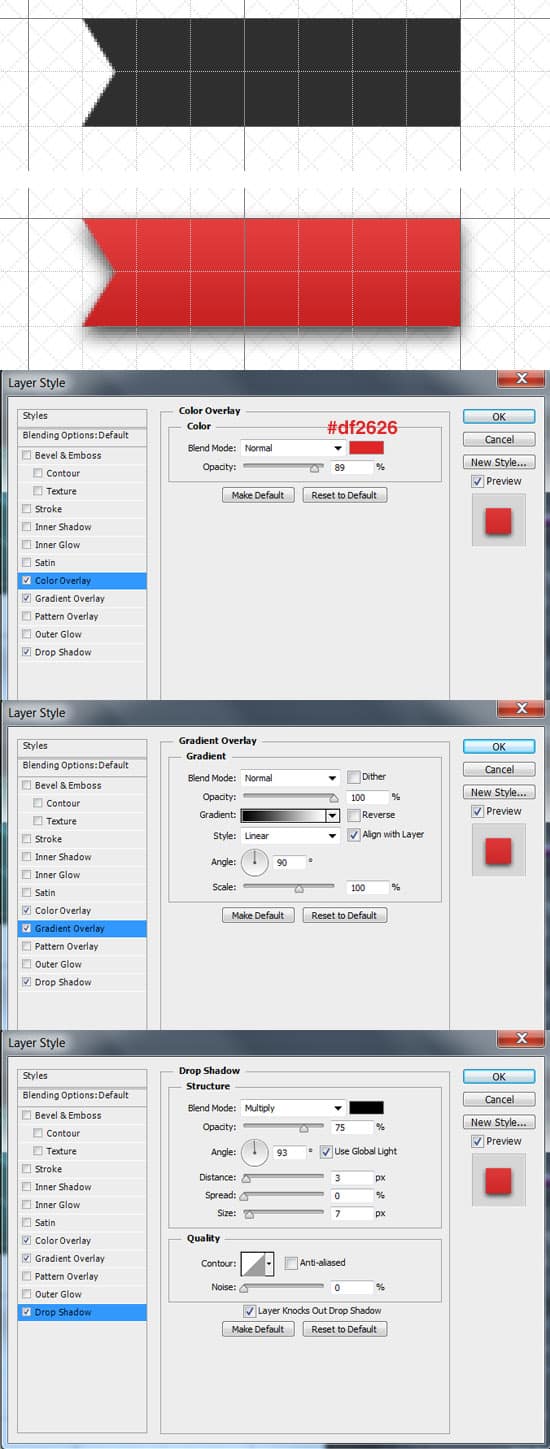
16. Bring up the grid again, and draw a shape like below using the Pen Tool. Double click into Blending Options and put in the settings below to create a nice red ribbon. D
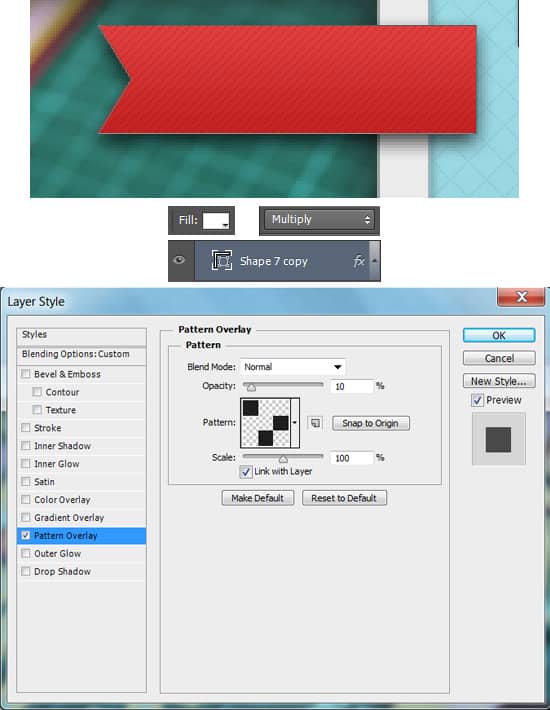
17. Place the ribbon over the slider area. Next to add a nice textured effect, duplicate the red ribbon and remove all of the Blending Options. Set the Fill color of the ribbon to white and set the Blending Mode to Multiply so it's invisible. Double click into Blending Options and put in the Pattern Overlay.
18. To finish off the ribbon, draw the 3D part of it using the pen tool. Using a font of your choice, write out a word in white, go into Blending Options and add in an Inner Shadow.

