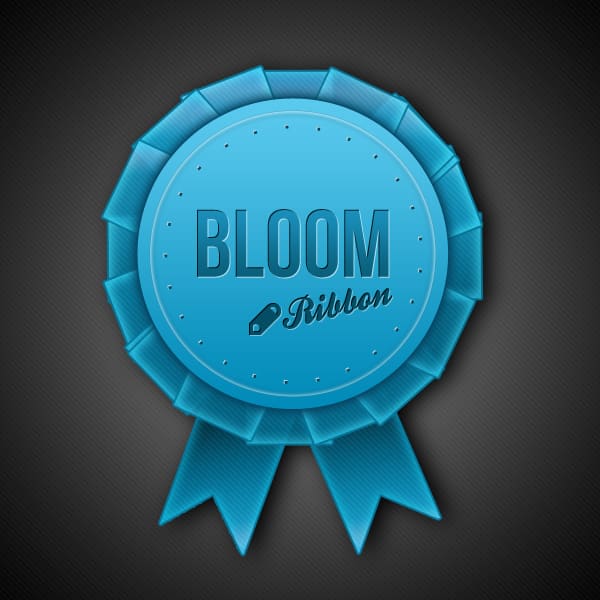
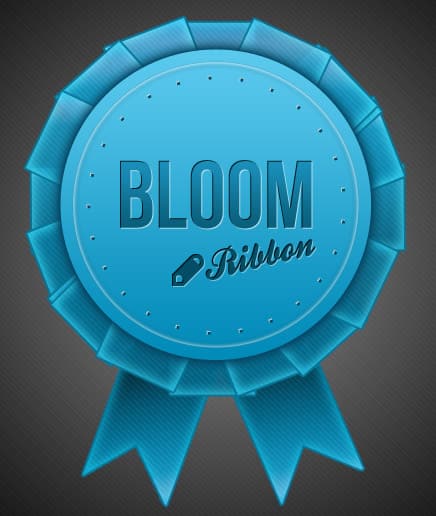
Learn how to create a fun Prize/Show Ribbon in Photoshop using Shapes, Text tool & Blending Options.
Final Result
Prize Ribbon Stitching Pattern
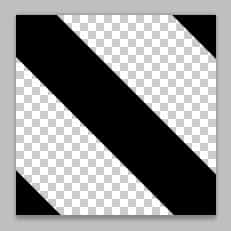
1. Create a new document that’s 200×200 pixels with the Background contents to Transparent. Get the Rectangle Tool and draw a thin rectangle like below. To rotate the shape press CTRL+T and rotate diagonally like below. Duplicate the shape 2 times by dragging it to the new layer icon and place the 2 half of the shapes on the top and bottom edge like below.
To make it into a Pattern go to Edit > Define Pattern.
Prize Ribbon Background
2. Create a new document that’s 600×600 pixels with a white background. Double click on the background layer to unlock it and then again to go into Blending Options. Put in the following options below:
Prize Ribbon
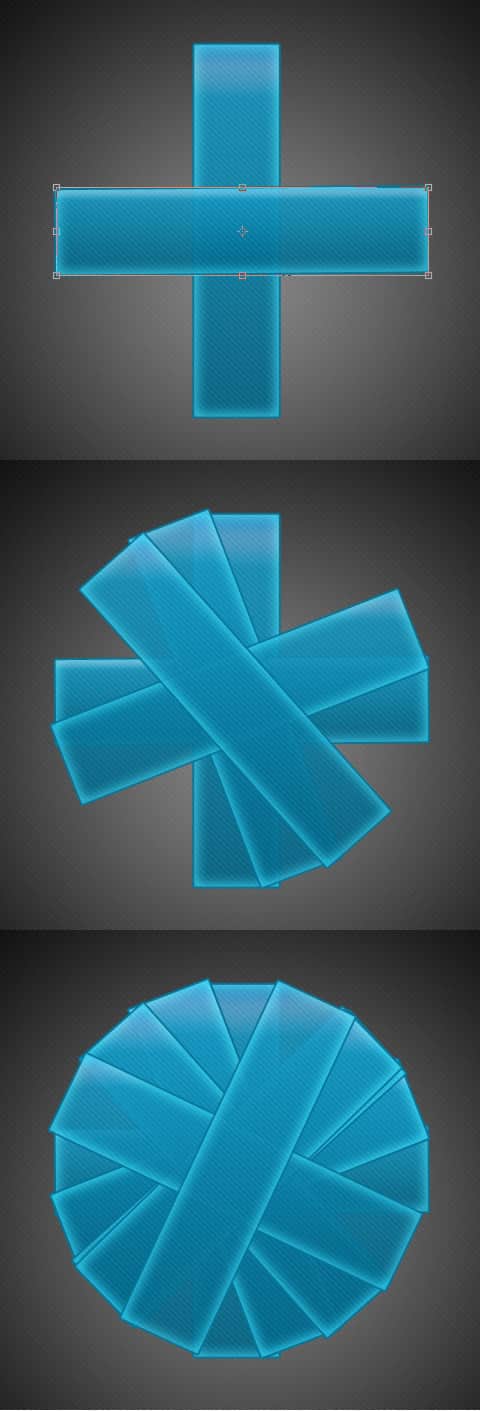
3. Using the Rectangle Tool, draw a thin vertical rectangle like below. Double click into Blending Options and put in the following settings:
4. Duplicate the shape by dragging it to the new layer icon & rotate the new shape by press CTRL+T and rotating a corner. Do this until all the shapes are rotated into a circle.
5. Next select the Ellipse Tool and draw a large circle like below while holding down the Shift Key (to keep the shape perfect). Double click into Blending Options and put in the following:
6. Next draw a smaller circle using the colour white & set the Blending Mode to Multiply so the circle is invisible. Double click into Blending Options and put in the following option:
7. Again select the Ellipse Tool, but this time set it to Paths by click on the Paths Layer circled below.
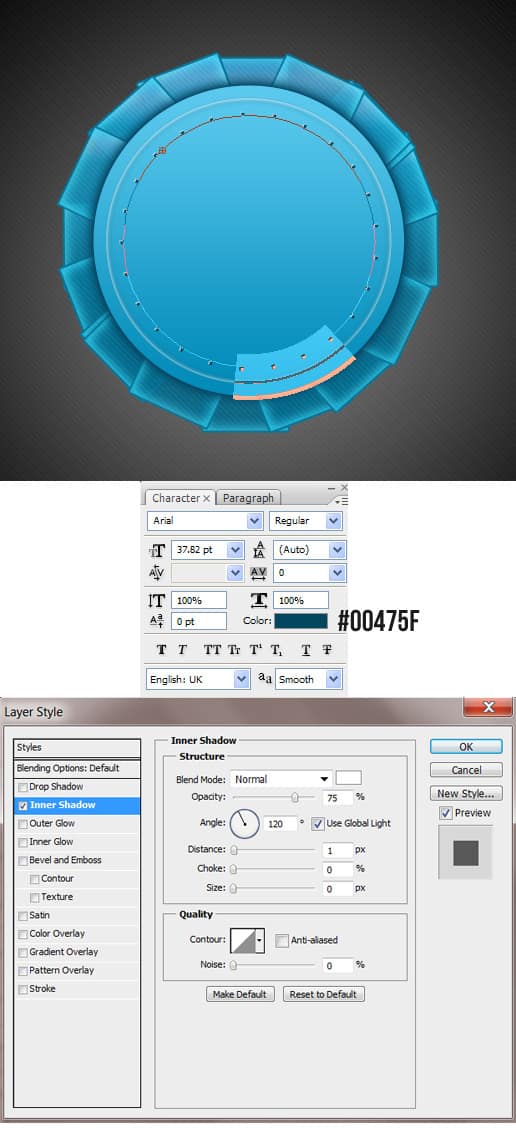
8. Draw a circle using the Paths. It doesn’t matter if it isn’t centred. Click on the Text Tool and click on the Path you just created. Click the . Full Stop Symbol with spaces in between until you have the dots pattern like below. Double click on the text layer to go into Blending Options and put in the following setting. Then centre the text you just created.
9. At this stage you can experiment with what you want to put on the ribbon (eg. shapes, text). I’ve written out the text below using the font Bebas Neue, gone into Blending Options and put the following settings:
10. I’ve written the next font in Ballpark Weiner and rotated it by press CTRL+T and rotating. I’ve put in the Blending Options below:
11. I’ve selected an icon from this Iconic Icon Set and placed it on the ribbon using the same Blending Options as the Ribbon text. Next select the Rectangle Tool and place draw the a thin rectangle like below, place it under the ribbon layers and rotate it. Double click into Blending Options on put in the following below:
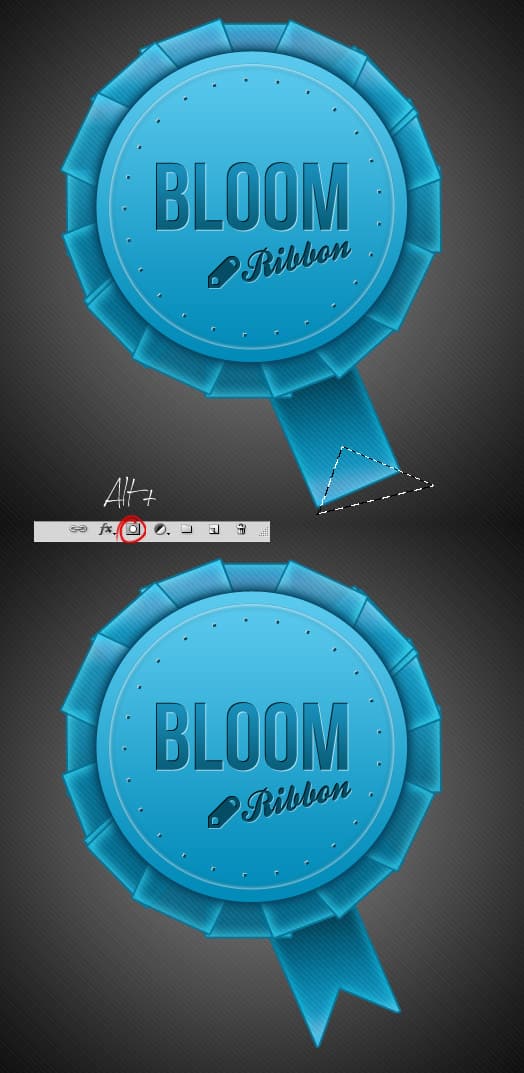
12. Using the Polygonal Lasso Tool, select the end of the ribbon shape like below. While pressing the Alt Key click on the Add Layer Mask Icon to remove the shape you just created on the ribbon layer.
13. Duplicate the ribbon and place it on the other side. Rotate it by press CTRL+T and rotate a top corner.
Drop Shadow
14. Put all of the Ribbon layers into a Folder and Duplicate the folder. On the duplicated folder right click and Convert to Smart Object, then right click again and Rasterize Layer.
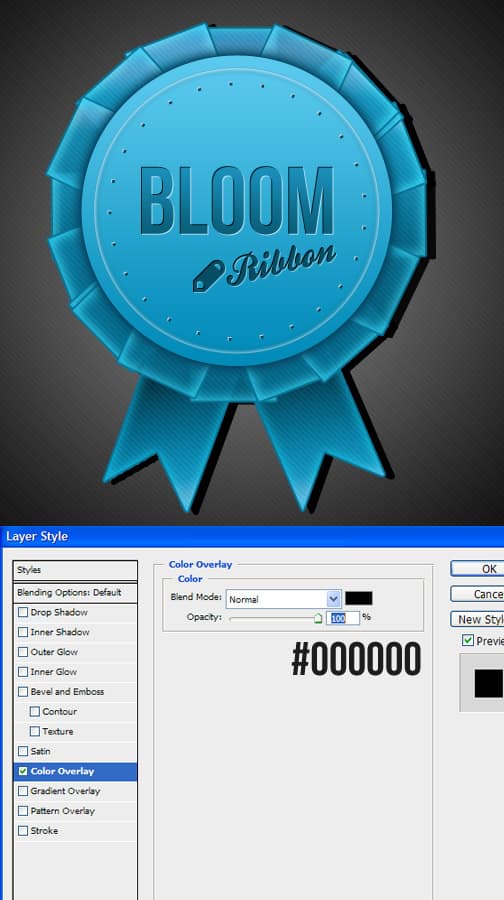
15. Double click on copy to go into Blending Options and put in a black Color Overlay. Move the shadow slightly to the right.
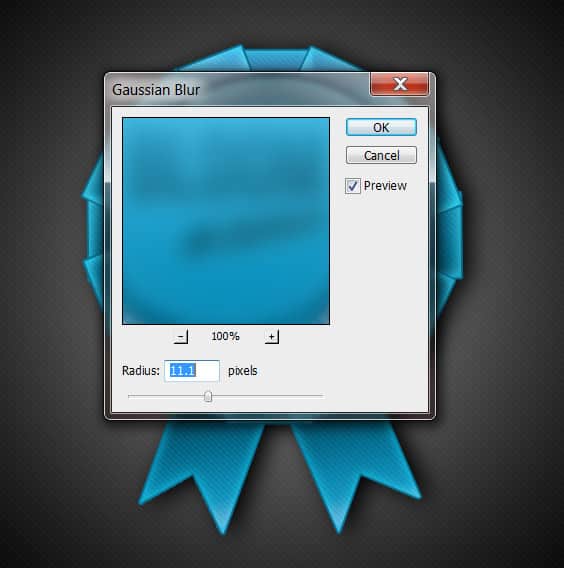
16. Lastly go into Filter > Blur > Gaussian Blur and put in 11.1 on the shadow layer.

