Subtle Background Patterns in Photoshop are a means to make your web site stand out from the crowd. If you’re just getting starting with web design or need help in general with creating backgrounds we’ll teach you how to create 5 Subtle Background Patterns in Photoshop. One of the most essential elements in website design are background patterns that don’t take up too much attention but still add something special to the overall website.
Subtle Background Patterns are also used for Print Design, User Interfaces and many other design types.
There are unlimited websites now offering free Photoshop Background Patterns, but sometimes creating your own Background Pattern that be beneficial, especially if you can’t find what you’re looking for. Today we’ll put together 5 Subtle Backgrounds which you can learn to make yourself.
These short tutorials of Subtle Background Patterns in Photoshop are great for beginner and intermediate users, I’ll be going through simple step by step instructions, I hope these quick Photoshop Pattern Tutorials help you out.
Create 5 Subtle Background Patterns in Photoshop
Pattern 1
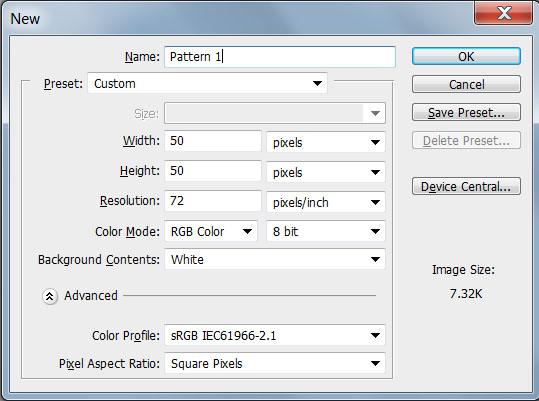
1. Our first pattern will be a subtle grunge effect, create a new document with the size of around 100×100 pixels.

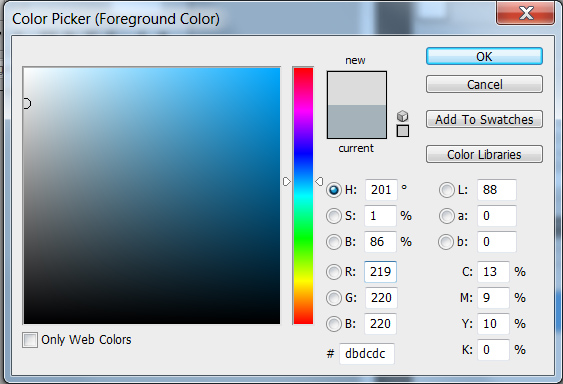
2. Fill in the background with a light grey colour.
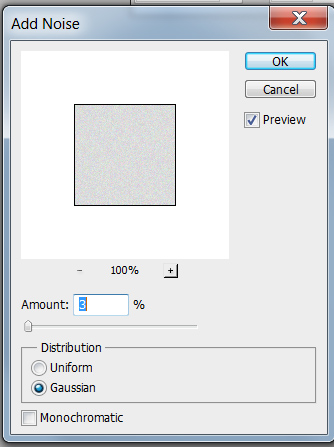
3. Now to add some texture, go into Filter > Noise > Add Noise. Add in an amount of 3% click on Gaussian. This will add in a nice subtle noise texture.
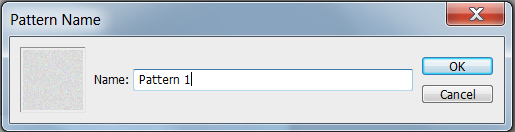
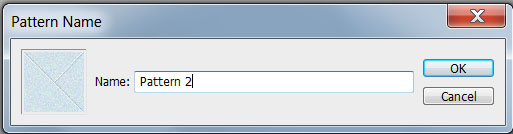
4. Now to turn in into a Pattern, go into Edit > Define Pattern . A popup box should appear asking you to name your pattern, name it and press okay.
To put your pattern in motion, grab the Paint Bucket Tool and set it to Pattern Mode, select your pattern and fill your canvas. The second solution is right clicking on your layer and go into Blending Options > Pattern Overlay and selecting your pattern that way (the layer must be filled a solid colour for this way to work.

Pattern 2
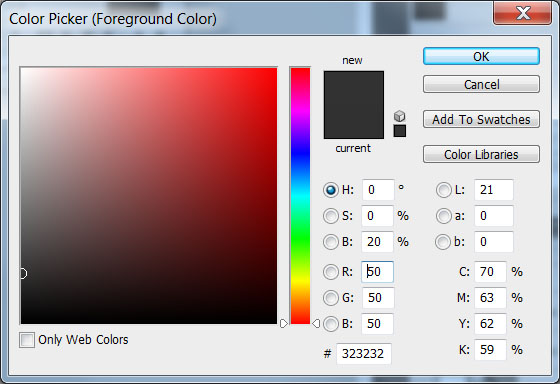
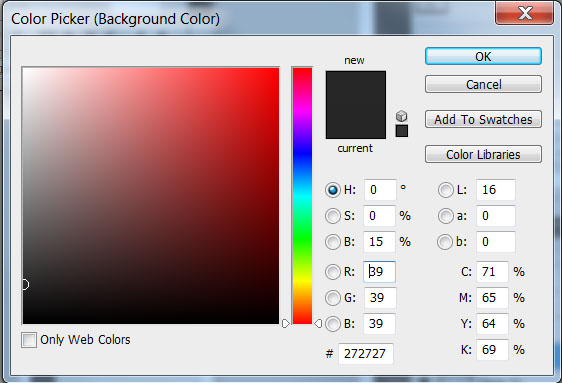
1. Our second pattern will be a dark subtle pattern. Create a new  document with the size of 50×50 pixels.
2. Fill in the background with a dark grey colour.
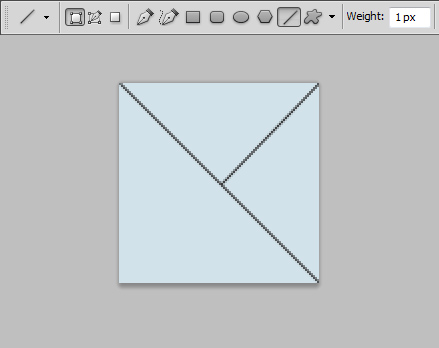
3. Select your Line Tool, make you’e in Shape Mode and the weight is 1px. Click on the top left corner and drag down to the bottom right corner using a dark grey colour. Hold down the shift key to make sure it’s exact. Draw a second line from the top right corner to the center of the first line while holding down the Shift Key.
4. Now to turn in into a Pattern, go into Edit > Define Pattern . A popup box should appear asking you to name your pattern, name it and press okay.
To put your pattern in motion, grab the Paint Bucket Tool and set it to Pattern Mode, select your pattern and fill your canvas. The second solution is right clicking on your layer and go into Blending Options > Pattern Overlay and selecting your pattern that way (the layer must be filled a solid colour for this way to work. In Pattern Overlay you also have the option of changing the size of the pattern to make it smaller.

Pattern 3
1. Our next pattern will be a subtle pattern grunge effect, create a new document with the size of around 100×100 pixels.
2. Fill in the background with a light colour of your choice.
3. Select your Line Tool, make you’e in Shape Mode and the weight is 1px. Click on the top left corner and drag down to the bottom right corner using a dark grey. Hold down the shift key to make sure it’s exact. Draw a second line from the top right corner to the center of the first line while holding down the Shift Key.
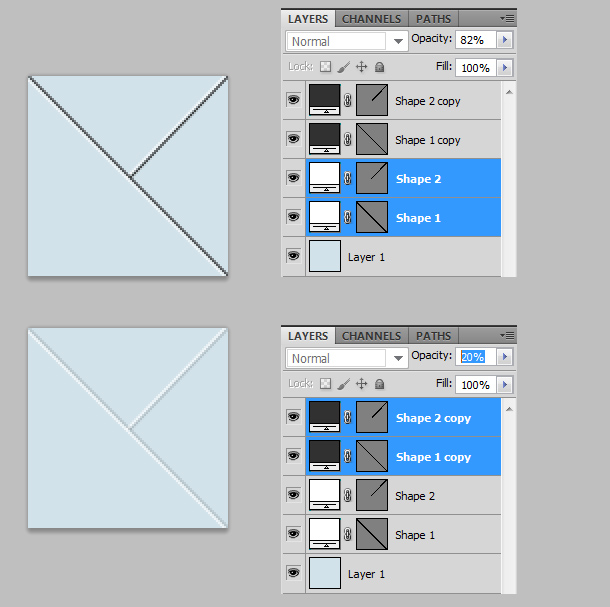
4. Select the 2 Lines while holding down the CTRL key and drag to the new layer icon to duplicate. While the duplicated lines are selected click CTRL and the bottom arrow key to move the 2 lines down. Change the color to white and make the Opacity 82%. Set the opacity of the dark lines to 20%.
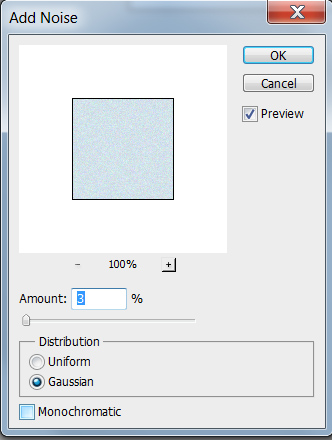
3. Go back to the background layer and go into Filter > Noise > Add Noise. Add in an amount of 3% click on Gaussian. This will add in a nice subtle noise texture.
4. Now to turn in into a Pattern, go into Edit > Define Pattern . A popup box should appear asking you to name your pattern, name it and press okay.
To put your pattern in motion, grab the Paint Bucket Tool and set it to Pattern Mode, select your pattern and fill your canvas. The second solution is right clicking on your layer and go into Blending Options > Pattern Overlay and selecting your pattern that way (the layer must be filled a solid colour for this way to work. In Pattern Overlay you also have the option of changing the size of the pattern to make it smaller.

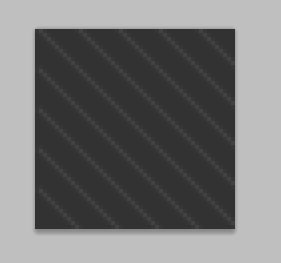
Pattern 4
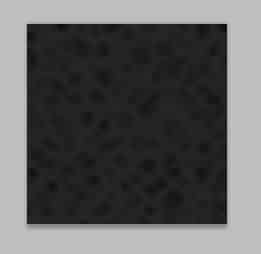
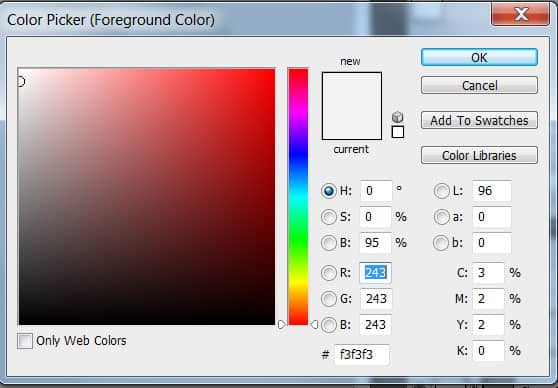
1. Our next pattern will be a subtle pattern grunge effect, create a new document with the size of around 100×100 pixels.
2. Fill in the background with a light colour of your choice.
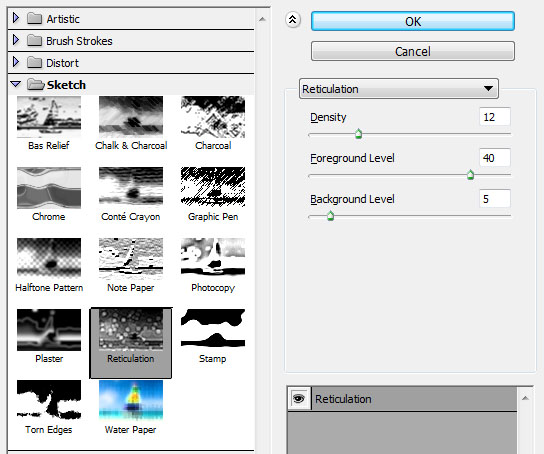
2. Create a new layer, fill it white and the set Blending Mode to Multiply. Go into  Filter > Stylize > Reticulation. Place in the settings below and click okay. You’ll be left with a grunge texture, set the Opacity to 60% to make it more subtle.
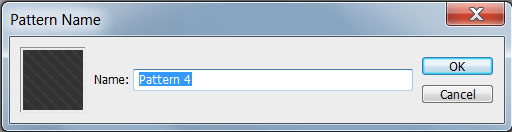
4. Now to turn in into a Pattern, go into Edit > Define Pattern . A popup box should appear asking you to name your pattern, name it and press okay.
To put your pattern in motion, grab the Paint Bucket Tool and set it to Pattern Mode, select your pattern and fill your canvas. The second solution is right clicking on your layer and go into Blending Options > Pattern Overlay and selecting your pattern that way (the layer must be filled a solid colour for this way to work. In Pattern Overlay you also have the option of changing the size of the pattern to make it smaller.

Pattern 5
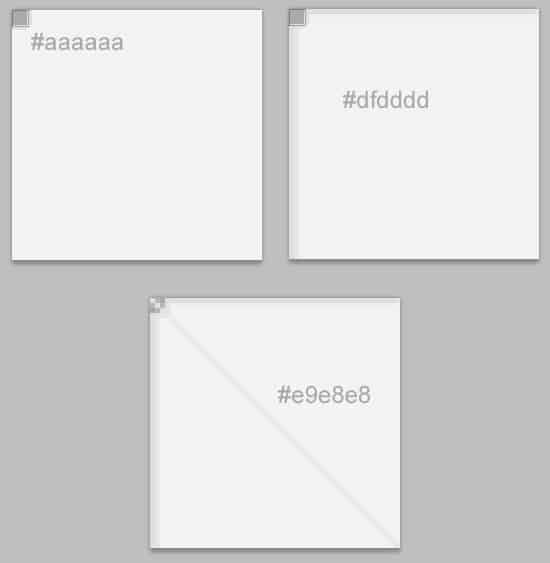
1. Our next pattern will be a subtle lined box pattern, create a new document with the size of around 50×50 pixels.
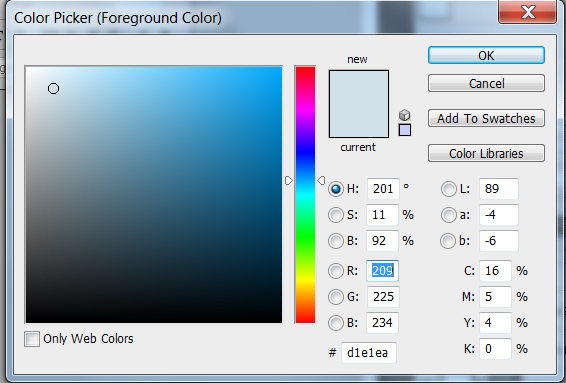
2. Fill in the background with a light colour of your choice.
2. Select the Rectangle Tool and draw a small square on the top left corner of the canvas using the colour #aaaaaa. Next select the Line Tool, make you’e in Shape Mode and the weight is 1px while holding down the Shift Key draw a horizontal line on the top of the canvas and a vertical line on the left side using the colour #dfdddd. Now while holding down the Shift Key draw a diagonal line going from the top left corner of the canvas to the bottom right corner using the colour #e9e8e8.
3. Now to turn in into a Pattern, go into Edit > Define Pattern . A popup box should appear asking you to name your pattern, name it and press okay.
To put your pattern in motion, grab the Paint Bucket Tool and set it to Pattern Mode, select your pattern and fill your canvas. The second solution is right clicking on your layer and go into Blending Options > Pattern Overlay and selecting your pattern that way (the layer must be filled a solid colour for this way to work. In Pattern Overlay you also have the option of changing the size of the pattern to make it smaller.