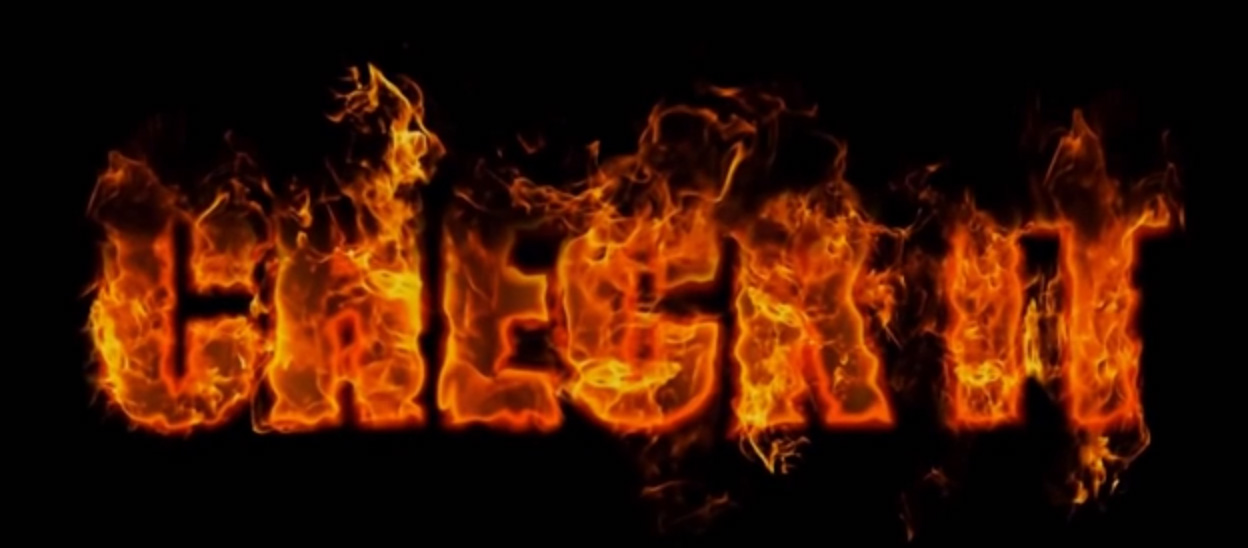
Learning how to create fire text effect in photoshop are a fantastic way to learn more skills. In today's video, Ch-Ch-Check It, teaches you how to Create Realistic Fire Text Effect Photoshop in this video tutorial. This Photoshop Text Effect Tutorial will teach you step by step how to create some cool fire text effect using easy Photoshop Tools like Blending Options, Gradient Tool and more!
This Fire Text Effect is perfect if you're looking to create something eye catching and realistic. For the text layers a number blending options are used to help create a subtle Fire Effect in the background, then a Fire image is used to add in some realistic flames to the canvas. We hope this Realistic Fire Text Effect Photoshop Tutorial helps you to learn more skills when creating fantastic Photoshop Text Effects.
More Text Effect Tutorials:
Create a Medieval Metallic Text Effect Photoshop [Tutorial]
Create a Glowing Text Effect Photoshop Tutorial
Create a Dripping Typography Poster in Illustrator & Photoshop
Tutorials Assets:
Below is a quick breakdown of the Create Realistic Fire Text Effect Photoshop Tutorial video.
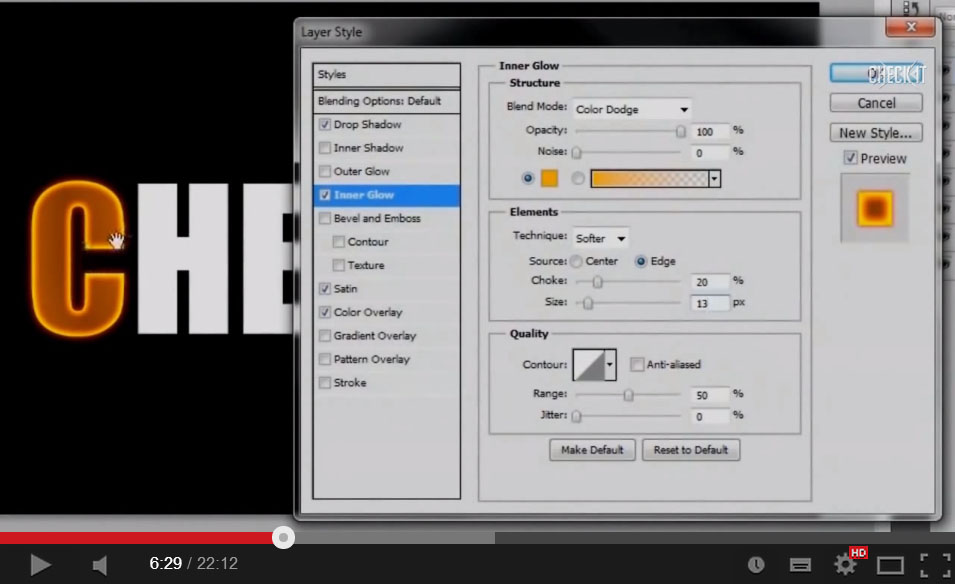
1. Font and Blending Options
You start out creating a new canvas with the size of your choice. You then write out the word/s you'd like turned into fire. The text layer is then rasterized and each of the letters and copy/pasted onto individual layers. A number of Blending Options are used on each letter to get the fire effect started.
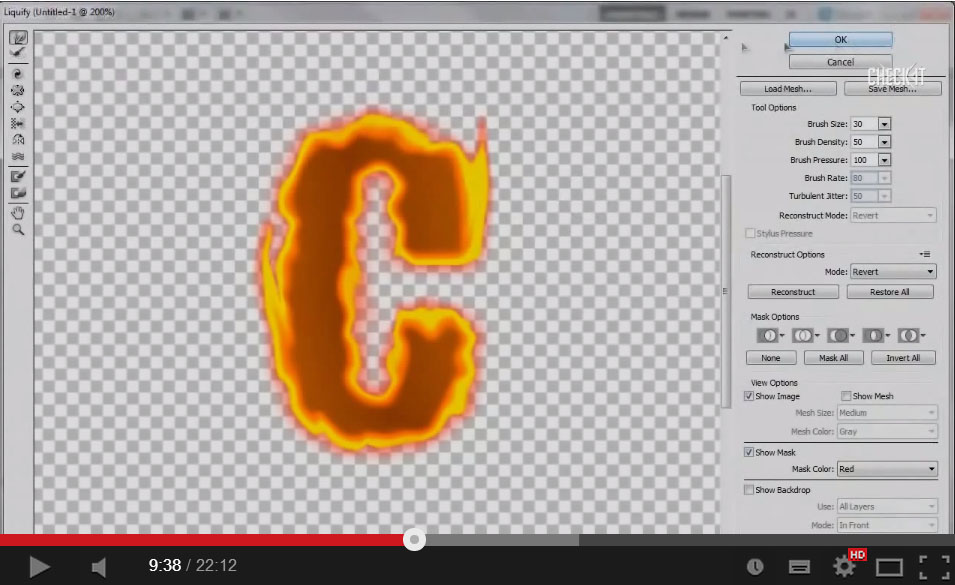
2. Warping the Letter
Each font layer is then duplicated and the original copies are save. The duplicated layers are then flattened. With a letter layer selected you go into Filter > Liquify with the forward warp tool selected and a brush size of 30, Brush Density of 50 and a brush pressue of 100 you'll start brushing the edges of the letter to make it distorted. You'll repeat this step on all of the letters.
3. More editing
The letters are placed into a Folder and a Mask Layer is put onto the folder. Using a brush with the color black, you'll brush the tops of the letters away. The Layer Mask allows you to edit the mask not the actual image leaving the image intact if you make mistakes.
4. Fire
Open up the fire image in Photoshop, you'll be using a number of steps to select the fire in order to copy/paste it onto the text effect canvas.

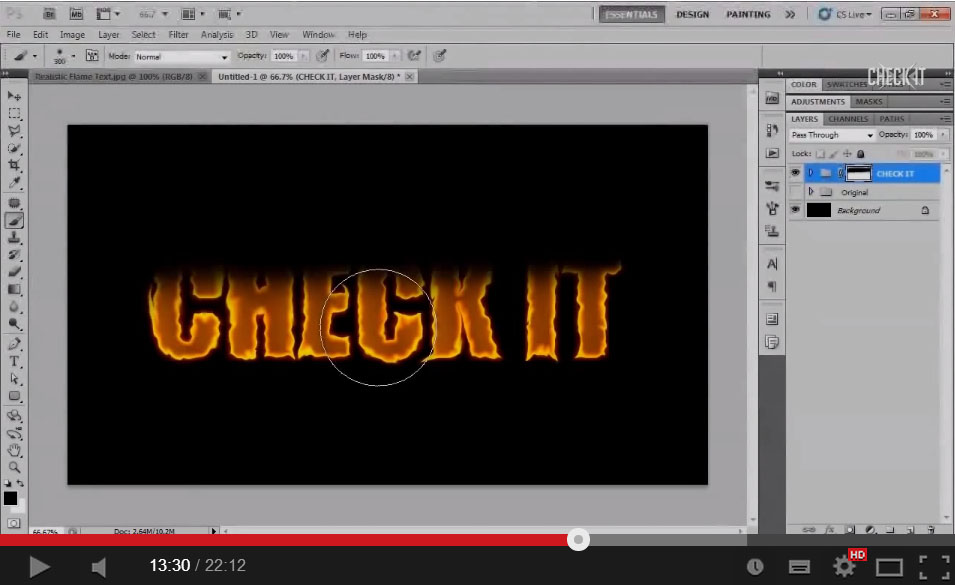
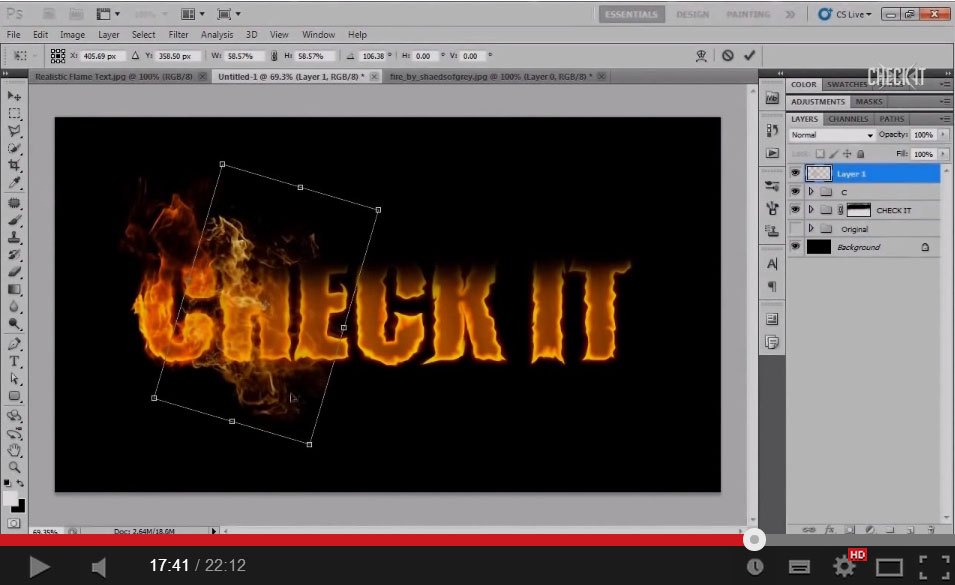
5. Add in the Fire
You'll place the fire selection onto the text effect canvas and arrange it over the first letter making it smaller with the transform tool. You'll then put a mask layer over the fire and erase some of the fire so it goes with the letter. You'll then duplicate the layer and experiment withte different blending options to add in more brightness and intensity. Repeat this process with each letter.
In this tutorial, Ch-Ch-Check It, will take you through the process of how to Create Realistic Fire Text Effect Photoshop Tutorial, and show you how to create a realsitc fire text effect. Let’s get started!