Create Vintage Ticket Stubs in Photoshop – Tutorial
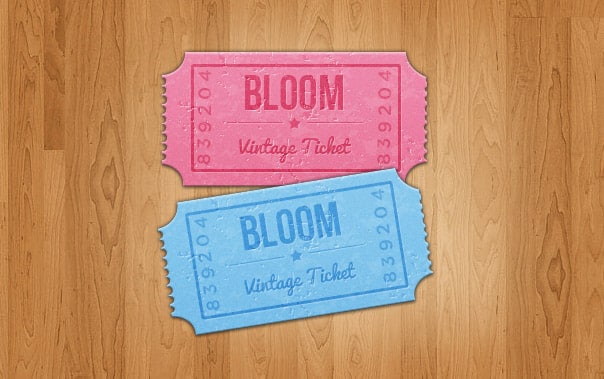
In this tutorial we'll be learning how to create vintage stubs using Adobe Photoshop. For this tutorial we'll be learning some new methods on how to use the Shape Tool as well as other techniques to create some fancy vintage tickets with some nice textures!
Final Result
Resources
1. Create a new document with the size you're after. Select the Rectangle Shape Tool and draw the base of the Ticket stub.
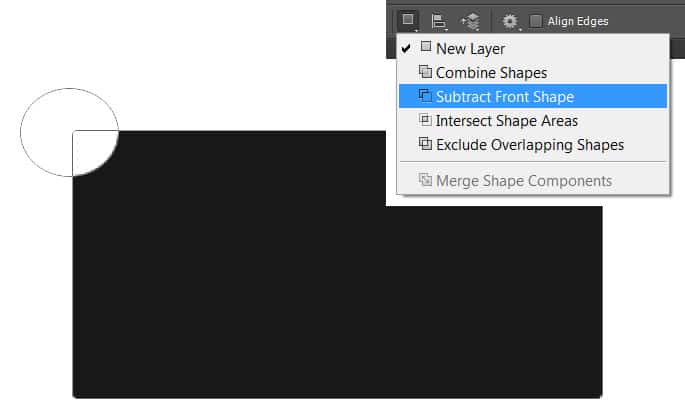
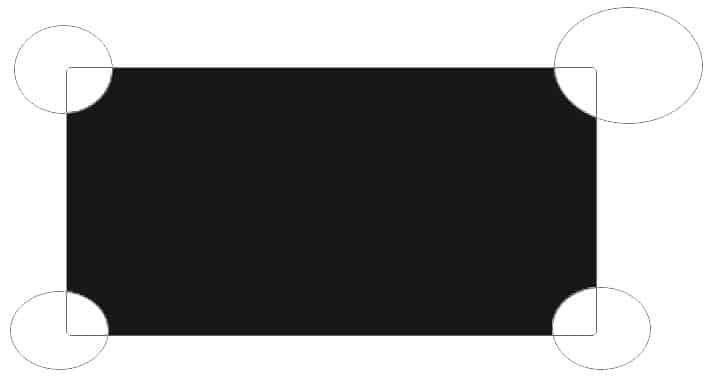
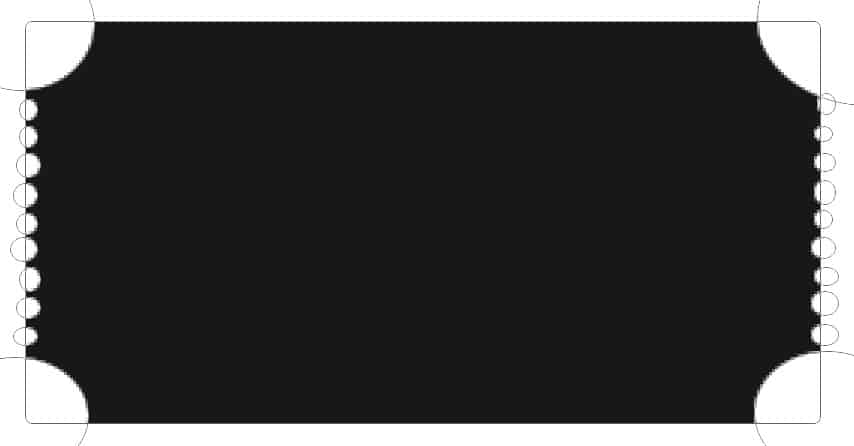
2. Next select the Ellipse Tool, click on the Path Operations icon and select Subtract Front Shapes. This will allow us to subtract parts of the shape by drawing over them with the Ellipse Tool. Now start drawing over the four corners of the rectangle using the Ellipse Tool.
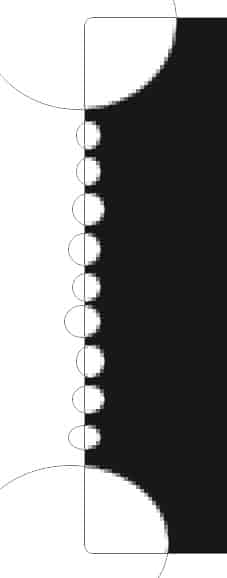
3. Next to make the shape look more like ticket, draw some smaller circles on the left & right sides using the same method.
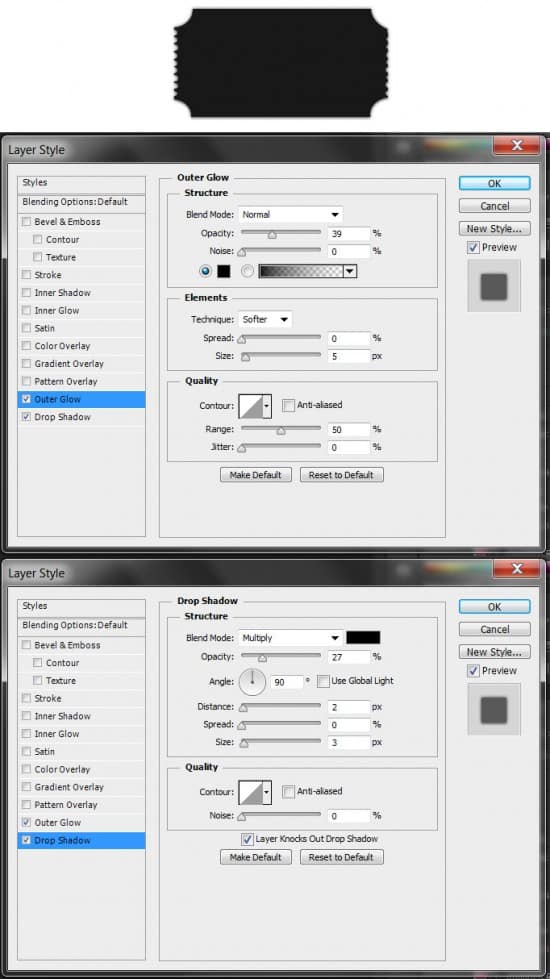
4. Duplicate the layer by dragging it to the new layer icon. On the bottom layer, double click on the layer to go into Blending Options and put in an Outer Glow & Drop Shadow.
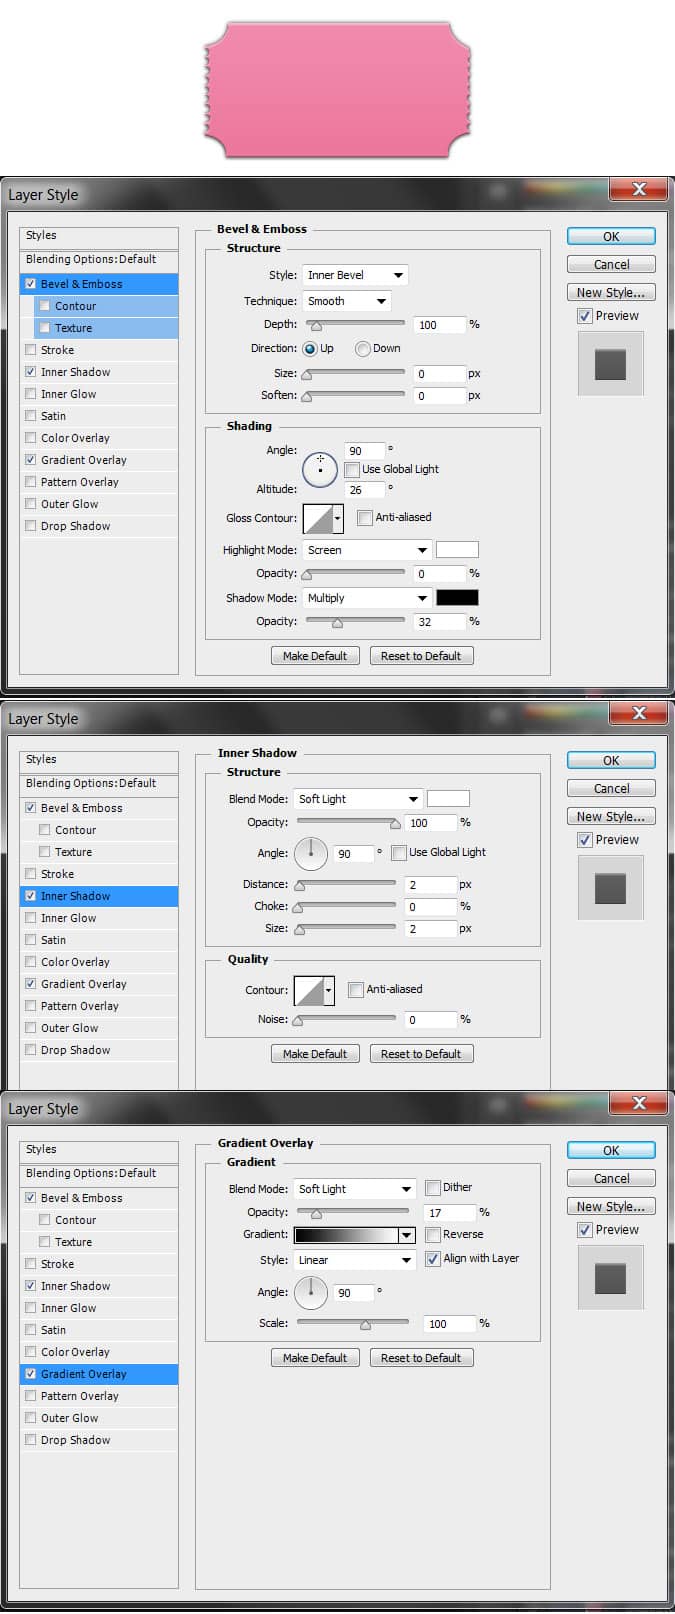
5. On the top layer, double click on the thumbnail image layer to open up the colour swatch and choose a colour you'd like the ticket to be. Next double click on the layer into Blending Options and put in the setting below.
6. Create a new layer, fill it white and set the Blending Mode to Multiply. Right click on the layer and click on Create Clipping Mask. This will crop whatever you add on the layer to the shape of the ticket. Next go into Filter > Noise > Add Noise to add a slight texture.
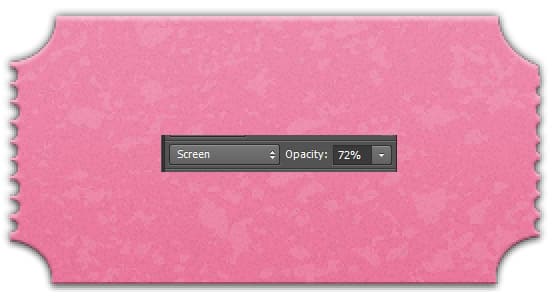
7. Create a new layer right click on the layer and click on Create Clipping Mask. Using the Distressed Grunge brushes and the colour black, choose a brush and click on the ticket. Set the layers Blending Mode to Screen and the Opacity to 72%. This will enhance the vintage look.
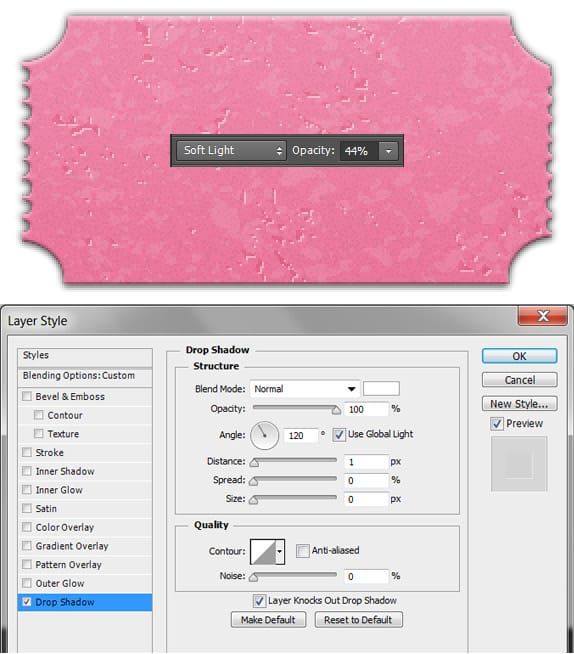
8. For our last texture, create a new layer and Create a Clipping Mask again. Choose a smaller distressed brush this time and click on the ticket using the color black again. Set the Blending Mode to Soft Light and the Opacity to 44%. Go into Blending Options and put in a Drop Shadow. This will give the texture a dented look.
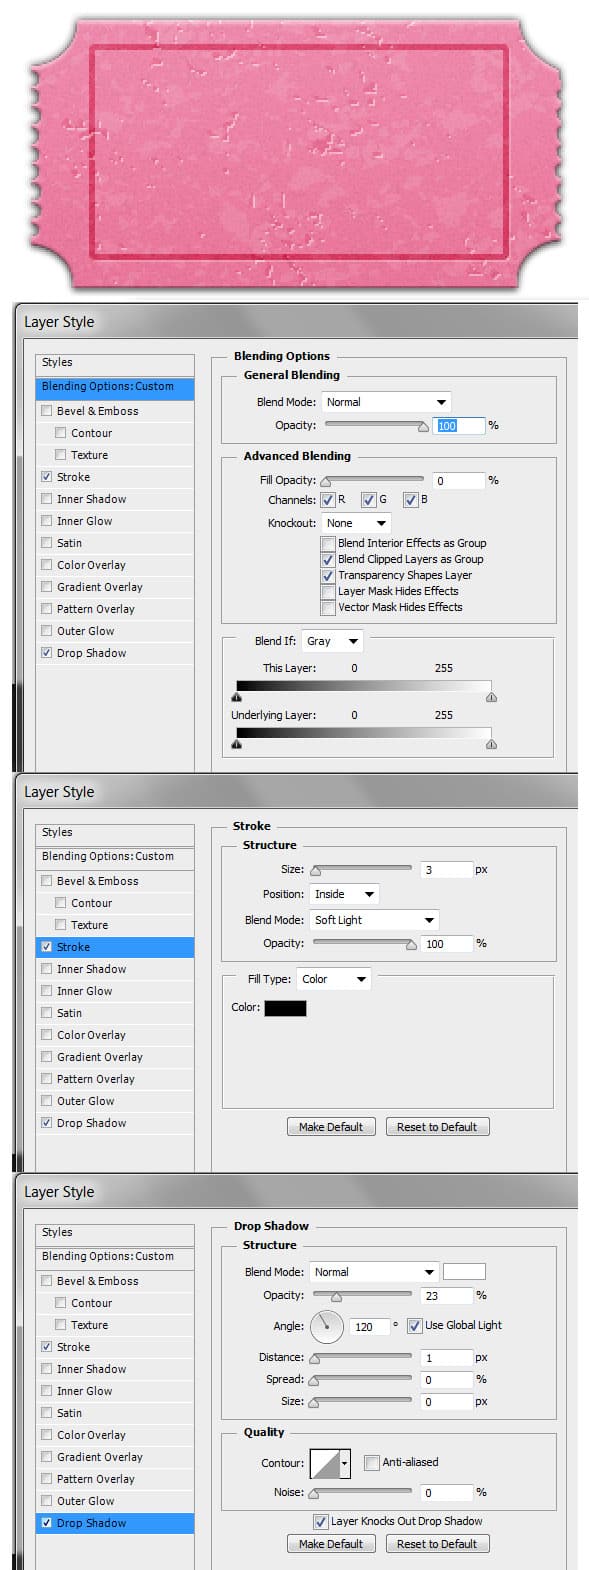
9. Using the Rounded Rectangle Tool, draw a shape like below and go into Blending Options. Because we want the fill of the shape to be transparent, go into Blending Options Custom and set the Fill Opacity to 0%. Next add in a Stroke and Drop Shadow to finish off the border.
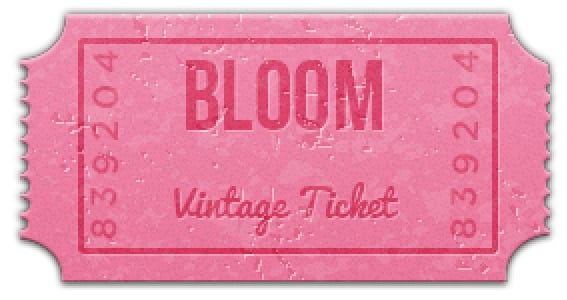
10. Next using the font of your choice, write out some words in black and set the Blending Mode to Soft Light. Double click into Blending Options and add in a Drop Shadow.
11. Next write out some numbers using the font Gotham and rotate them by pressing CTRL+T and rotating a corner. I've written out the text in a dark grey and set the Blending Mode to Soft Light.
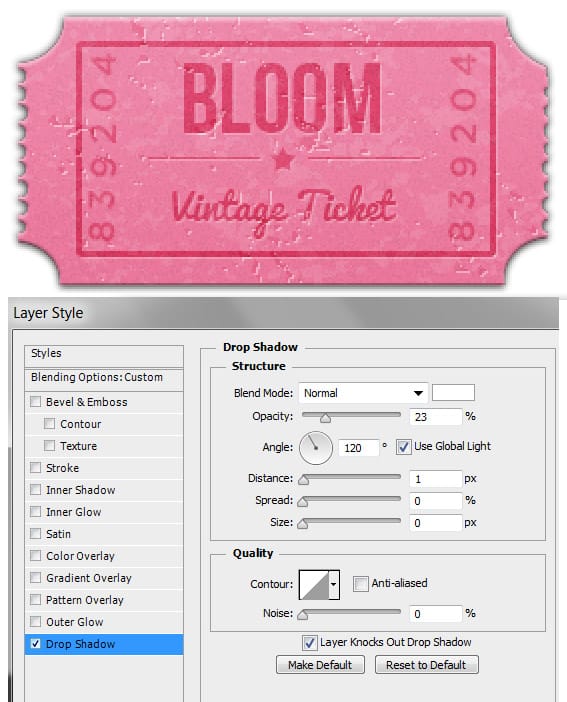
12. Lastly I've added some lines and a star shape to the ticket but you can experiment. I've created the shapes using a dark grey and set the Blending modes to Soft Light. Next go into Blending Options and create a Drop Shadow for the dent look.
At that's it! If you want to change the colour of the Ticket, you just go to the base layer (in step 5) and change the colour which makes it ten times easier then changing each element on the ticket.
