Design a Bright & Fun Coming Soon Page
Learn how to design a fun Coming Soon Page for a website.
Final Result
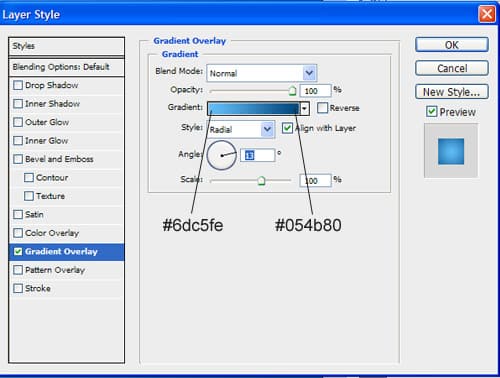
 1. Create a new document that’s 900×650. Double click the background layer to unlock it. With the background layer white right click and go into Blending Options, put in the following settings in Gradient Overlay:
  2. Create a new layer and fill it white.
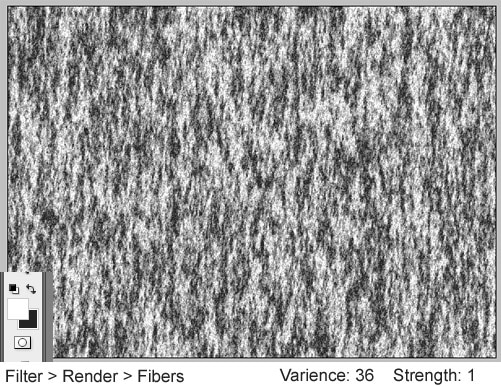
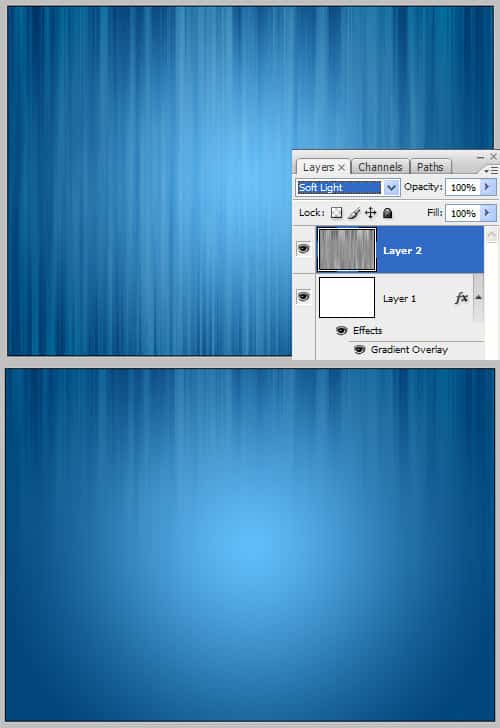
  3. WIth the foregound & background colour black & white, go into Filter > Render > Fibers, put in the settings I have below:
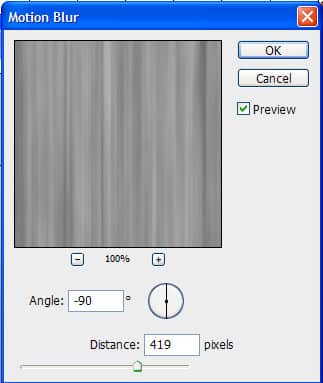
  4. Next on the layer, go into Filter > Blur > Motion Blur and put in the settings below:
  5. Now set the blending mode to Soft Light to get a nice effect. Get a large soft edged eraser brush with an opacity of 75% and remove some of the bottom.
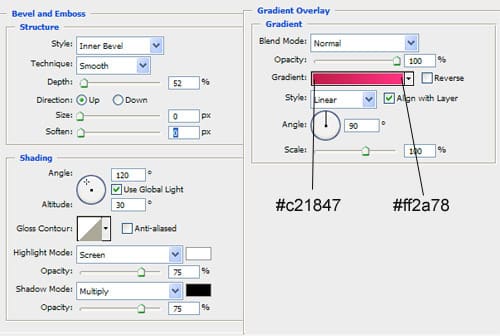
  6. Get the rounded rectangle tool and draw a box, then on the layer put in these settings in Blending Options.
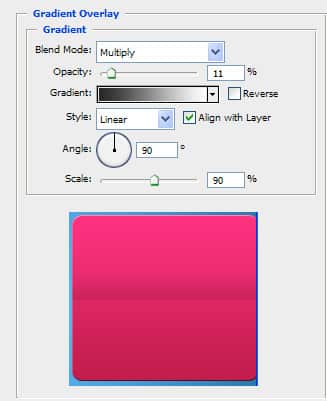
  7. Next get the rectangle tool and draw on part of the square like below with the colour white, set the Blending Mode to Multiply so it’s See through, then go into Blending Options on the layer and put in the following settings:
  8. Using the font Qlassik write in the following details (for an example).
  9. Using the pen tool and circle tool for the window, draw a rocket like below.
  10. Go to Window > Brushes (f5) and create a new brush called dots with a 9px.
 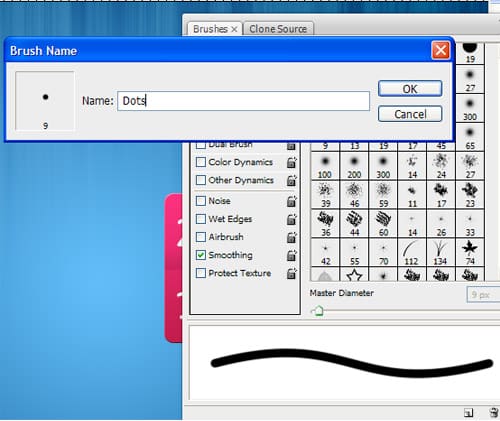 11. Put in the following settings:
 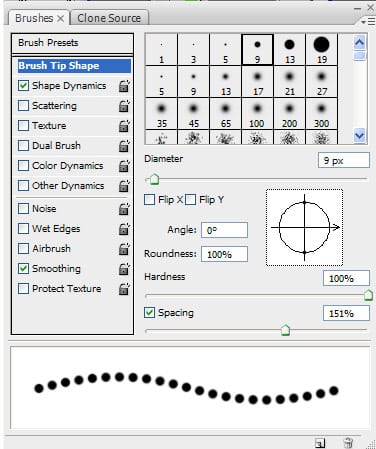 12. With the colour white draw a swirly line.
  13. Using the font Qlassik write some information about the company. I’ve used a drop down shadow for some of the writing.
  14. Using social icons from here (i’ve used 60x60px size) copy and paste them into the canvas and write the heading Follow Us.
  15. Using the rounded rectangle tool draw the sign up bar, go into blending options and put in the following settings. Write in the heading and the other font in Arial, Â Italic, size 17, Smooth and grey.
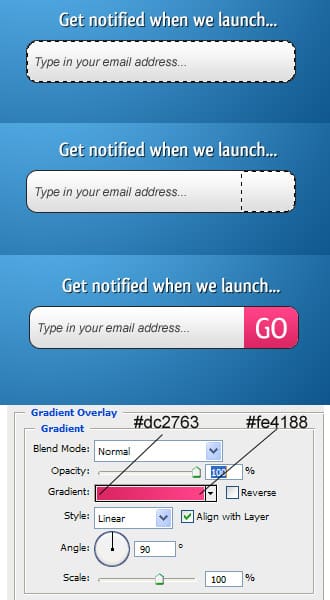
 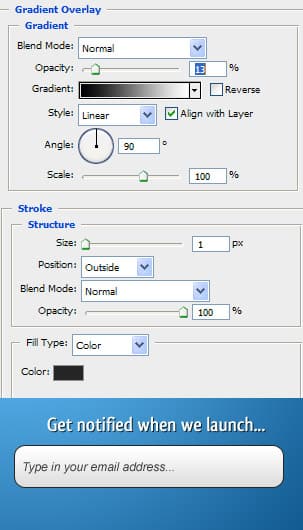 16. Now hold down ctrl and click on the rectangle box to highlight the shape, select the rectangular marquee tool, hold down ctrl and remove part of the shape. create a new layer and fill it white. Next go into blending options of the layer and put in the gradient colours below. Next type in GO in the Qlassik font.
  17. Finally write in the Copyright details with Arial, Regular, size 17, smooth and white.


