Design a Business Man Mascot in Photoshop
Learn how to create a Business Man Mascot in Photoshop!
Final Result
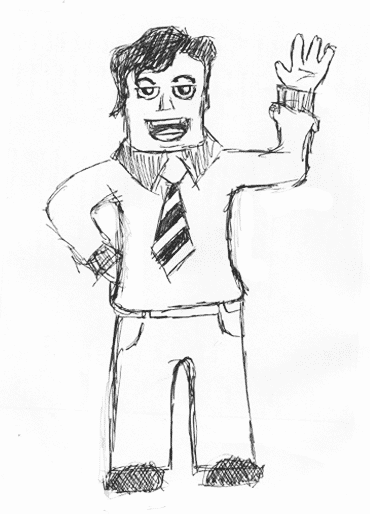
 Firstly Draw out a  rough sketch of how your character will look.
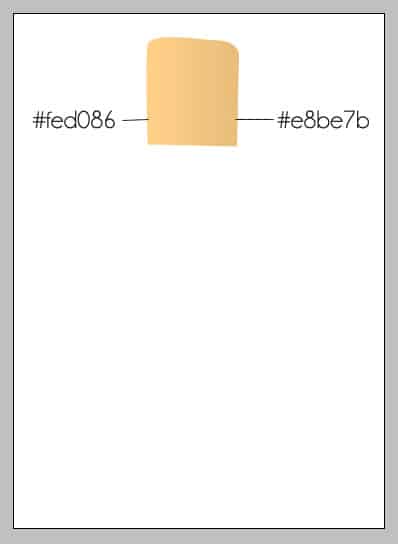
  1. Create a new document that’s 370×514. Get the pen tool and  draw the shape below. Right click on the layer and go into Blending Options > Gradient Overlay and put in a linear Gradient using the colours below on a 180 degree angle.
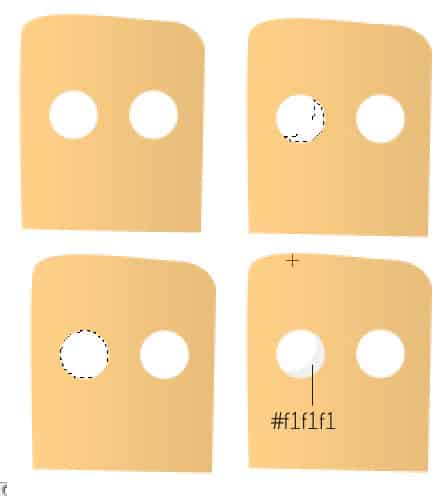
  2. Get the circle shape, hold down shift and draw a white eye. Drag the circle to the new layer icon to duplicate. Hold down ctrl and click on the circle layer to highlight it. Get the Elliptical Marquee Tool and remove part of the highlighted circle while holding down the alt key. Create a new layer and fill the highlighted shape with the colour below.
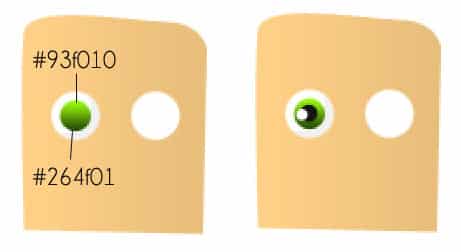
  3. Get the circle shape tool again, hold down shift (so it stays a perfect circle) and draw 1 circle, go into blending options > gradient overlay and put in the colours below. Next draw another small black circle and place it in the centre of the green shape, and again draw another white circle for a reflection.
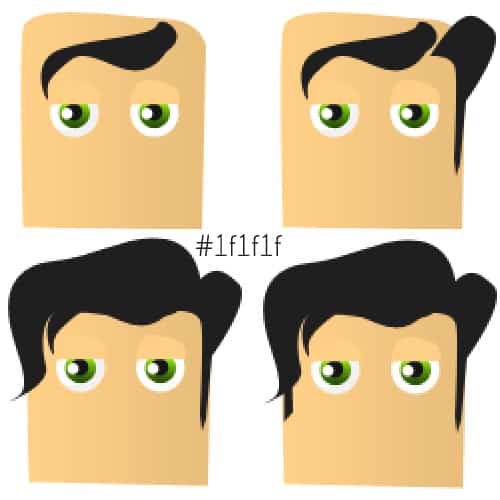
  4. Using the colour #ffd087 and the pen tool draw some eyelids. Now for the hair, using the colour below and the pen tool draw the hair. To make it easier I have drawn the hair in different stages.
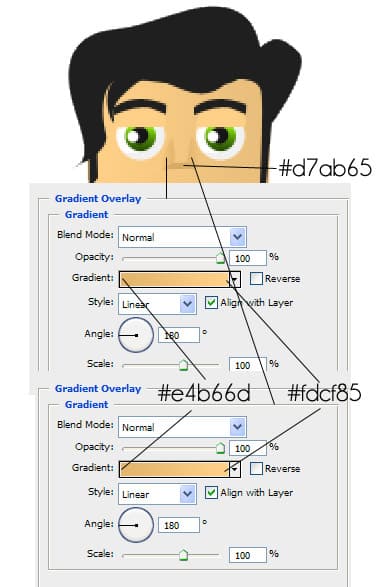
  5. Now for the nose, get the pen tool and draw each 3 sides, go into Blending Options > Gradient Overlay and put in the settings below for the sides of the nose, for the bottom just put in the solid colour below:
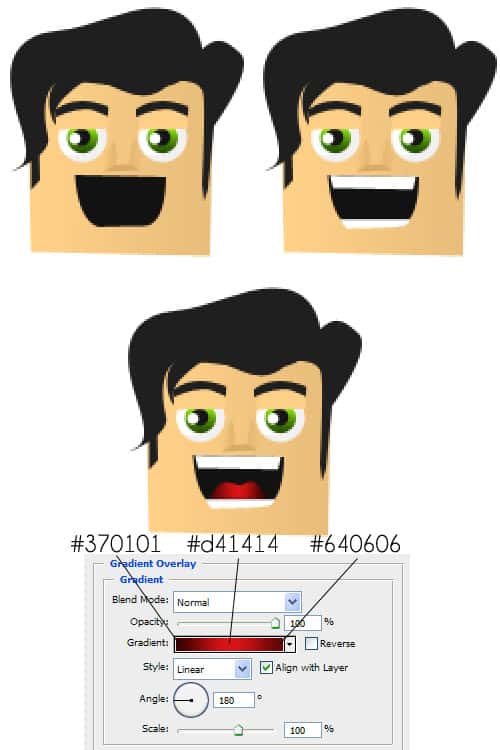
  6. Next using the pen tool draw the mouth and teeth, then draw the tongue using the colours below (again go into Blending Options > Graadient overlay for the colours).
  7. Now draw the chest/shirt using the pen tool, and put a gradient overlay using these settings:
 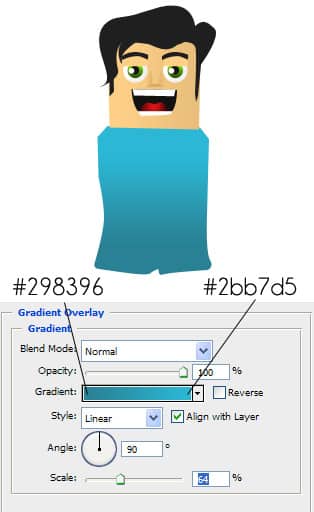 8. Next draw the arms using the pen tool and put a gradient overlay on each arm using the same colours as above with the following angles:
 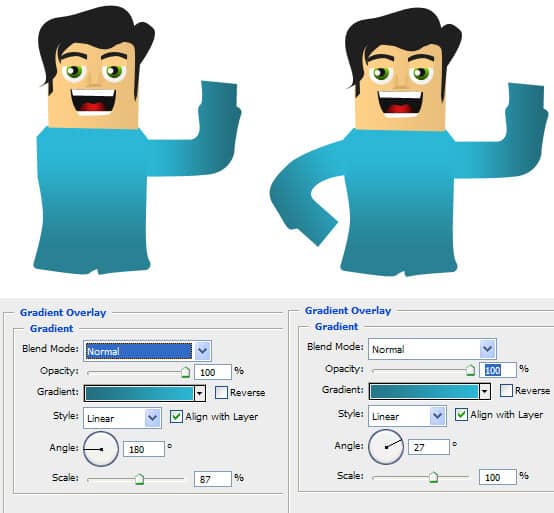 9. next with the colour below draw the rest of the shirt.
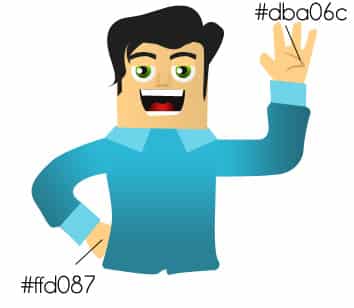
 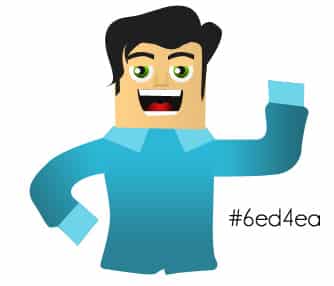 10. Using the pen tool draw the hands and hand crease.
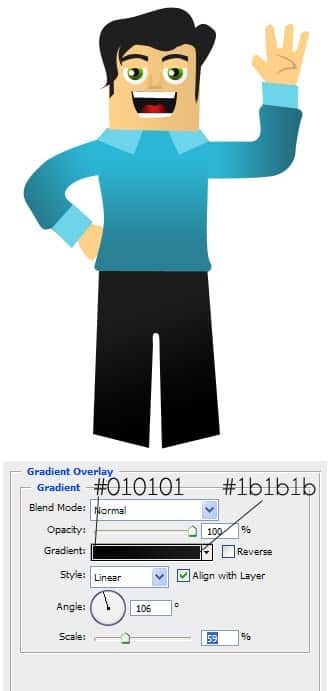
  11. Draw the pants with the pen tool and the Gradient Overlay below.
  12. Next draw the belt with the pen tool.
 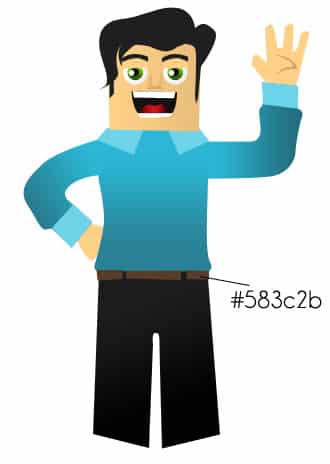 13. Then the shoes with the pen tool…
  14. With the circle shape draw the white buttons while holding down shift. With the pen tool draw and little shape on the bottom of his mouth and draw some light grey pockets.
  15. With the pen tool draw the 2 parts of the tie, go into Blending Options >Gradient Overlay and put in the settings for each part:
 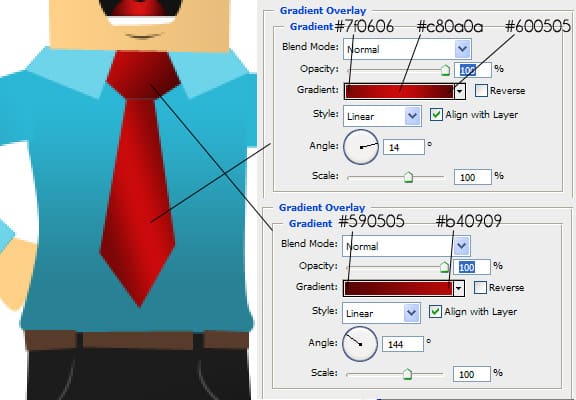 16. now draw some stripes on the tie with the pen tool using the a gradient overlay, you’ll need to change the angle for each stripe according to your liking.
 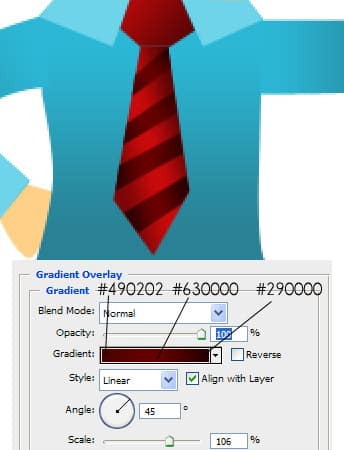 17. Now place all the business man layers into a folder and name it Business Man. Next get the rectangle tool and draw 2 rectangles each with a different gradient overlay like below.
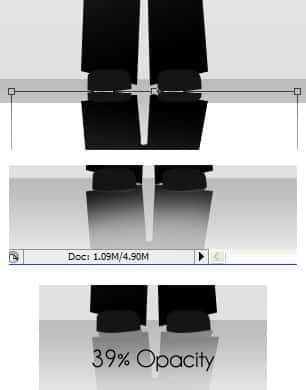
 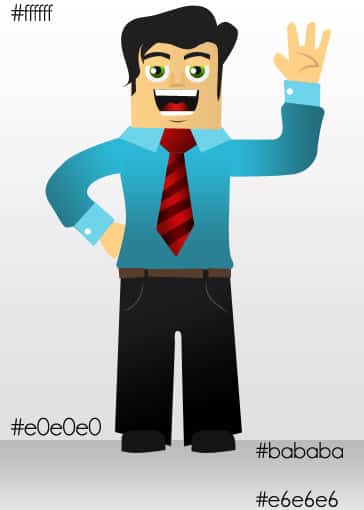 18. Now duplicate the Business Man folder (drag it to the new layer icon in the layers window), right click and convert to Smart Object and then right click and rasterize the layer. Press ctrl+t to make the shape editable and draw the top to the bottom (so it’s upside down and make it slightly squashed, move the layer underneath the man. Get the soft edged eraser tool and remove the bottom part of the image, then make the opacity 39%. You should now have a nice reflection.
  19. Using the font Champagne & Limousines write out any name you want, press ctrl+t and move the text so it’s sideways.


