Easy Neon Text Effect in Photoshop Tutorial
Create your very own Neon Text Effect in Photoshop with this easy 8 step tutorial. Neon Text is one of the trendiest effects to learn, there are many Neon Text Effect Photoshop Tutorials on the internet today I decided to add this simple tutorial.
In this tutorial we’ll be learning how to create an easy neon text effect using Photoshop. To create this simple text effect we’ll be using Blending Options, Blending Modes, Pen Tool and the Brush Tool.
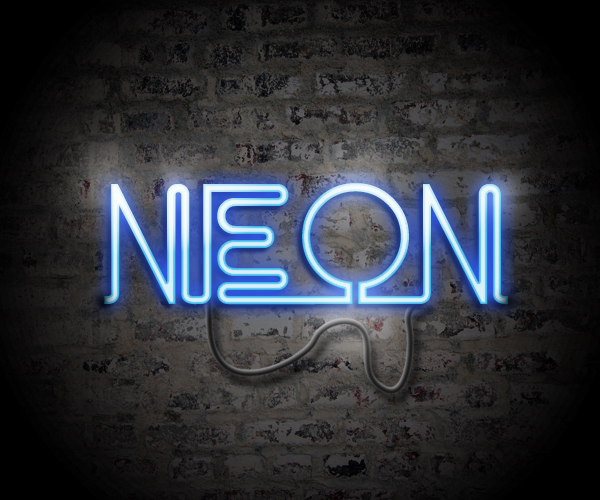
Final Result
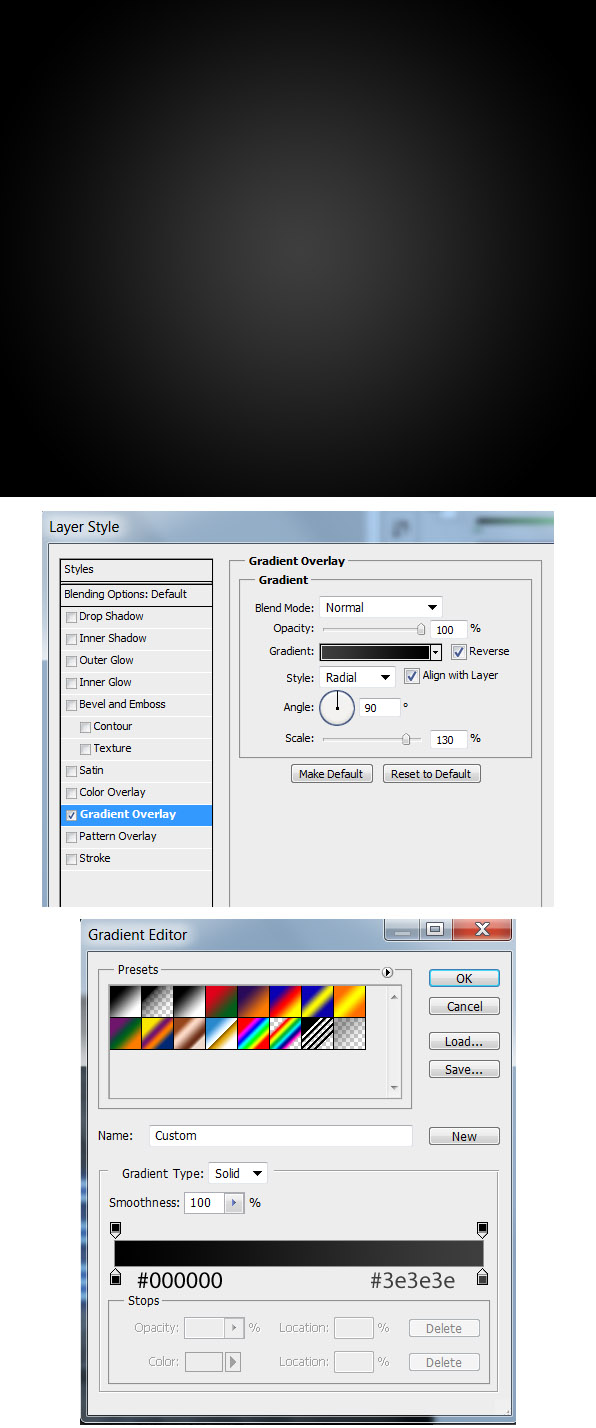
1. Create a new document that’s 600×500 pixels. Double click on the background layer to go into Blending Options and put in the following style.
2. Next Copy and Paste the Brick Texture onto the canvas and make it smaller by clicking CTRL+T and dragging the top corner down while holding down the shift key. Set the Layer’s Blending Mode to Soft Light.
3. Next using the font Neon, write out your word. Double click on the layer to go into Blending Options and put in the following styles to create a cool Neon Effect.
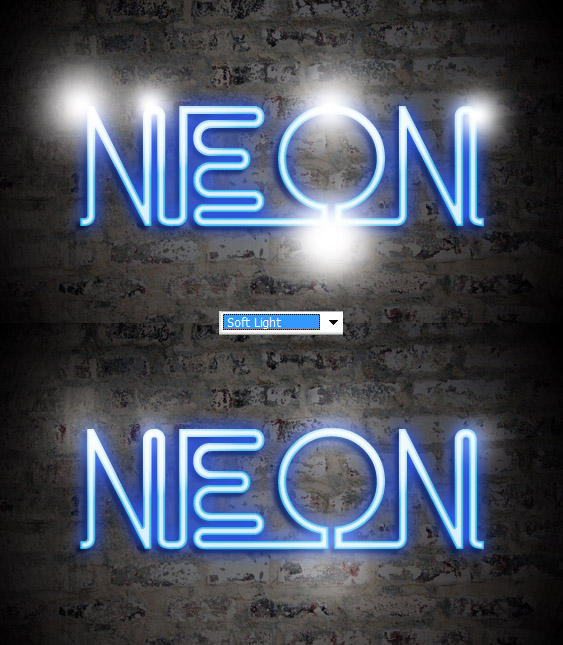
4. Now to add some highlights, create a new layer and place it over the text. Choose a soft edged brush and using the color White click on some areas like below and set the Blending Mode to Soft Light.
5. Create another new layer and select a smaller soft edged brush and using the color Black click on the ends of the text.
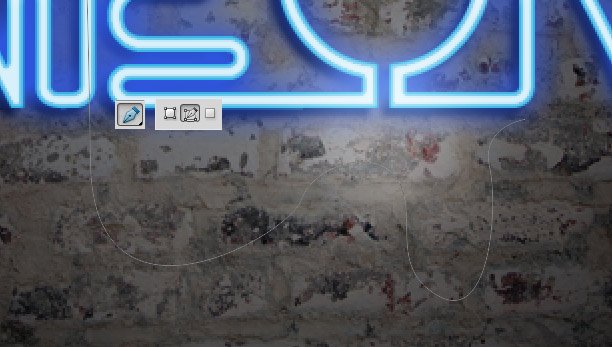
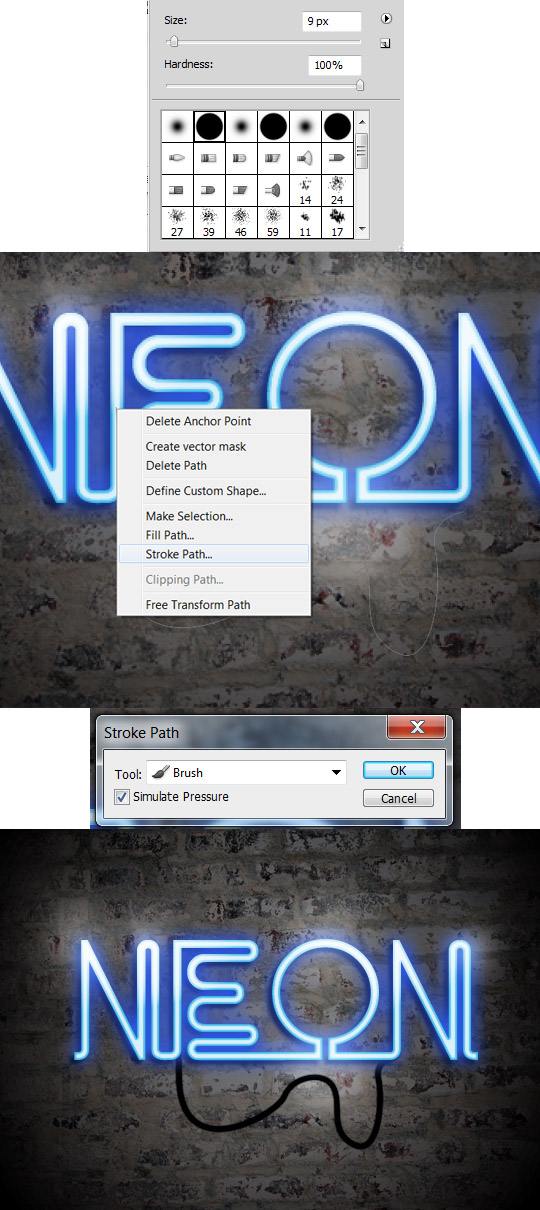
6. Now to make a realistic power cable, select the Pen Tool and choose the Paths layer and draw your cable line.
7. Next click on the brushes icon and select the brush with the presets below. Then click on the Pen Tool again, right click over your cable line and select Stroke path. When the Stroke Path box appears select the Brush Tool, Simulate Pressure and click OK.
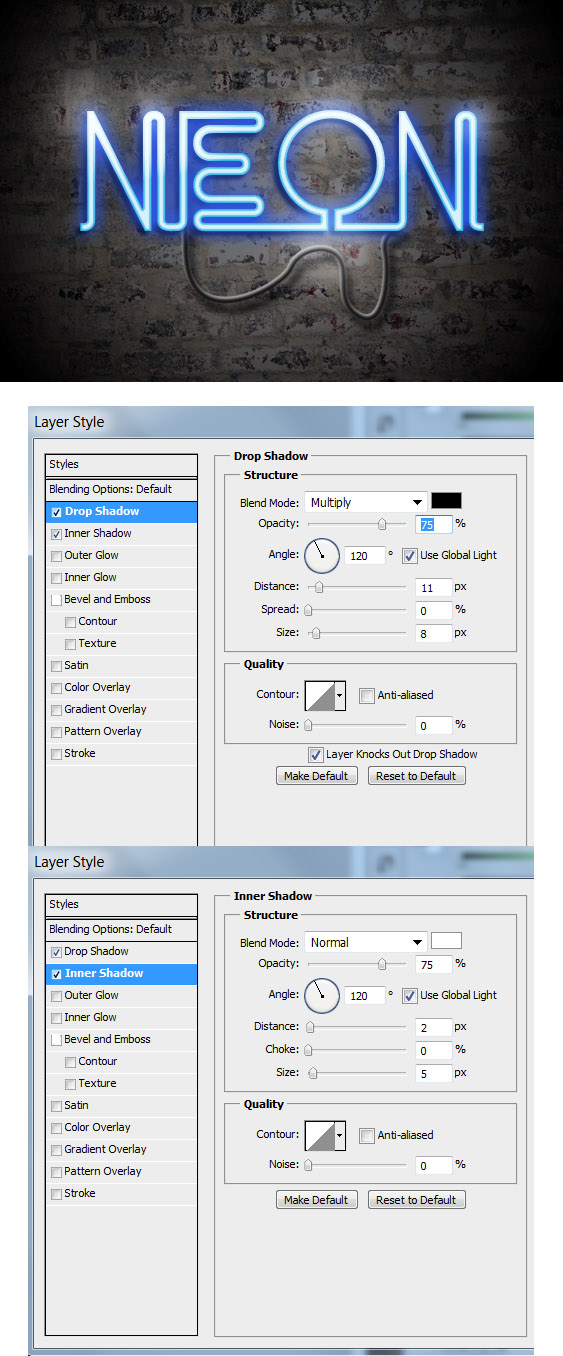
8. Finally lets add some Styles to make the cable look  more realistic. Double click on the layer to go into Blending Options put in the following styles.
