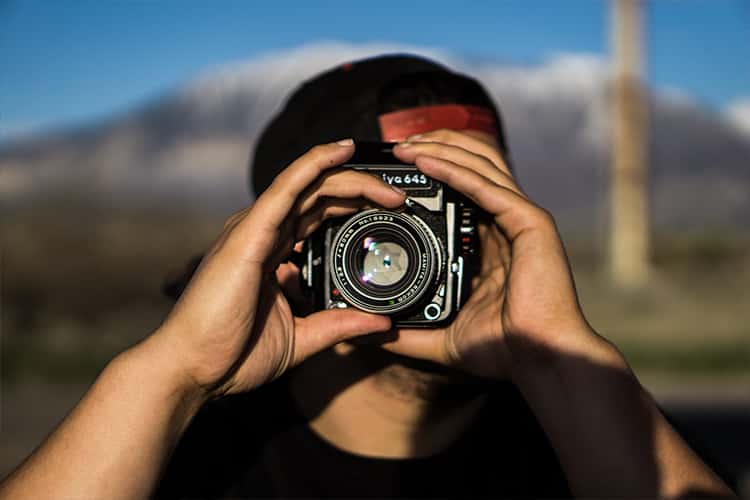
Best Photography Tips You Must Know
Do you love to capture sweet memories and scenic beauties in an image? We have figured out the best photography tips and tricks to make your pictures more elegant.
Photography is one of the many forms of art, and it is the application and practice of creating pictures by recording light. The photograph can be made either chemically with light-sensitive material or electronically through an image sensor.
The first-ever digital camera was invented in 1975. Cameras and photography have drastically evolved since then.
If you are learning photography or want to pursue a career in this, this article will be valuable to you along the way.
Top 7 Photography Tips and Tricks
Photography is just like any other art or practice, and you should be committed to the process of learning and enjoy it at the same time to get better.
Some good tips and tricks will surely help you improve your photography skills. But you must have a deep understanding of how the light, shades, subject, and other elements apply those techniques.
Here are seven fantastic photo tips that will help you get better:
1. Work With the Composition
How much engagement you can sustain will reflect on your photographs. There is a difference between photography and clicking pictures on auto mode.
Learning the basics of photography, or rather any art, may seem tedious at the beginning. But whether you can gain expertise or not will depend on how strong your basics are.
Talking about composition, remember not to crop any part of your subject with the frame. Try to keep the subject in the middle of the frame and aligned to your frame.
However, that is not mandatory for all photographs, and sometimes you will need to play with the subject and frame to enhance the elegance of your picture. But to start off trying to keep your subject at the center and straight.
Then, you shall try to remove all the unwanted elements from your frame by adjusting the composition.
You will not get everything right straight away, and there will be problems with the photographs you click on at first. That is where practicing is necessary. The more shots you click, the more control you will have over the composition.
2. Learn About the Important Settings
Even with mediocre digital cameras, you will need to work with several visual settings that will take some practice to get familiar with. Even professional photographers often make mistakes while adjusting camera settings.
Set your camera to manual or professional mode while practicing. Try to avoid the auto mode. You can switch between modes but ensure that you give enough time to each of them.
Learning to use the focus is crucial as it is the most critical aspect of photography. We recommend practicing in either single-servo autofocus mode for still subjects and continuous-servo autofocus for subjects in motion.
We suggest not to use manual focus unless autofocus is not working due to low light or anything else.
Always shoot your images in RAW so that you can edit them in the future. JPEG images may look better on the camera, but the format does not have enough latitude for processing.
3. Do Not Overexpose the Highlights
While selecting the camera settings, you must know what the settings would do to your photo.
If you overexpose the highlights in a photo, it will be impossible to recover the details in the white areas.
If you compare two pictures, one with just enough highlights while the other one is overexposed. You will notice a photograph with details instead of large white blobs looks more vibrant.
Controlling an image’s highlights is quite simple, but this when all the knowledge of ISO, aperture, and shutter speed comes to play.
● Aperture, ISO, and shutter speed are the only three features that directly manipulate the brightness and highlights.
● Check on your camera screen if the exposure is alright while taking photos. In case you feel the exposure is too high, consider lowering the ISO to its base value, 100.
● If the ISO is set to 100 already, you shall increase the shutter speed and ensure the aperture is set at any moderate value.
4. Focus on the Light
What is that one thing, without which you can never take a photo? If your answer is light, you have got it right.
If you click a picture with good light, then no matter what, it will be pleasant to look at. But what is considered as good light?
It is never constant, one picture may look great with a certain amount of light, but another shot may turn out to be a disaster in the same light and settings.
Always try to balance light intensity between the background and your subject. You can achieve it by focusing on the direction and softness of light and adjusting the camera settings accordingly.
You will see unpleasant shadows across your frame if the light is too strong, a common issue for portrait photography.
If you see that the light is coming from an odd angle, you may change the source’s position if you are in a studio. If you are shooting outdoors, then you can only move your subject.
5. Use Good Photo Editor
This tip will not improve your photograph skills, but it will help you achieve beautifully processed pictures.
No matter how good the photographer is, most pictures are published only after edit.
You can make any image look more vibrant with am editing software. Besides, you can colorize old black and white photographs.
Image retouching is a common act for professional photographers. It is necessary because a perfect subject does not exist.
A good photo editor like Movavi Picverse will help you to enhance the beauty of your photo by:
● Change the background.
● Color Correction
● It helps to mask images.
● To create shadows.
● Restore Pictures.
You have all the reasons in the world to use good photo editing software to keep your pictures in proper shape. Using a photo editor will also enhance your understanding of how the light plays in your photographs.
6. Learn to Play with the Perspective
According to the rule of the third, photographs look more interesting when the subject is not centered.
Initially, you may use a grid to take references while shooting a photo. We recommend using a grid with two horizontal and two vertical lines.
You must position the subject on one of these lines or at a point where two lines are intersecting.
Some cameras may not have a grid, so users can imagine a grid to quickly align their subject with the image align their subject with the imaginary lines rapidly.
7. Get a Tripod and Learn When to Use It
A tripod is an essential accessory for any kind of photography. You need not use it for every picture, but you must know when to experiment with prolonged exposure.
Using a tripod will help you in capturing sharp photos in low light, even without raising the ISO.
You must examine the height, weight, and stability of a tripod before buying it.
The weight and stability of a tripod need to be on point because you will have to carry it around, and you would want it to support the camera in any position and angle.
Summary
There is only one key to excel in not just photography but any skill, and it is practice. The tips and tricks we have shared will be helpful only if you apply them. The more time you spend on photography, the easier it will be to play with the settings and other features.
You have to keep experimenting to learn new things about photography. And practicing them will help you to achieve the perfect photograph that you have on your mind.


