Create a DIY Smartphone Projector From An Old Shoebox
Sharing the screen of your smartphone could be tricky. While there are some Android devices that support HDMI, the very best option for smartphone owners on all platforms is usually to use some screen-reflecting software (especially straightforward for iOS users) and see the existing app on an HDTV or computer screen.
There’s another way though, which is to project your display. Placing up your mobile device using a digital projector is easy enough, but additionally you have the option of turning the display of your phone into a projector.
Yes, you read that right. And all you’ll want is a an old shoebox and a projector lens.
The Simple Option: Buy a Kit

None of this is an original idea. Rather, it is a DIY version of Luckies’ Smartphone Projector, a cardboard flatpack system that you can build yourself.
Essentially, the device is a camera obscura – a black box with a hole in it, and illuminated image within. The camera obscura is one of the keystones of photography, the notion that an image can be projected through a small hole in a box or even room, and displayed on the opposite side, rotated 180 degrees. Without the discovery of this optical phenomenon, it is unlikely that photography and the photographic camera would have been developed.
So, Luckies’ Smartphone Projector uses this principle, as does any projector, using a lens to rotate the image, hence righting the image so it can be viewed.
Step 1 / You Will Need
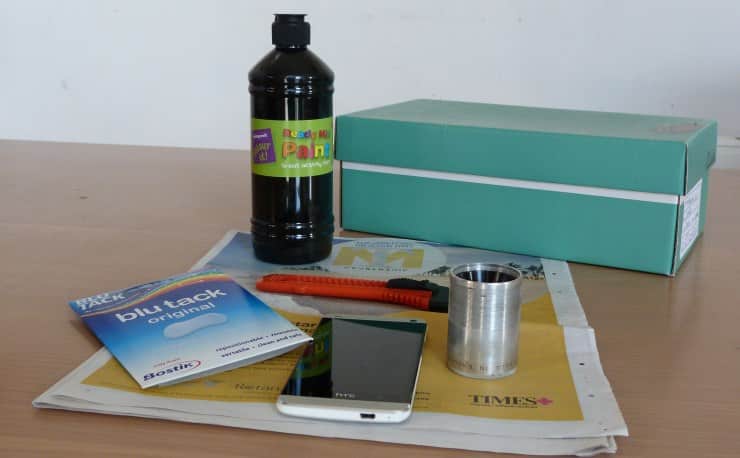
The great thing about the camera obscurais that you don’t need a special $80 box to recreate it; you can use an old shoebox, a tub of black paint, some adhesive putty, a suitable lens, and your smartphone.
The sort of lens you will need for this project is a biconvex lens. These can be purchased from photography shops or online from specialist retailers, Amazon or even eBay. In fact, should you have an existing projector you may be able to remove the lens and use this.
Step 2 / Where Can You Find a Suitable Lens?
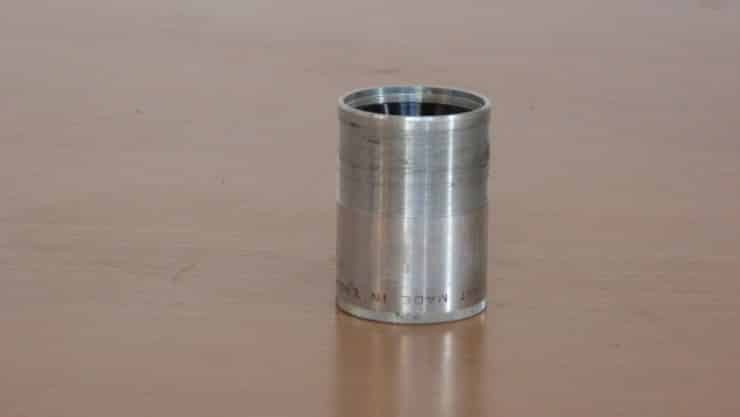
Lenses can be expensive, so a good option to keep the price down is to find an old cine or slide projector and remove the lens from that.
To project your smartphone display through the hole in your shoebox, you’ll need to ensure that the device is positioned at the correct distance (the optimum focal length) from the lens. To get an idea of the size of the shoebox you require, find a darkened room in the dead of night, switch your phone’s display to the maximum brightness and place it around 6 inches behind your lens, pointing both devices at a blank wall or pinned-up sheet of paper.
While the image will not be particularly bright or sharp, it should give you enough information to judge the size of the shoebox you will need.
Step 3 / Getting Started: Install the Lens
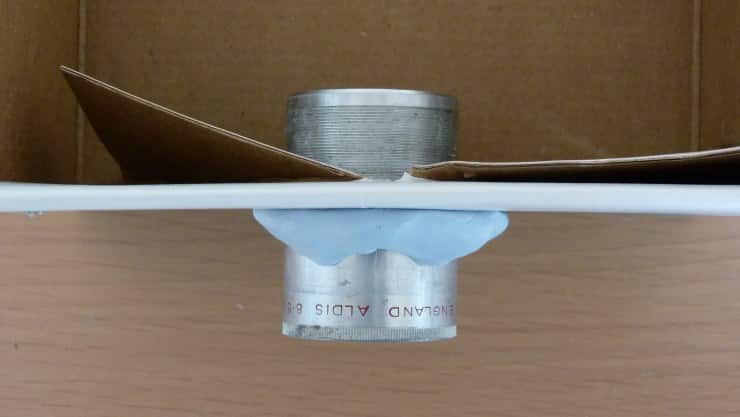
Begin by placing the shoebox on one end, and determine where the lens will be fitted by using a ruler or measuring tape to find the centre of the box end. It’s a good idea to draw two lines to make a cross. Place the lens over the cross, getting it as close to centre as possible, and draw around it.
After you have cut out the shape of the lens, place it into the hole, using the adhesive putty to keep it in position. You can substitute this for duct tape later, but bear in mind that you may need putty to support the length of the lens; a small matchbox might be employed here to prop the lens in place temporarily.
Step 4 / Insert Your Phone
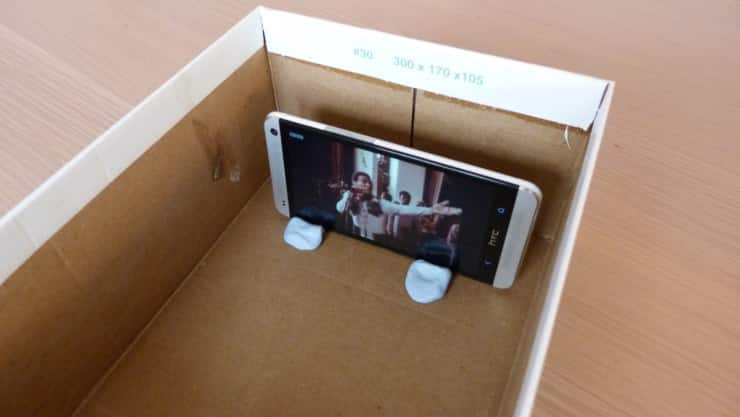
Inside the box, place your phone, with the lock screen disabled and the brightness turned to full. While one option is to secure it in place temporarily with more of the putty, for the best results use a smartphone case that will allow the phone to “stand†on its side for viewing.
With the lid replaced, return to your darkened room and check the quality of the projected image. You should be able to focus the image by adjusting the position of the phone, moving it back and forth, making sure to secure the putty again when you’re satisfied.
Step 5 / Painting
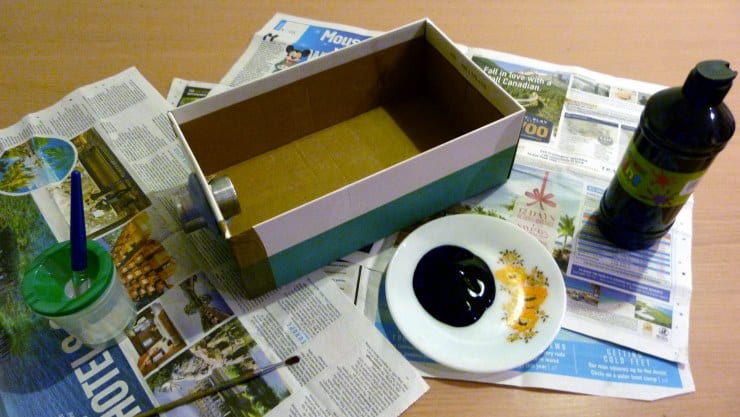
When you’re finally happy with the positioning, make some notes, take a couple of photos and even pierce a couple of holes on each side of the box so that you can find the “sweet spot†again later, after you’ve painted it.
It’s now time to paint the shoebox. Ideally you should paint inside and out, but certainly the inside needs every surface coating in black paint, preferably acrylic. Naturally you should remove the lens and your smartphone before painting; don’t replace them until the paint is bone dry.
Don’t forget to paint the inside of the lid!
Step 6 / Putting It All Together
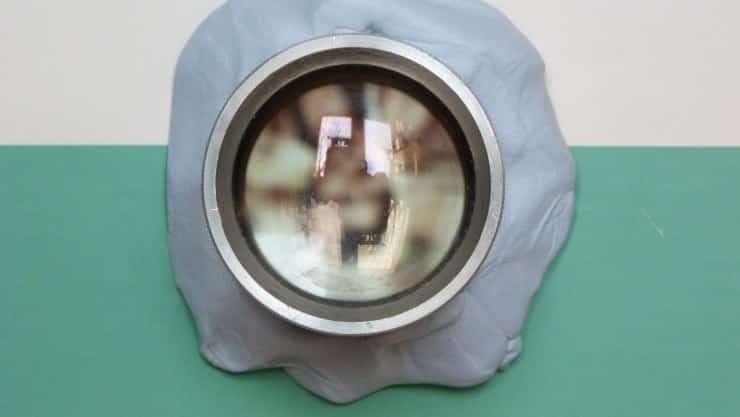
With the paint dry (you might opt for a second coat, especially if you used poster paint (a cheaper alternative to acrylic), it’s time to put everything back together. With the lens now fixed back into place, position the phone, and turn the lights down to ensure the image is being projected and is in focus.
You’ll notice something is wrong: the projected image is upside down. The solution is to turn your phone upside down, leaving the image locked. If you’re using an iPhone, all you need to do is the activate the orientation lock while in landscape view, and then flip the phone upside down. On Android, you can do this with an app such as Set Orientation, free from Google Play (and not alone in its functionality).
Step 7 / Finished!

With the orientation issue fixed, you’re done. You’re the owner of a smartphone projector, built from a shoebox, all for the cost of some black paint, adhesive putty and a lens. For the very best results, ensure your shoebox projector has at least two coats, and that you set the brightness on your smartphone to the full setting. Also, project onto a white screen in a completely darkened room.
As you can see above, the results are satisfactory (although photographing the results are tricky) but note that the results are a mirror image of what you might expect to see.
via MakeUseOf


