Create a Harry Potter Poster from Scratch
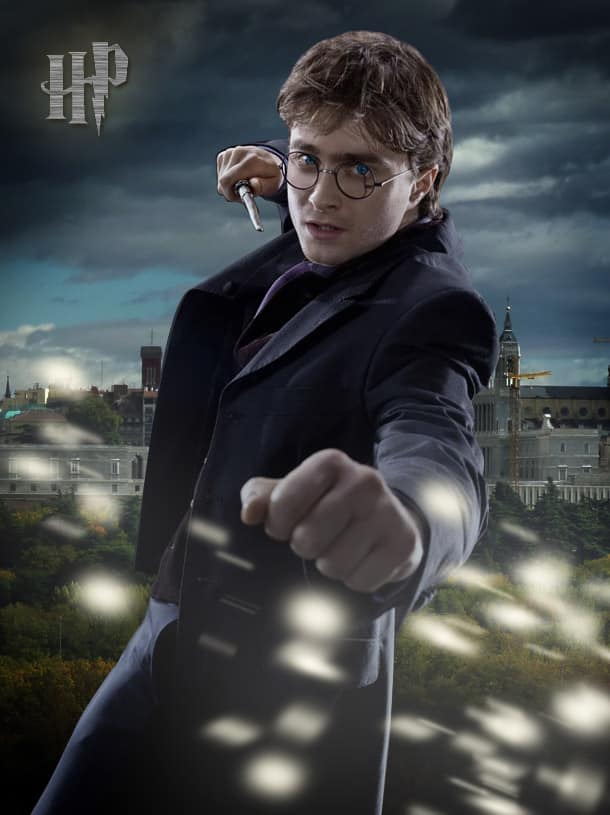
Learn how to create a Harry Potter Poster from scratch in Photoshop!
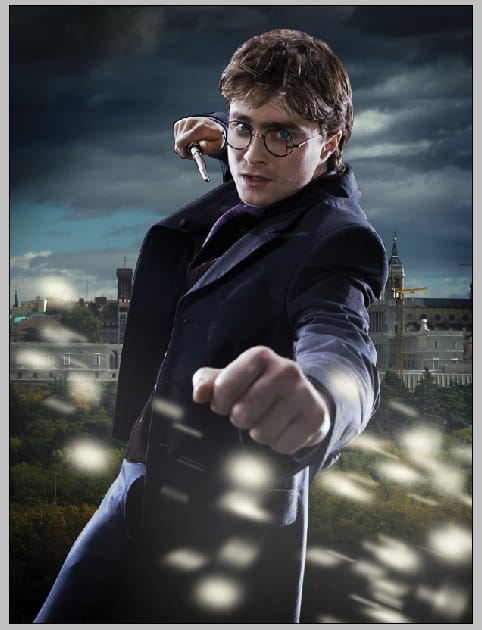
Final Result
1. Create a new document that’s 610×815 pixels. Get this scenery photo from here, copy and paste it onto the document. Resize and move the image to your like by press ctrl+t. 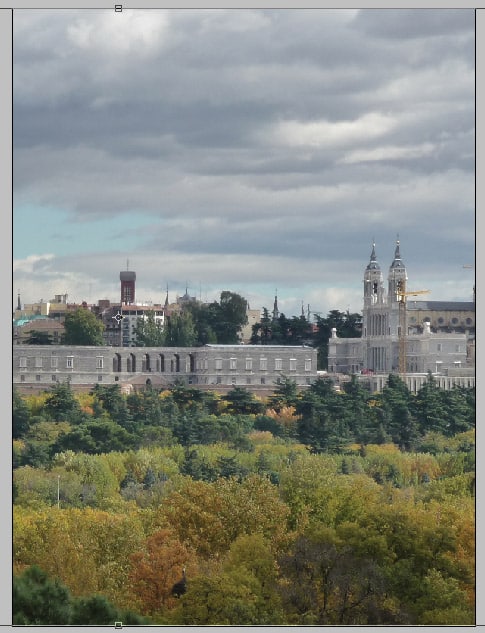 2. Get this Harry Potter image from here and place it on the document. Get the pen tool, set the color to white and make the opacity to 10%. Trace around Harry.
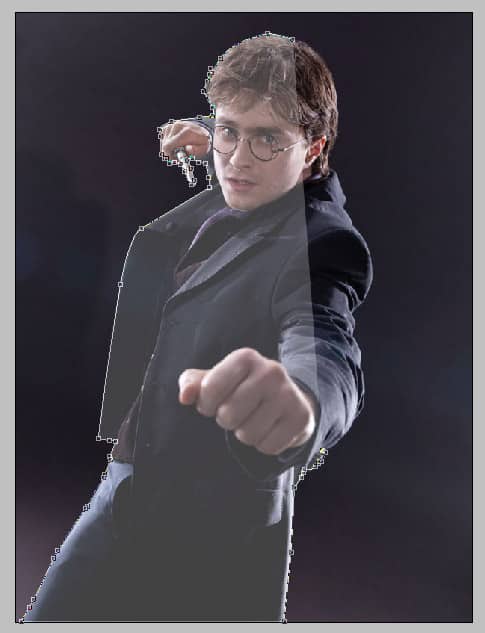
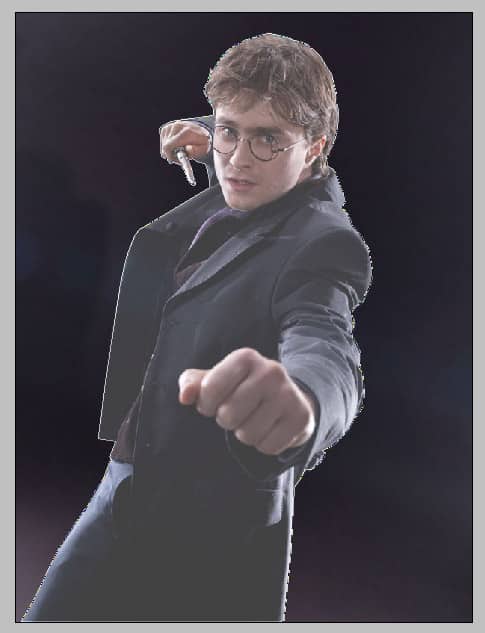 3. While on the pen layer hold down ctrl and click on the box to highlight the shape. Go to the Harry layer and copy/paste Harry onto a new layer.
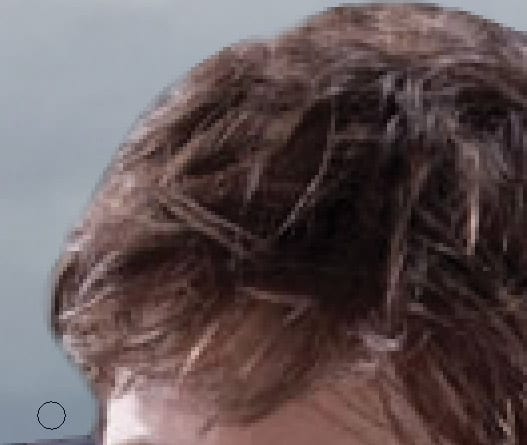
 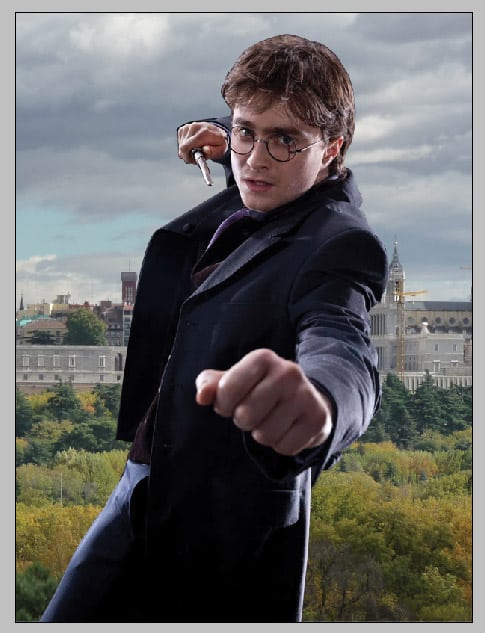 4. With the zoom tool zoom up to Harry, with a soft edged erase, erase any edges that are messy.
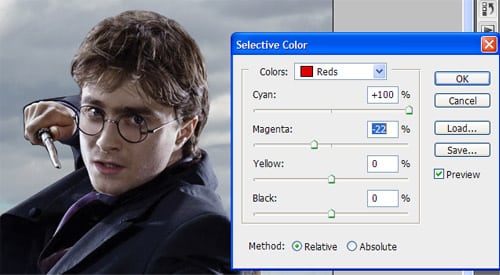
  5. Duplicate the Harry image 2 times. Make the first harry 59% opacity, go to Image > Adjustments > Selective color and make it these settings:
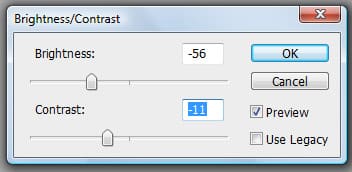
  6. On the second layer go to Image > Adjustments > Brightness & Contrast and make it these settings:
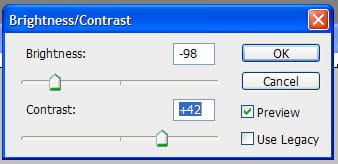
  8. Duplicate the scenery layer 3 times, make the first layer 55% opacity.On the second layer make it 55%, go to Image > Adjustments > Brightness/Contract and make it these settings:
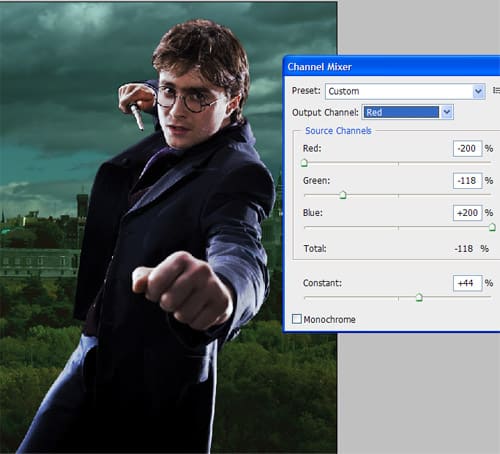
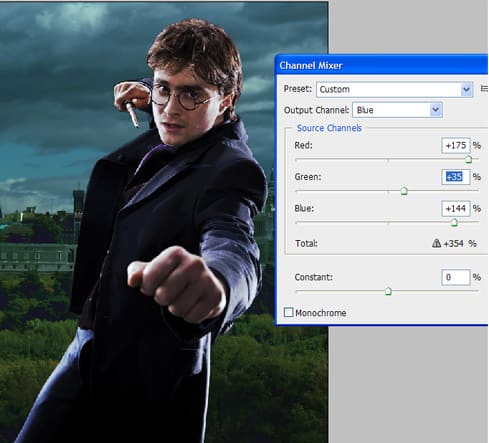
  9. Make the 3rd layer 62%, go to Image > Adjustments > Channel Mixer and apply these settings:
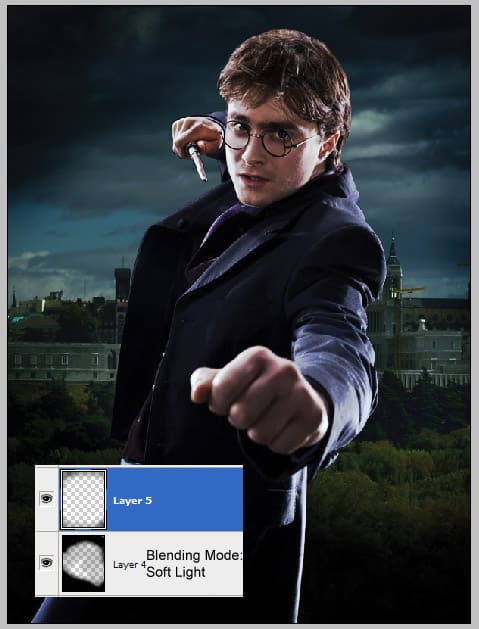
 10. Leave the last scenery image normal. Create a new layer above the scenery, get a soft edge brush, using the color black draw around the edges of the canvas.
  11. Set the blending mode to Soft Light. Create a new layer, with a low opacity soft edged brush, brush some more shading around the scenery.
  12. Place the scenery images into a folder named BG. Go to Window > Brushes (or F5) to open up the brushes box. Select a soft edge brush and put in these settings in the brush box:
 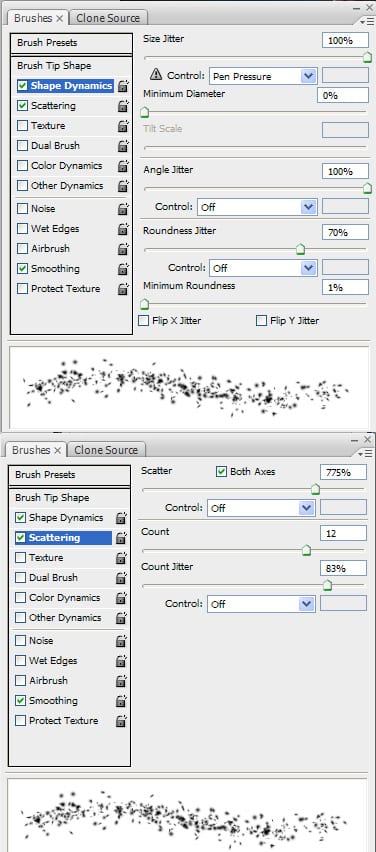 13. Create a new layer over all the other layers and create brushes a couple of times with a light yellow color.
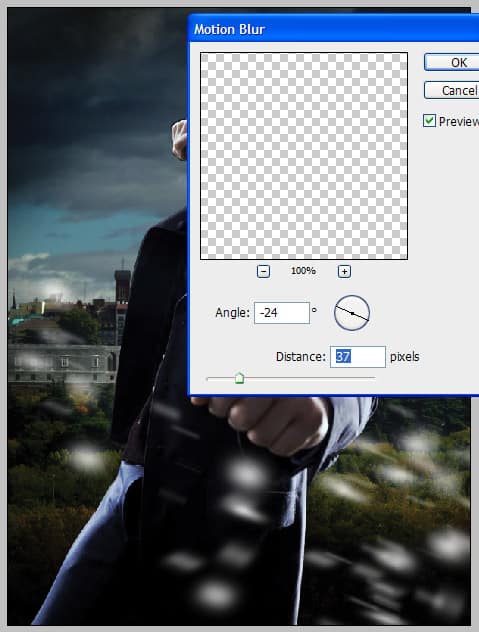
 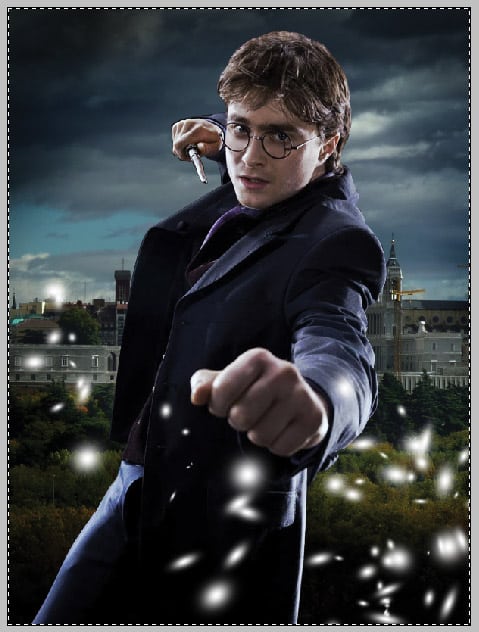 14. On the brush layer go to Filter > Blur > Motion Blur and apply these settings:
  15. Right-Click and go into Blending Options, out in this settings:
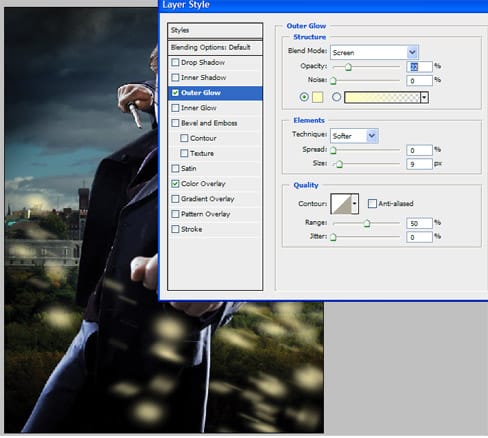
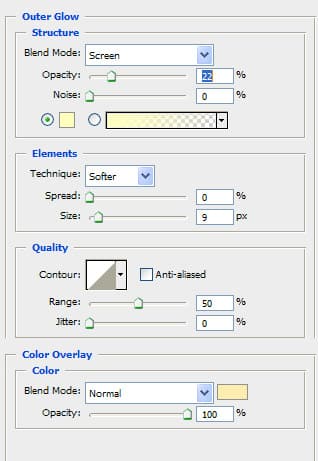 16. Duplicate the spots layer and add this settings on the bottom spots:
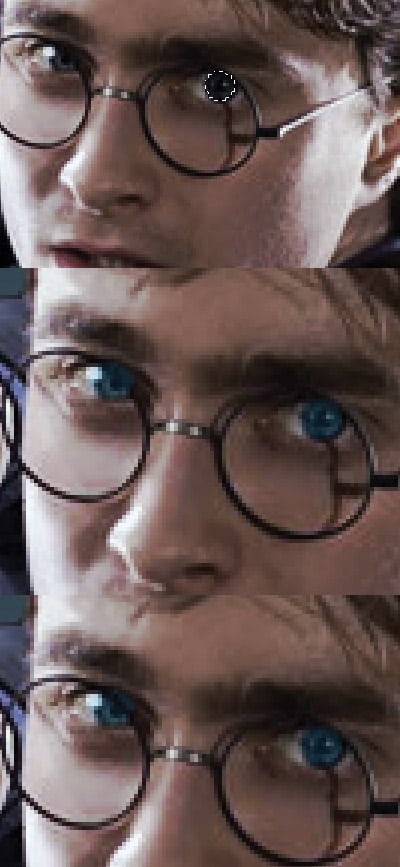
  17. Create a new layer and zoom up to Harry’s eyes. Using the Elliptical Marquee Tool hold down shift and circle the eyes. Get a light blue colour and fill in the eyes. Make the opacity 12%. With the eraser tool erase the blue part of the left eye that’s over the glasses frame.
 18. Get the Harry Potter font from here, and type in his initials or full name. Go into Blending Options on the layer and put in these settings:
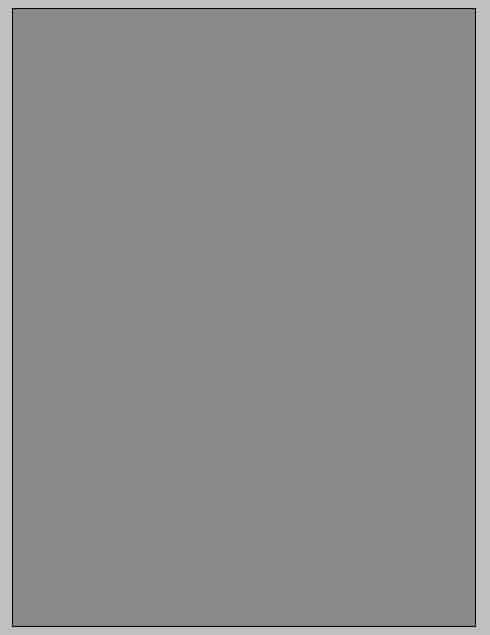
 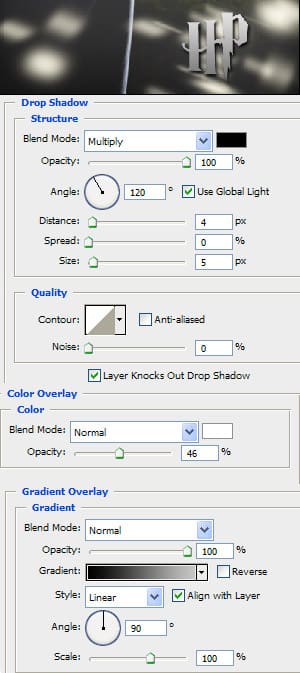 19. Create a new layer and fill it with a light grey colour.
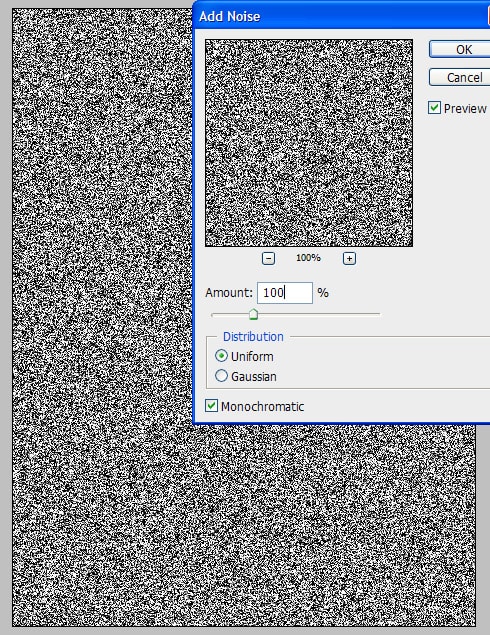
  20. Go to filter > Noise > Add Noise and put in this settings:
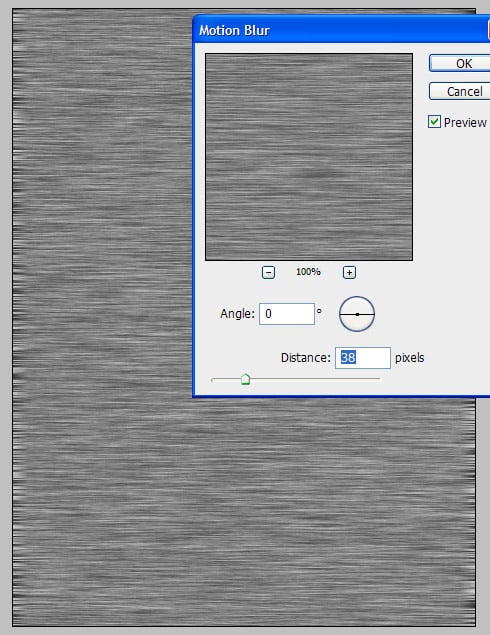
  21. Next go to Filter > Blur > Motion Blur and put in these settings:
  22. Go to the font layer, hold down ctrl and select the layer box to highlight the text.
  23. Copy and paste the metal layer onto a new layer and place it over the text. Place the title where ever you want on the poster.
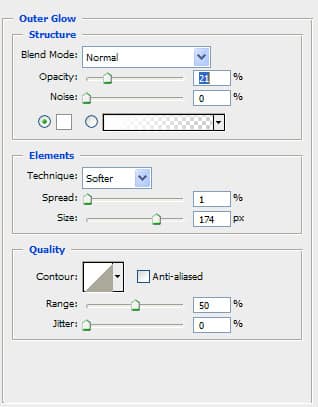
 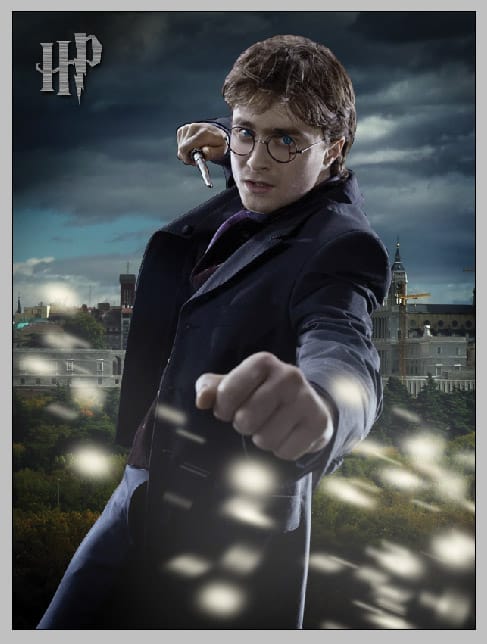 24. Lastly place a glow around the font with these settings:
