Create a Print Ready Festive Postcard in Photoshop
Learn how to make a Christmas Theme Print Ready Postcard in Photoshop! We’ll be designing the Front & Back of the Postcard using various shapes and helpful methods & techniques.
Final Result
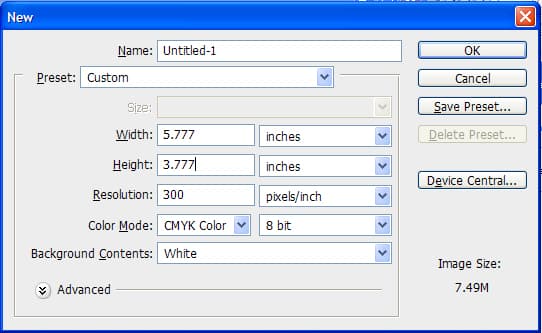
1. Create a new document with the settings below. The resolution is set to 300 for high quality & CMYK is the Printing mode.
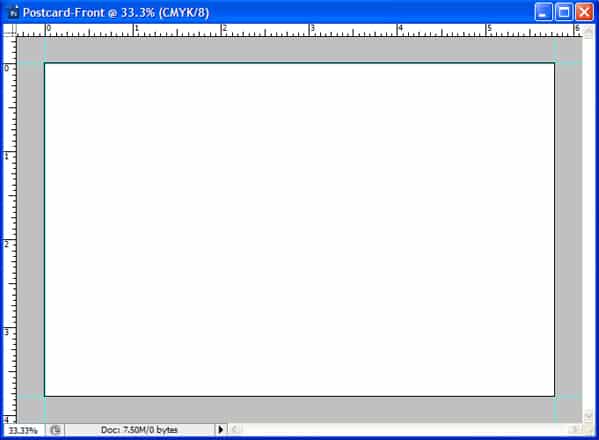
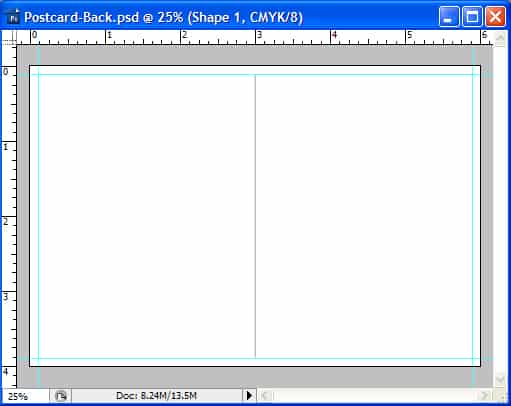
2. Press CTRL+R to bring up the rulers around the canvas. Drag out 2 horizontal & vertical lines and place them on the edge of the canvas like below:
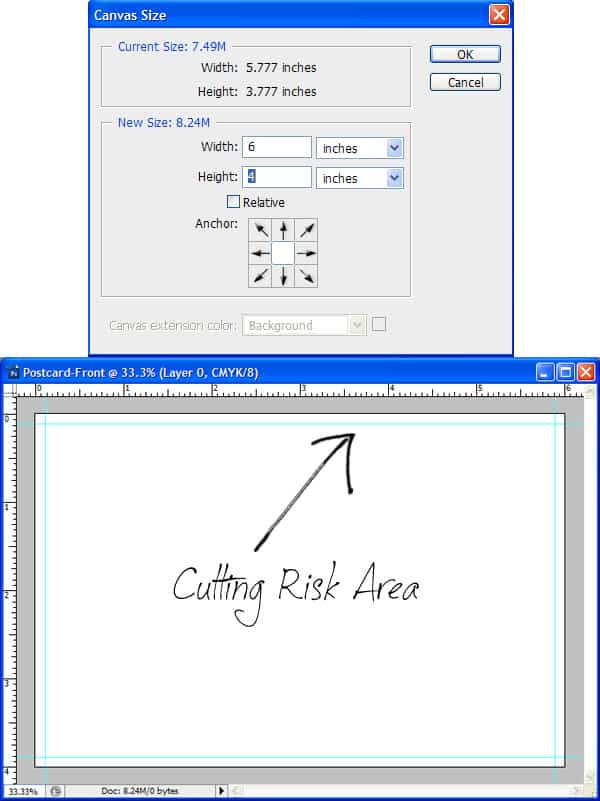
3. Next go to Image > Canvas Size (ALT+CTRL+C) and expand the canvas using the settings below. These lines are now show the ‘Cutting Risk Area’. Make sure your postcard design stays within the lines.
Postcard – Front
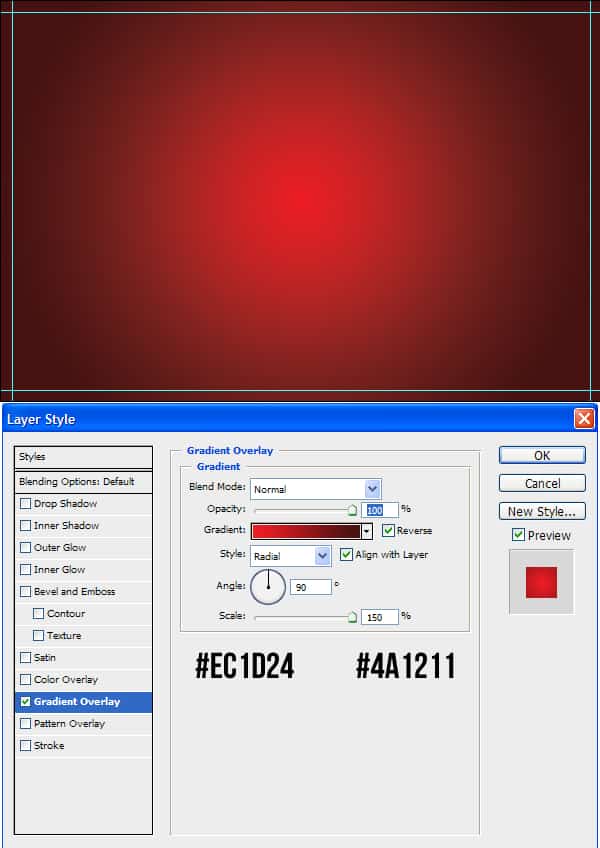
4. Save the document 2 times one for the Front of the Postcard, the other for the back. Open up the Front Postcard document. Double click on the white background to unlock it, then again to go into Blending Options. Put in the Gradient Overlay below:
5. Next go into the Custom Shape Tool and select the Registration Target 2 Shape. While holding down the Shift Key (to keep the shape straight) draw a large shape using the colour black. Set the opacity to 11% on the shape.
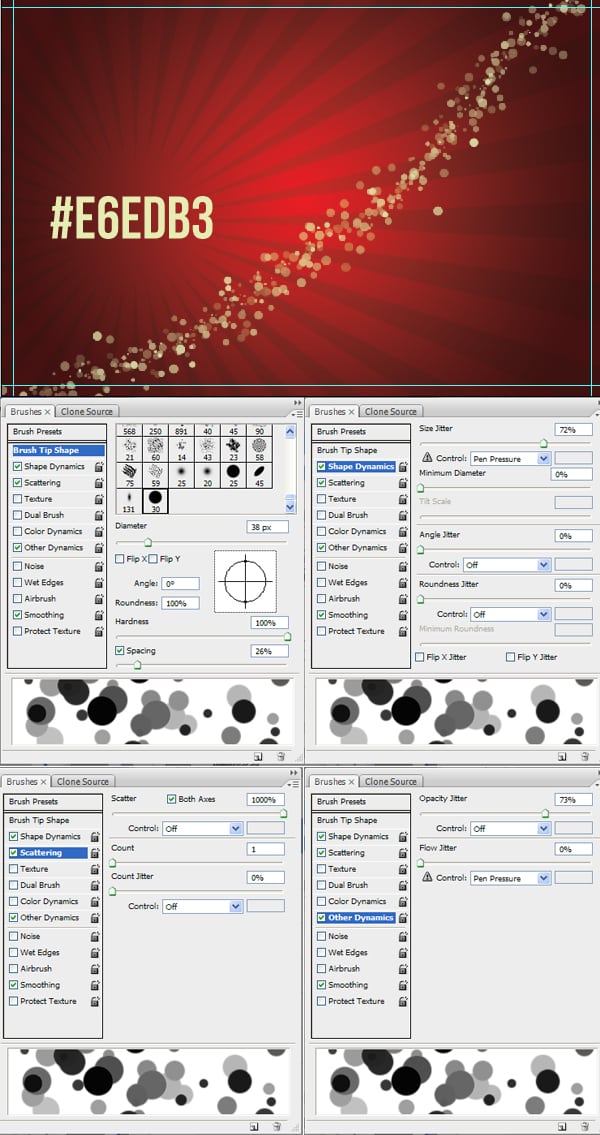
6. Create a new layer & click on the Brush Tool. Go into Window > Brushes (F5) and put in the settings below to make a new brush type. With the colour below draw a diagonal line from top to bottom using the custom brush you created.
7. Download & install these Star Brushes. Create a new layer for the stars, using the colour #fbeea0 brush on some stars using various stars & sizes.
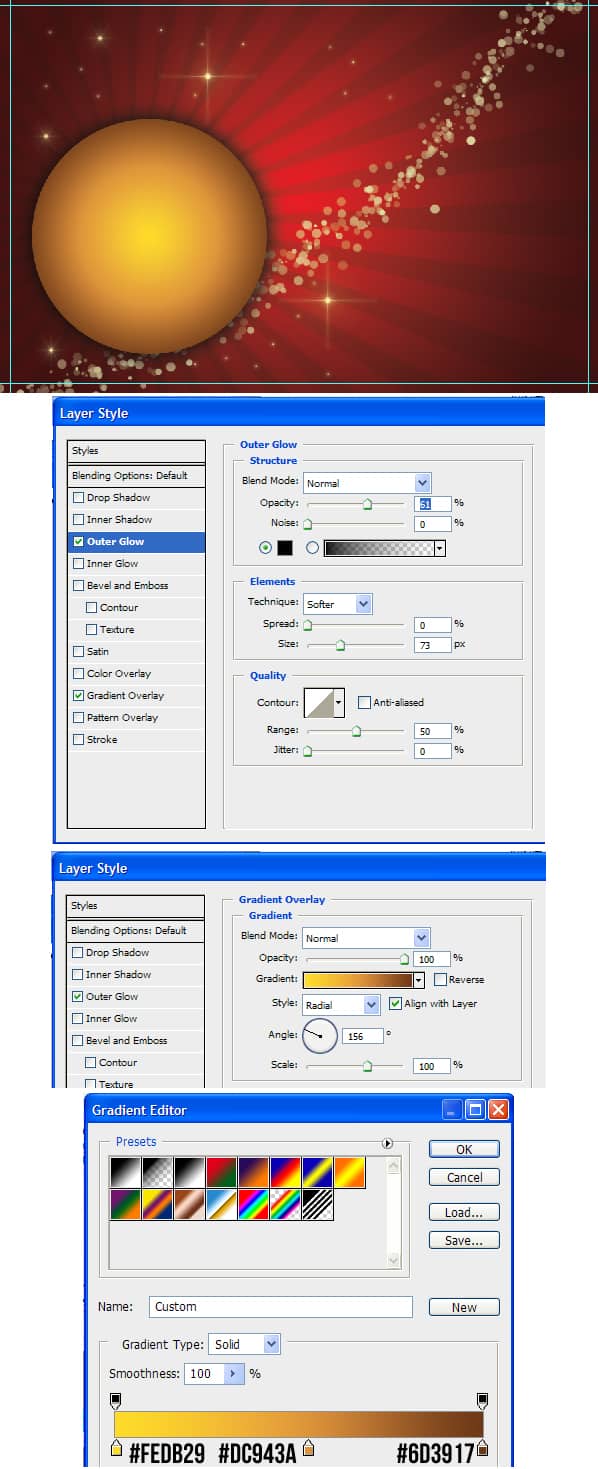
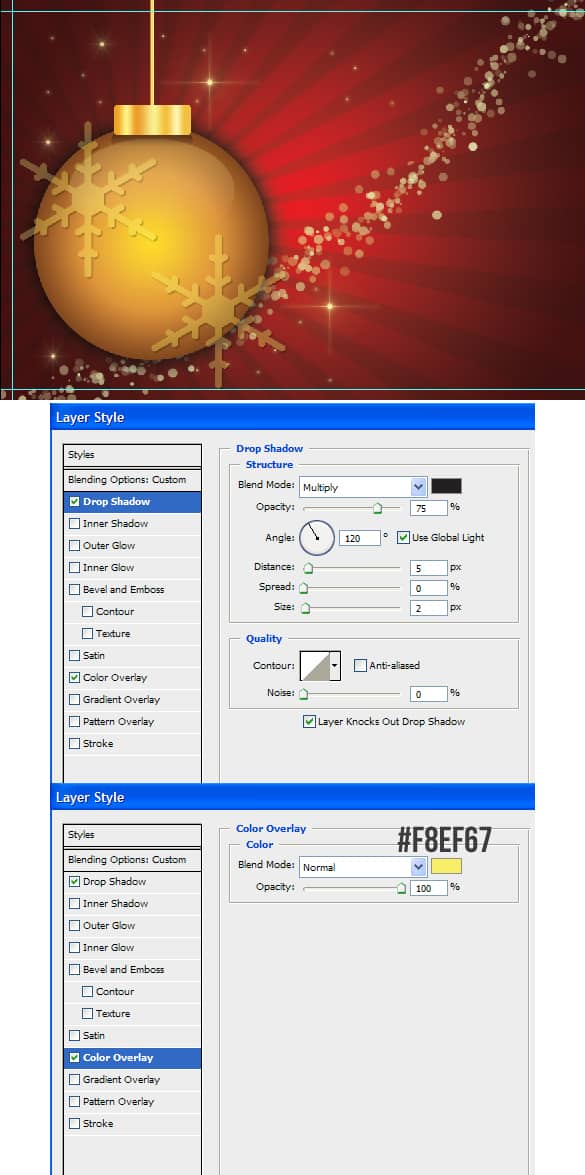
8. For the Christmas Ball, select the Ellipse Tool and draw a circle while holding down the Shift Key. Double click on the circle layer to go into Blending Options and put in the options below:
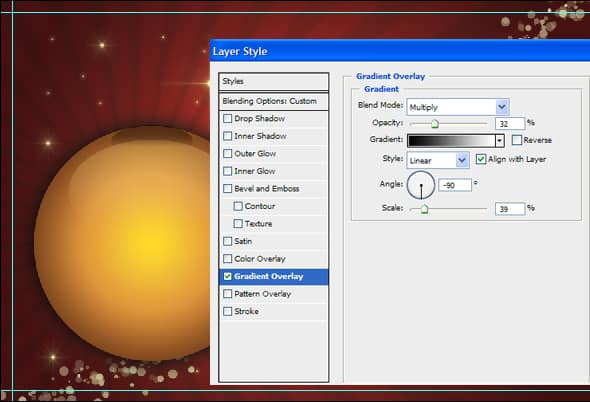
9. Using the Ellipse Tool again, draw an oval shape in white for the highlight. Set the Blending Mode to Multiply so the oval in invisible & the Opacity to 27%. Double click into Blending Options and put in the Gradient Overlay below.
10. For a shadow, draw another smaller oval like below using the colour white. Set the Blending Mode to Multiply. Double click into Blending Options and put in the Gradient Overlay below:
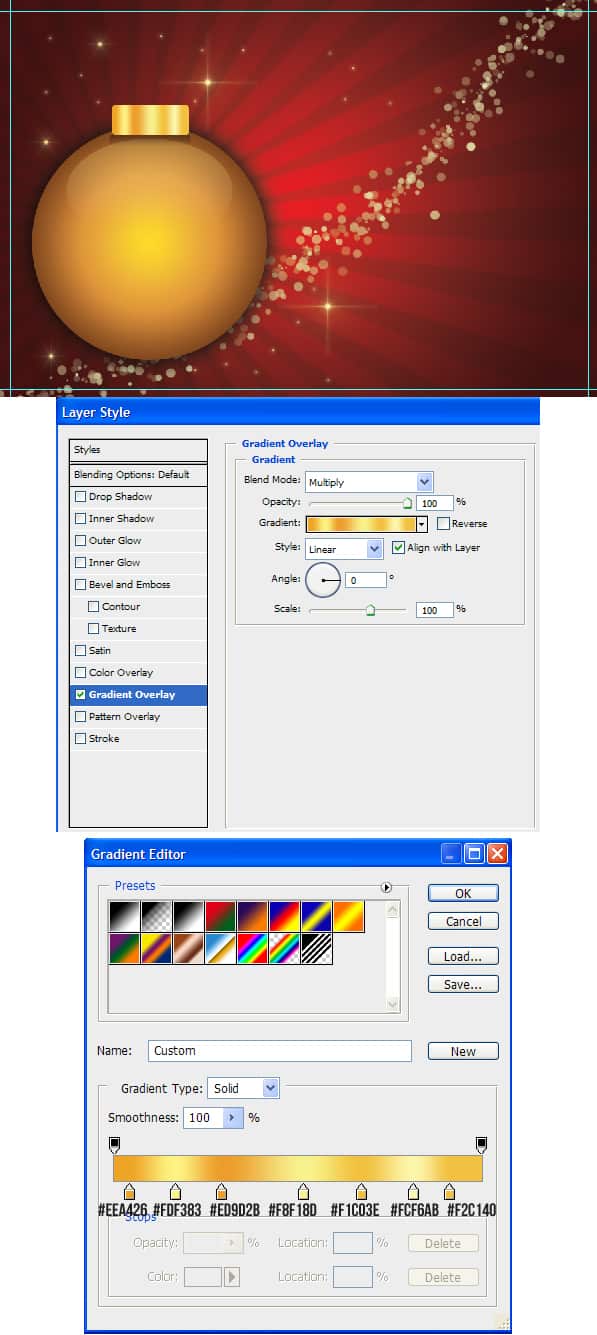
11. Using the Rounded Rectangle Tool draw the top section of the christmas ball. Double click into Blending Options and put in the Gradient Overlay below.
12. Next select the Rectangle Tool and draw the string using the colour.
13. Go into the Custom Shape Tool and select a Snowflake icon. Draw 2 snowflakes. Double click on each shape and put in the following Blending Options:
14. While holding down the CTRL key click on the main circle’s Layer Thumbnail to highlight the shape. Go to each of the Snow Flake icon and click on the Add Mask Layer Icon. This will crop the snowflakes down to the highlighted shape.
15. While holding down the CTRL or Shift Key select all of the Christmas Ball Layers and drag them to the Folder Icon to place into a folder. Duplicate the folder by dragging it to the new layer icon. To make the duplicated Christmas ball smaller press CTRL+T on the folder and drag a corner down while holding down the Shift Key.
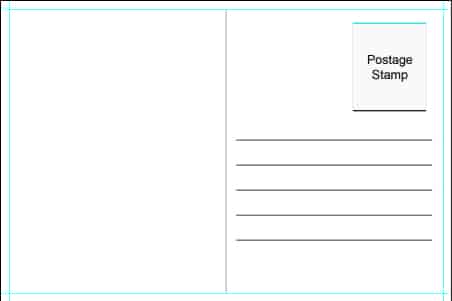
16. Using the font Jellyka Delicious Cake font write out the Postcard message using the colours below. The front of the postcard is now finished!
Postcard – Back
17. Open up the Back document you saved earlier. Drag out a 5th line from Ruler boarder to the center of the canvas (3).
18. Using the Line Tool (3px black), draw a line on the center line you just dragged out (don’t forget to hold down the shift key). You can drag the center ruler line off the canvas using the Move Tool (V).
19. Using the Rectangle Tool draw a shape using the colour below where the stamp will be placed. Double click on the shape to go into Blending Options and put in the Stroke below.
20. Draw a Line using the Line Tool (2px black) for the postal address. Duplicate the line by dragging it to the new layer icon until you have 5 Lines. Move each line down by selecting the layer, holding down the Shift & click on the bottom arrow key. Note: You need to have the Move Tool clicked on while doing this.
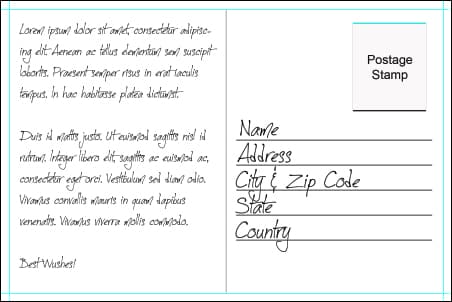
21. Using the font Jellyka CuttyCupCake I’ve written out some text examples.
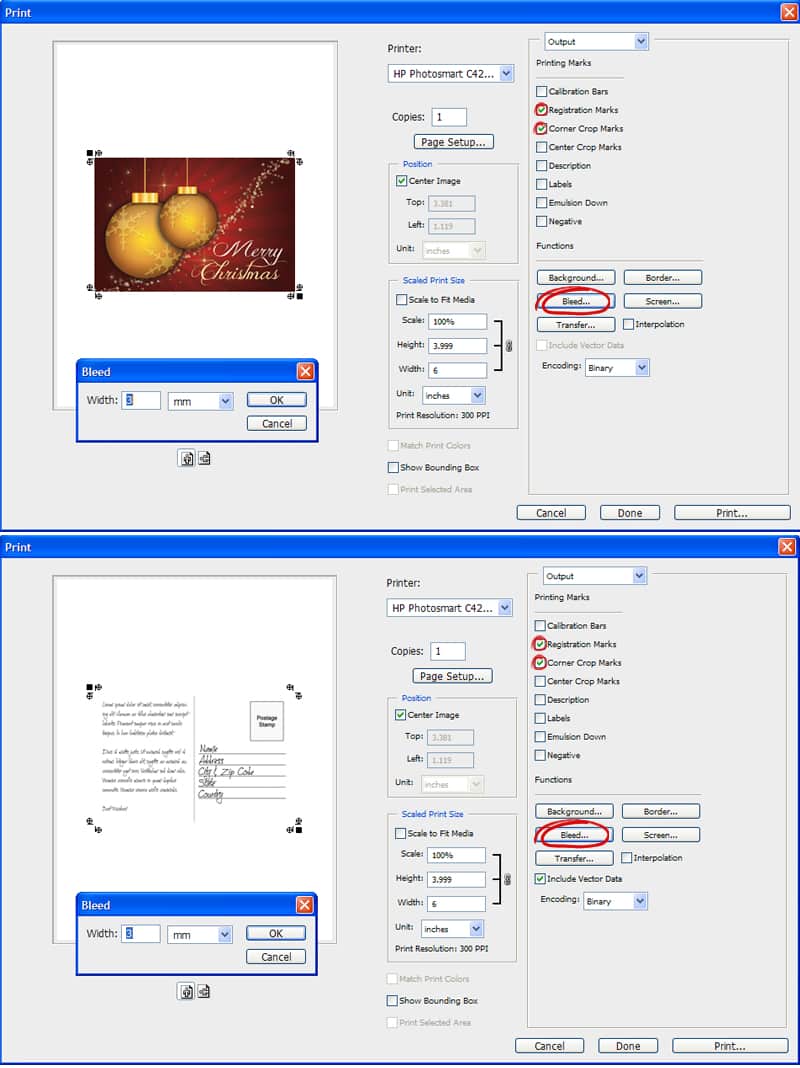
22.  If you’re ready to print each Postcard side go to File > Print. A box should appear, click on the top right menu and go into output. Select the printing marks you want to appear on the printed work. Unclick Show Bounding Box, then go into Bleed and create a 3mm bleed. Then click Print.
If you want to take it to the printers for Printing, Save it in PDF format.

