Create a Retro Badge/Emblem Logo in Illustrator [Tutorial + Free Vector]
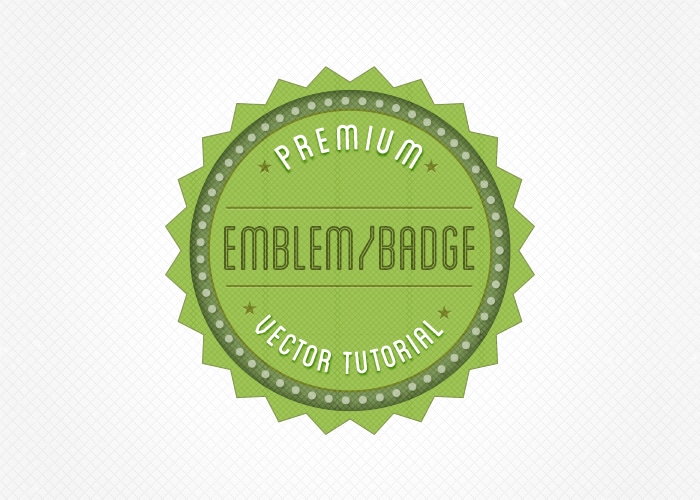
Retro and Vintage Logos is a popular trend these days, the Badge/Emblem Logo style is especially popular and looks great! In today’s tutorial we’ll be learning how to create a Retro Badge/Emblem Logo using Adobe Illustrator. We’ve taken a look at 40+ Retro & Vintage Themed Logo Designs for Inspiration, now it’s time to create our own, with cool shapes, lettering and textures!
Resources
Final Result
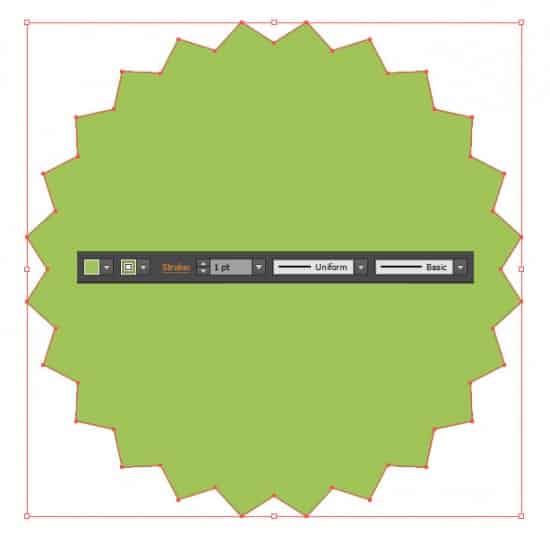
1. Create a new document in Illustrator and select the Star Tool. Click and drag on the canvas to draw a star shape, before releasing the mouse using the keyboard cursor keys to  increase the number of points & the ALT Key to adjust the depth of the star spikes. Place in a fill & stroke color of your choice.
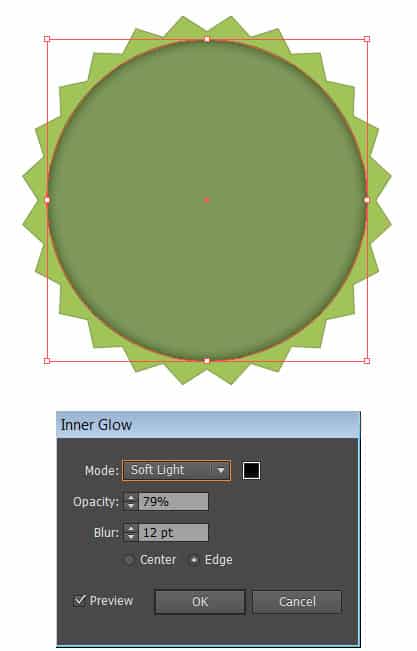
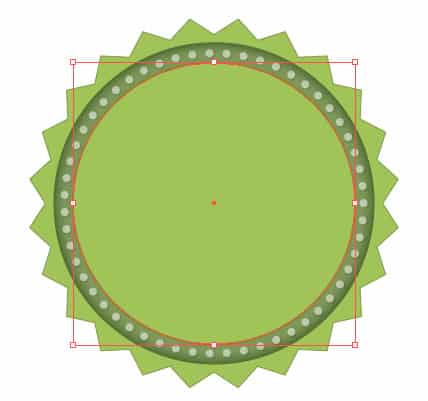
2. Next select the Ellipse Tool and draw a shape like below. Fill the shape to whatever color you want. To make the two shapes perfectly align, select both shapes and open up the Align Palette. Select Horizontal Align Center and Vertical Align Center icons. To add more depth, select the Inner Circle and go into Effect > Stylize > Inner Glow.
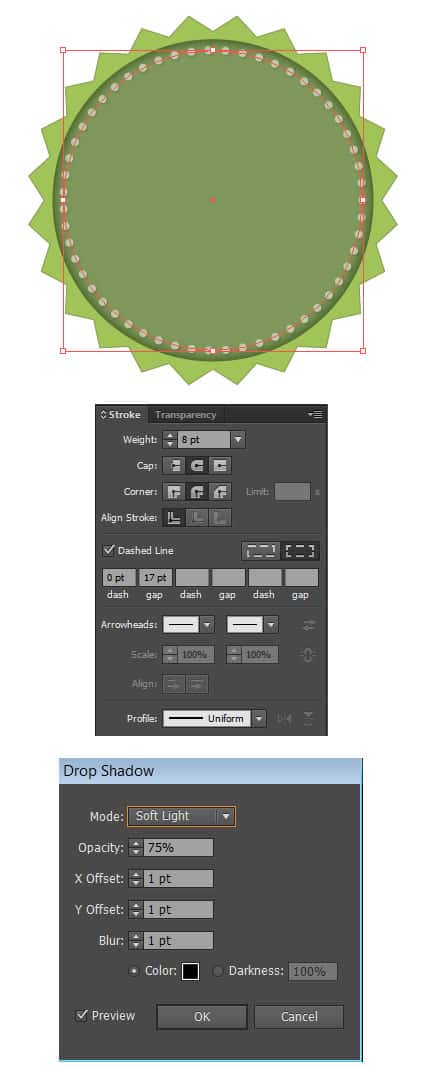
3. Draw smaller circle with a Fill of None and a stroke with the options below to create a nice circled stroke. Put the Stroke Opacity to 50% and go into Effects > Stylize > Drop Shadow.
4. Again using the Ellipse Tool, draw another circle like below and fill it to the same color as your star shape and align it center.
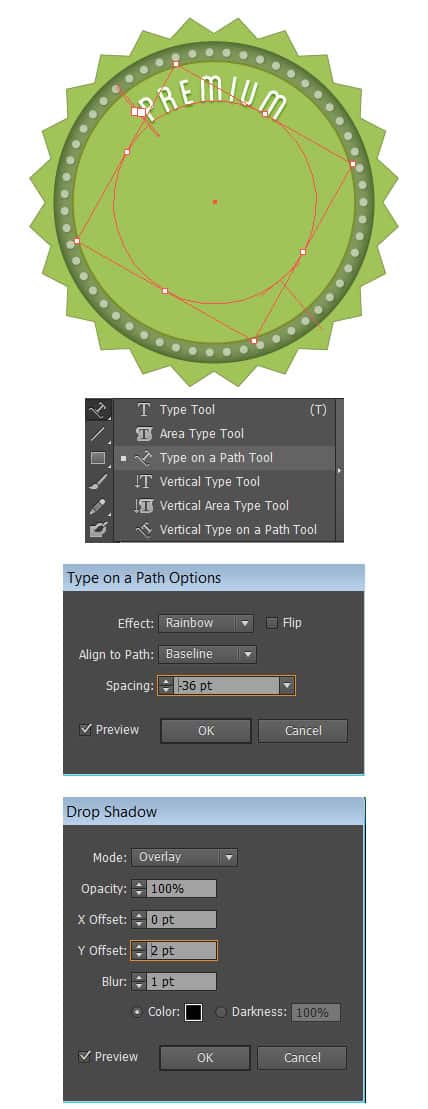
5. Draw a smaller circle with a fill and stroke of none. Select the Type on Path Tool in the Text Tool menu and click on the circle. Enter your word/s and select your desired font. Adjust the spacing of the font by going into Type > Type on Path > Type on Path Options and adjust the options. If you wish you can add in a Drop Shadow by having the text selected and going into Effects > Stylize > Drop Shadow.
6. Duplicate the text and drag it elsewhere on the canvas. To flip the text to rotate on the outside, go into Type > Type on Path > Type on Path Options and click on the Flip box and and select Ascender in Line to Path. Select the duplicated Type with the Selection Tool and rotate the text around so it’s on the bottom.
7. Write in the wording you want.
8. Place in some more wording using a darker color.
9. Using the Line Tool, draw a line above the horizontal text. Go into Effect > Stylize > Drop Shadow and put in the options below to make a dented look. Duplicate the link and place below the text.
10. Repeat step 9 using the Star Shape Tool and place beside the text.
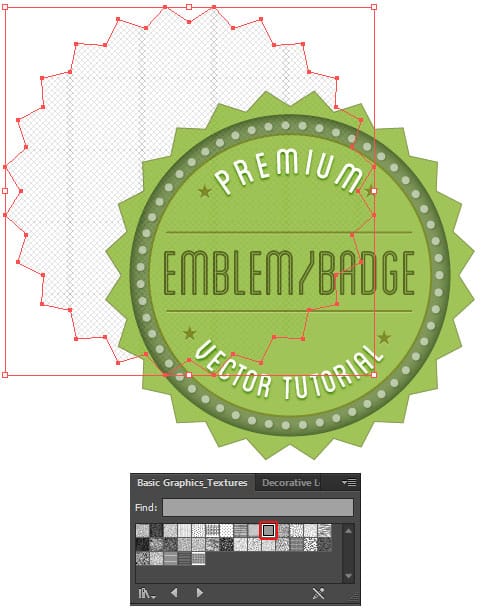
11. Lastly we want to add some subtle texture to the logo. Duplicate the star shape and drag elsewhere. Remove the Fill and Stroke color and go into Swatch Libraries > Patterns > Basic Graphics > Basic Graphics Texture and select the Diamond Pattern. To move the pattern shape above the logo, select the shape and click on CTRL+] to move the layer up. Align the layer in the center. In the Transparency Palette, make the Blending Mode Overlay and the Transparency 50%.
