Create a Speedometer Icon in Illustrator
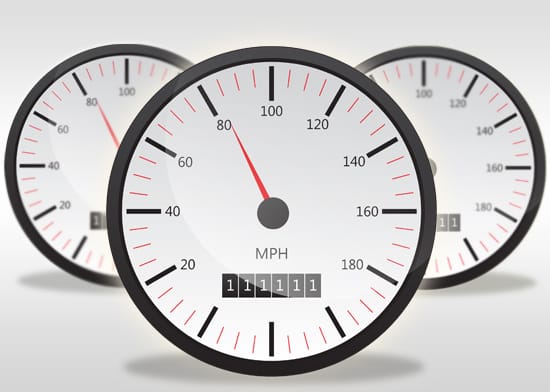
Learn how to create a Speedometer icon in Illustrator, and present it nice in Photoshop for your portfolio.
Final Result
![]()
1. Create a new document that’s 500×500. Using the Ellipse tool draw a circle while holding down the shift key (to keep the shape perfect). Make the circle the gradient colours below.
![]()
2. Draw another smaller circle, select the 2 circles and click on the 2 icons I’ve circled in the Align window to center them both. Put the following gradient colours on the inner circle and a stroke.
![]()
3. Using the rectangle tool draw a shape like below. Select all the shapes and press on the circled icon on the Align box to center the new shape.
![]()
4. While holding down the shift key select the inner circle and rectangle shape, select the rotate tool. While holding down the Alt key left click on the center of the circle.
![]()
5. The Rotate window should appear. To make it simple I’ve written 360 (for the whole circle) and then written the amount of lines that can be duplicated in the circle (360/12). After you have done that press copy.
![]()
6. Because the inner circle was also selected it will have duplicated the circle as well as the line, click on the duplicated circle and press delete. Now select the line and press CTRL+D to duplicate it 12 times around the circle.
![]()
7. If you want to remove any lines do this now. To make it easier press the shift key and select all of the lines, right click and group.
![]()
8. Next draw another small line using the rectangle tool center the new red line the same way as we centered the previous line.
![]()
9. Again while holding down the shift key select the inner circle and rectangle shape, select the rotate tool. While holding down the Alt key left click on the center of the circle to bring up the Rotate window. This time we’ll put in 48 red lines & press copy.
Again remove the duplicated circle, select one of the red lines and press CTRL+D to duplicate around the canvas.
![]()
10. Select all of the red lines that are on the black lines and press delete.
![]()
11. Using the Ellipse tool draw a circle while holding down the shift key, select all of the circles and align using the method on step 2.
![]()
12. Press ctrl+’ to bring up the grid, elsewhere on the canvas zoom up using the Zoom Tool (or press ctrl +). With the pen tool draw a shape like below using the grid as a guide. To remove the grid press ctrl+’ again.
![]()
13. Place the shape on the speedometer, go to the smaller circle, right click and press Arrange > Bring to Front so it’s over the needle. Using the font below write out the numbers separately, to align the numbers right press ctrl+r to bring up the rulers around the canvas and drag 3 lines down. To remove the rulers select them with the Selection Tool and delete.
![]()
14. Using the rectangle tool draw a shape like below with a dark gradient and white stroke.
![]()
15. Duplicate the shape by selecting it, holding down the ALT key and dragging out, place them like below and write out some numbers using the previous font. Next write out MPH.
![]()
16. Select the main black circle and duplicate using the previous method, drag it elsewhere on the canvas, using the ellipse tool draw another while circle and place it over the top. With the two shapes selected press the Intersect Icon on the Pathfinder box to create a new shape.
![]()
17. Place the shape over the Speedometer, make the gradient a white to none and the transparency to 50%.
![]()
18. Lastly using the ellipse tool draw a thin black oval shape on the bottom of the speedometer, with the shape selected go to Effect > Blur > Gaussian Blur and put in 20.
![]()
Photoshop
If you would like showcase this icon nicely in your portfolio, please follow these steps:
1. Create a new document of your choice, double click on the background layer to unlock it. Open up the Illustrator file & copy/paste it onto the canvas. Press ctrl+t and drag down a corner while holding down the shift key (to keep the image perfect) and place it in the center. Duplicate the speedometer by dragging it to the new layer icon 2 times. Make the duplicated layers smaller and place them on the sides.
Double click on the background layer again to go into Blending Options > Gradient Overlay and put in the following gradient.
![]()
2. Next double click on the speedometers to go into Blending Options > Outer Glow and put in the following using the colour #fff8e5.
![]()
3. Lastly using the Blur tool go to the behind speedometer layers and put in a slight blur.
![]()
Final Result
![]()


