Create a Vector Combination Lock in Illustrator
Learn how to create a Vector Combination Lock icon in Illustrator from scratch!
Final Result

1. Create a new document that’s 500×500. Get the Ellipse tool and draw a black circle while holding down the shift key to maintain a perfect circle. Next using the rectangle tool draw a square shape on the bottom of the circle (like below). Next select the two shape, go into Pathfinder (shift+ctrl+f9) and press the Unite icon. This will turn the two shapes into one.
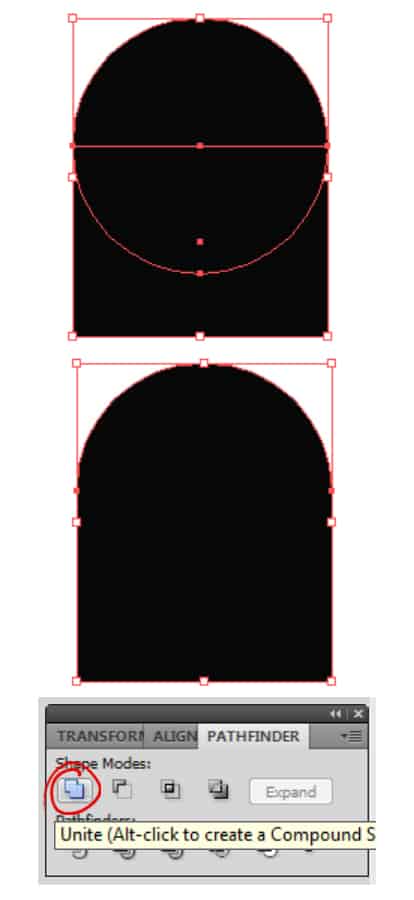
2. With the shape selected hold down the alt key and drag the shape away to duplicate it, press the duplicated shape with the Selection Tool and drag it to the centre of the shape & make it smaller, change the colour to something light. Select the 2 shapes, go into the Pathfinder again and click Minus Front to remove the front shape, you now have the top part of the lock.
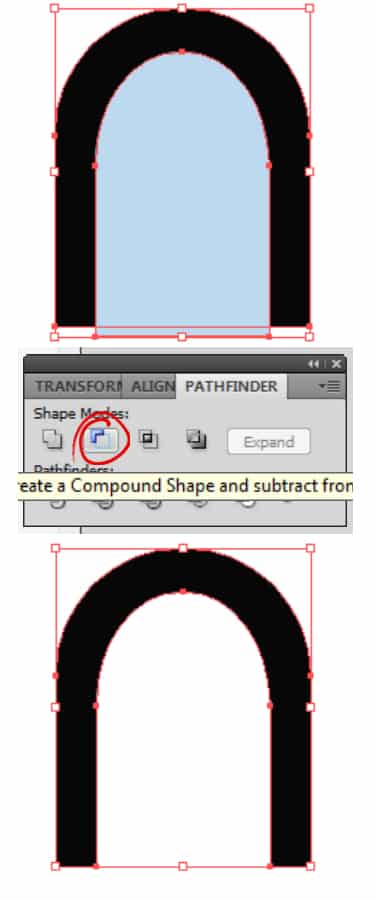
3. Click on the shape and make it a gradient with a 2pt dark grey stroke.
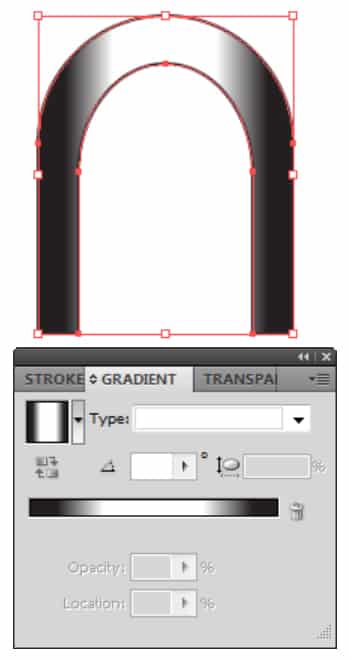
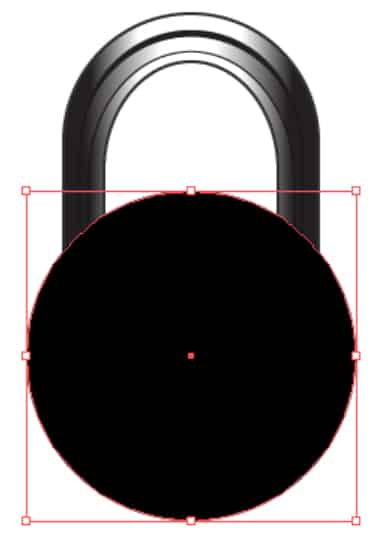
4. Select the shape and go into Object > Path > Offset Path, this will create another shape inside. Change the gradient to a light grey. Duplicate the shape using the same method previously and move it down. Click on the back shape and make the colour black.

5. Using the Ellipse tool draw a black circle while holding down the shift key.
6. Duplicate the circle, make the fill colour none & the stroke colour white. To make the circle smaller select it with the Selection Tool and drag a edge down while holding down the shift key.
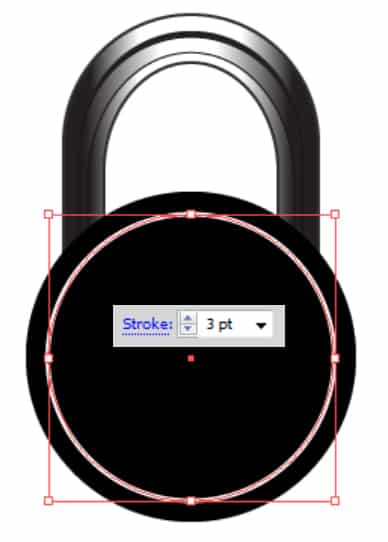
7. Create another smaller circle inside the white stroke circle. Make the fill colour a gradient radial, with a stroke of none.
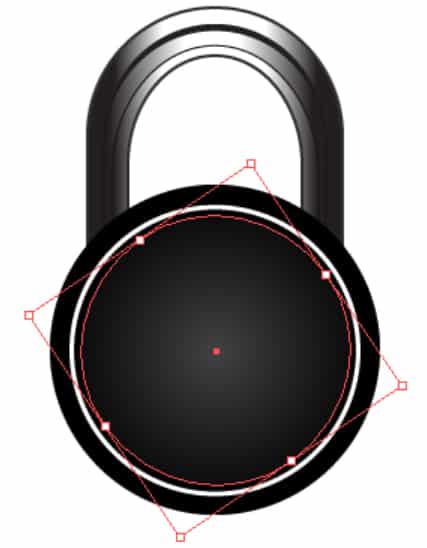
8. Again create a smaller circle, make the fill colour none, and the stroke colour white. Put in these stroke settings to the circle below, depending on how big the lock is the stroke settings may vary.
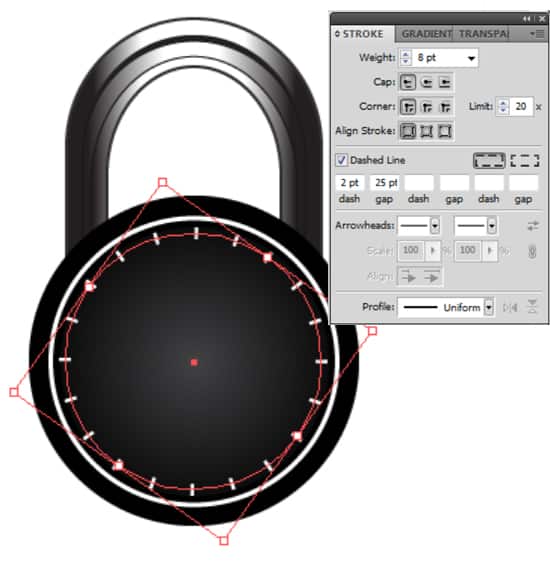
9. Create 2 smaller circles, the larger one with a darker radial gradient, and the smaller one with a white stroke. Put in the settings below on the stroke.
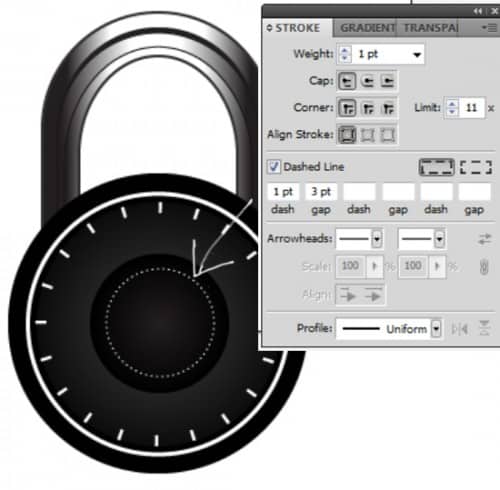
10. Next write out each number separately, placing them around the lock.

11. Next duplicate the main black circle and drag it away from the lock. Draw a white circle (the shape doesn’t have to be perfect) across the circle (look below). Select the 2 shapes and press the Intersect icon in Pathfinder.
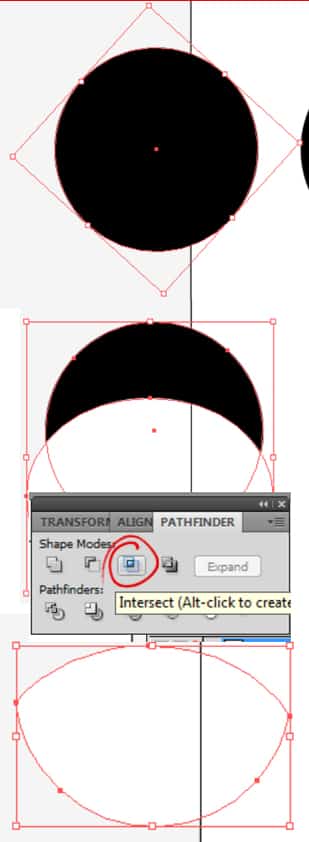
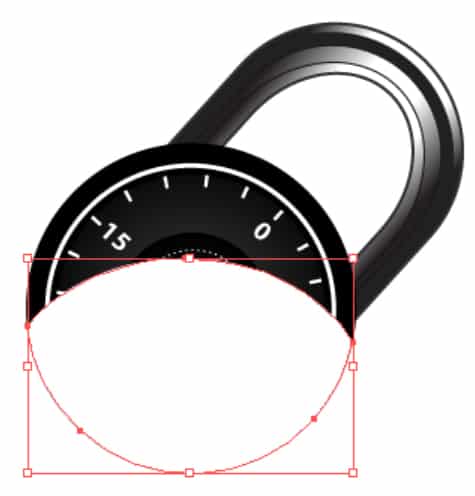
12. Place the white shape over the lock. I’ve decided to tilt the lock by selecting all the shape with the selection tool and rotating a corner.
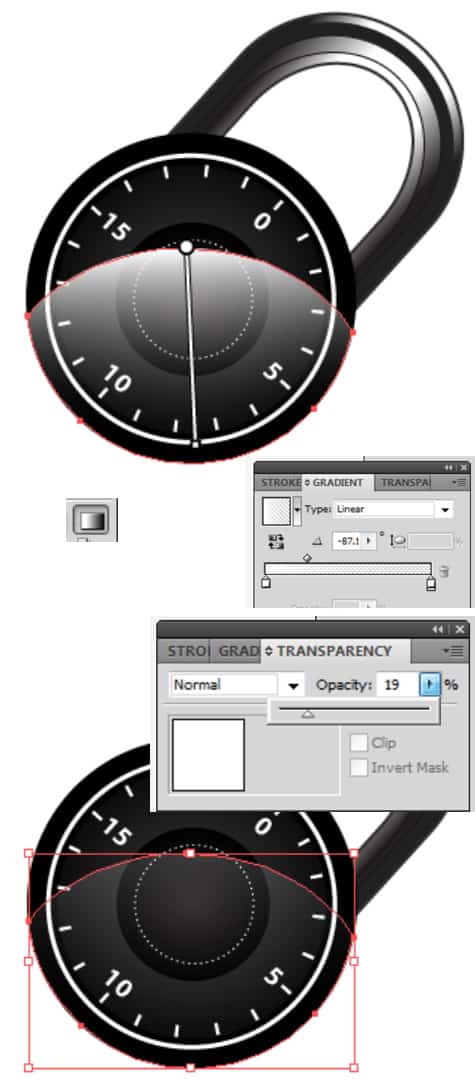
13. Make it a gradient going from white to none, you can change the direction of the gradient by selecting the gradient icon while the shape is selected and clicking on the shape moving in the direction of your choice. Set the Transparency of the white gradient to 19%.
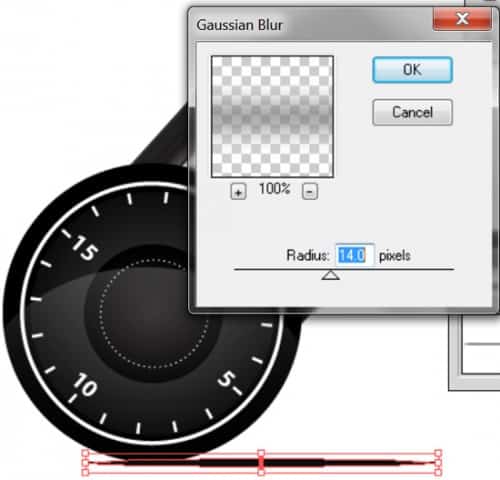
14. Using the Ellipse tool draw a thin oval shape for the shadow, with the shape selected go into Effect > Blur > Gaussian Blur.

Final Result


