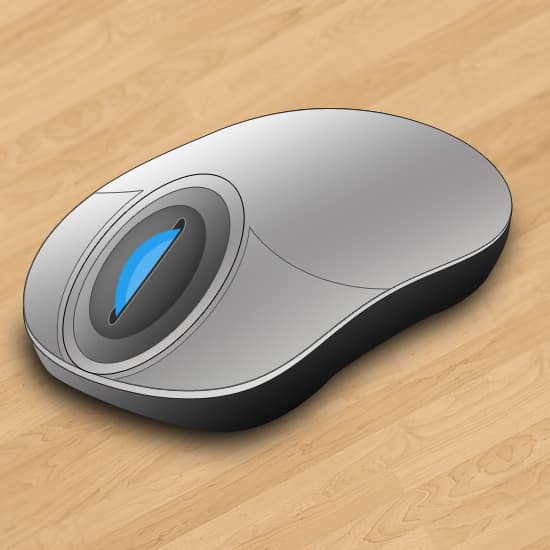
Create a Wireless Computer Mouse in Photoshop
Learn how to create a Wireless Computer Mouse in Adobe Photoshop!
Final Result

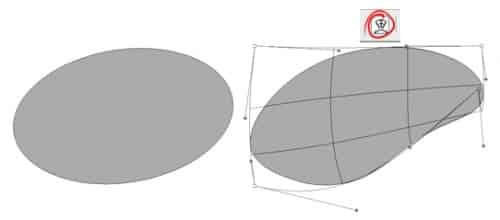
1. Create a new document with any size you want. I’ve got 550×550 pixels. Using the Ellipse tool draw a shape like below, press ctrl+t to rotate, while the shape is still transformable click on the icon I’ve circled below on the tool bar to bring up more options. Using the further options morph the oval shape into a shape you would like the mouse to be.
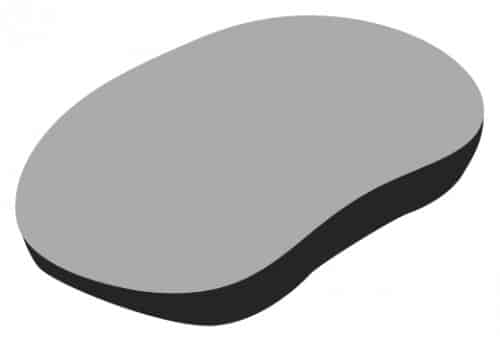
2. Now using the pen tool draw the bottom of the mouse.
3. Double click on the bottom section layer to go into Blending Options > Gradient Overlay and put in the following options:
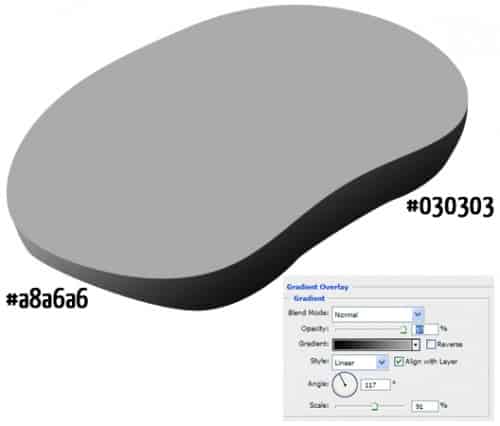
4. Next on the top section double click and go into Blending Options, put in the following:
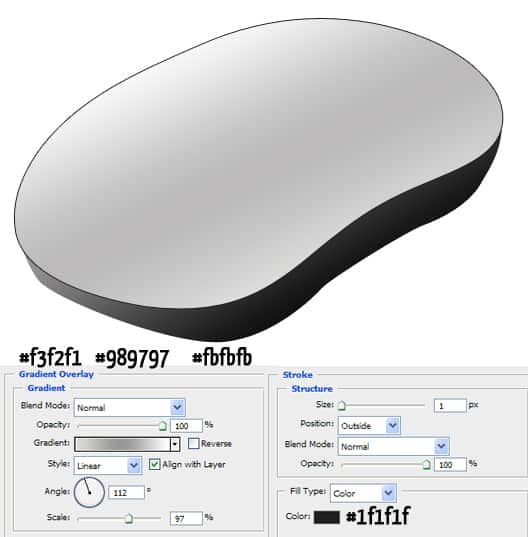
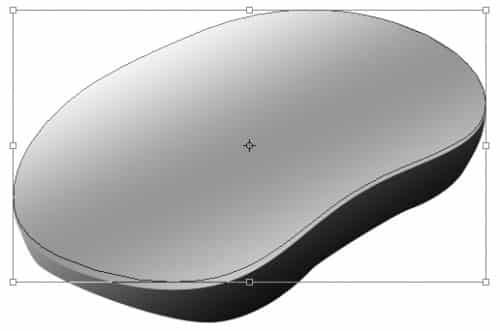
5. Duplicate the top section by dragging the layer to the new layer icon. Make the top layer slightly smaller my clicking ctrl+t and dragging a corner down while holding down the shift key.
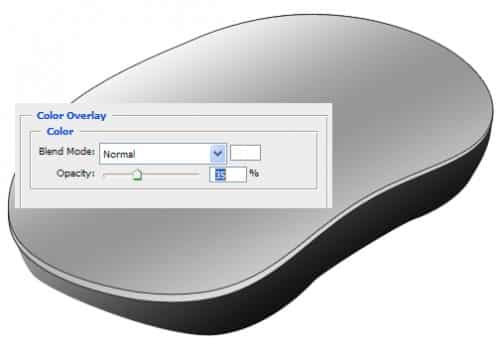
6. On the bottom section double click into Blending Options > Color Overlay and put in the following:
7. Next using the Ellipse tool draw a oval shape and rotate by press ctrl+t and rotating. Double click into Blending Options and put in a dark 1px stroke & a Gradient Overlay.
Draw another oval shape and rotating using the colour #ababab and go into Blending Options and put in the following colours below.
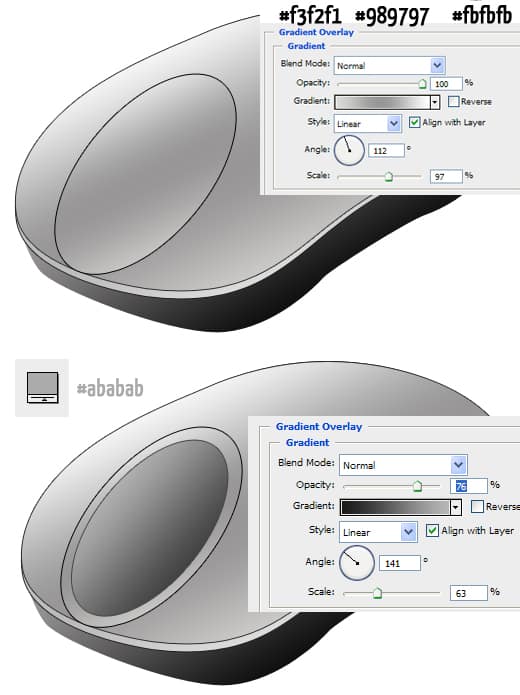
8. Draw a final oval shape like below and double click into Blending options, put in the following:
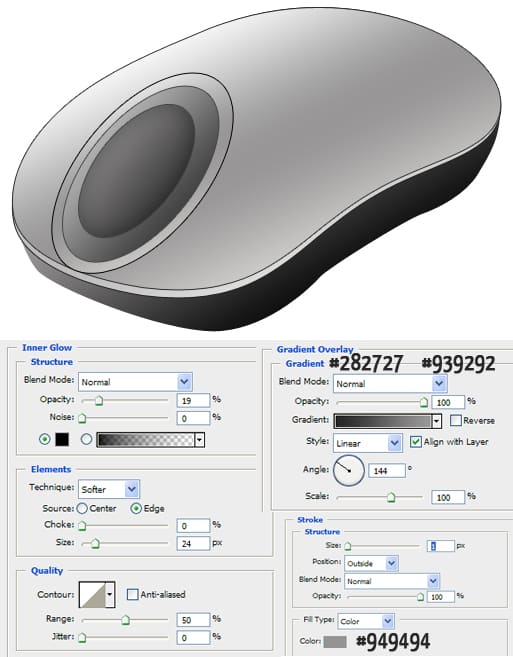
9. Using the rounded rectangle tool draw a shape like below, double click into Blending Options and put in a stroke.
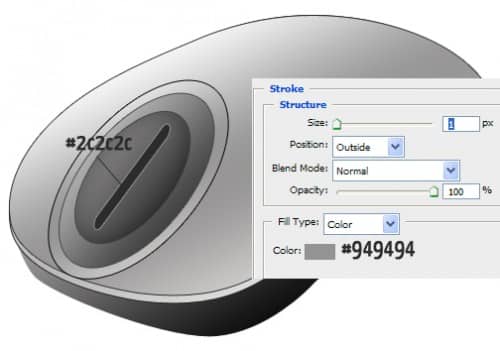
10. Using the Ellipse tool holding down the shift key (to keep the shape perfect) and draw a circle. Right click on the circle layer and Rasterize. Using the rectangle tool draw a shape like below, press ctrl+t and rotate it so it covers half of the circle.
While holding down the ctrl key click on the rectangle layer thumbnail to highlight the shape. go to the circle layer and press delete. Remove the rectangle shape.
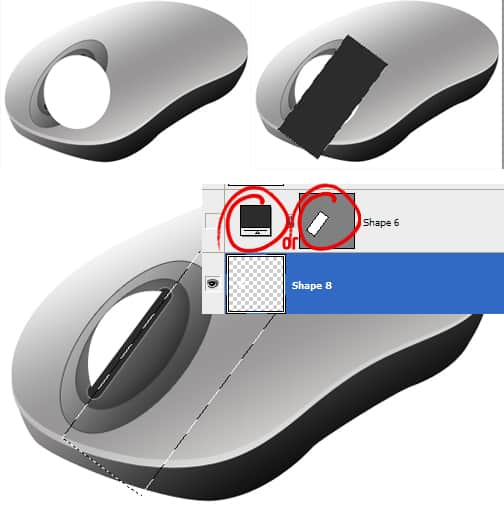
11. Move the half circle into place using the arrows. While holding down the ctrl key click on the circle thumbnail layer to highlight the shape, go into Select > Modify > Contract and contract by 5px.
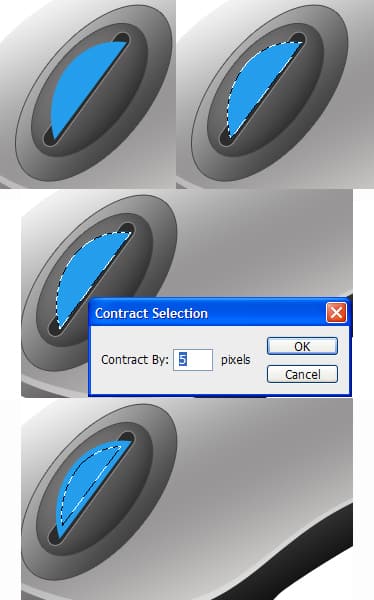
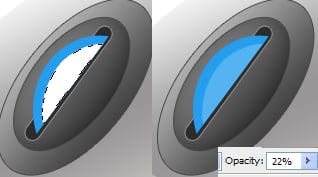
12. While the shape is still selected create a new layer and fill the shape white, set the layer opacity to 22%.
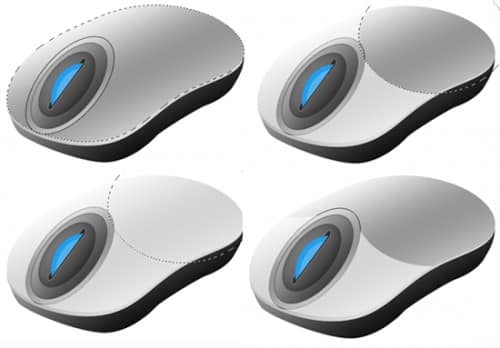
13. Now for the 2 buttons, highlight the top shape of the mouse using the previous method, create a new layer and fill it white, make the opacity low so you can see the mouse. Using the Ellipse Marquee Tool remove parts on the white shape until you have 2 shapes for the buttons.
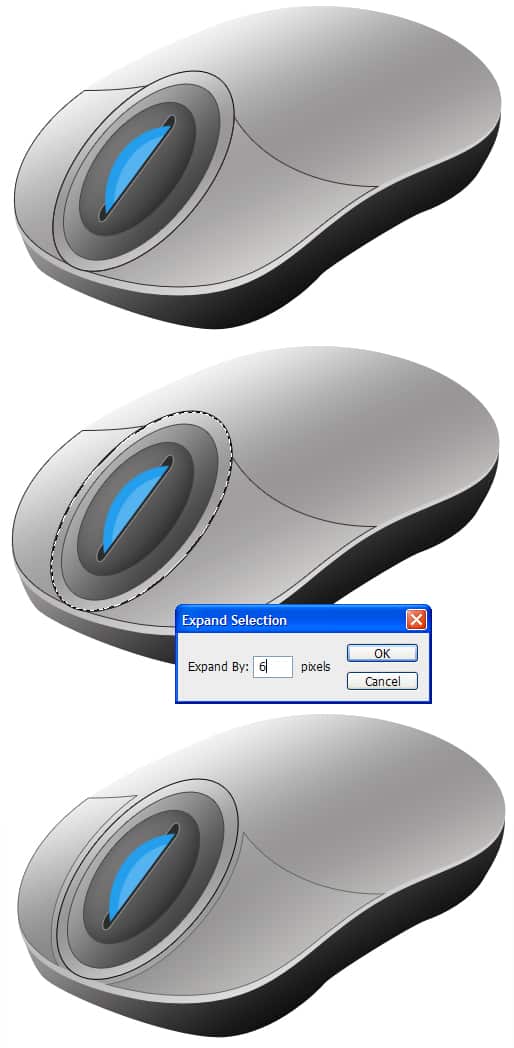
14. I will show you the blending options for the buttons soon! Highlight the shape of the large oval, go into Select > Modify > Expand and Expand by 6px, go to the buttons and press delete for a nice space.
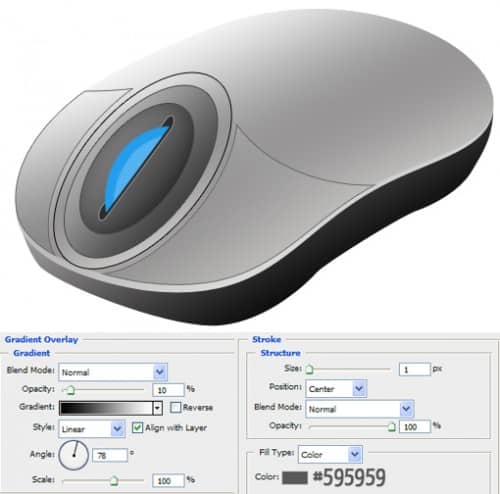
15. On the buttons layer double click into Blending Options and put in the following:
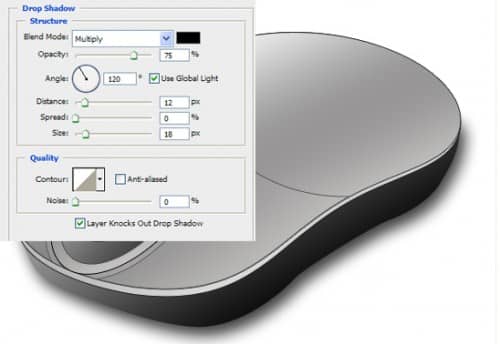
16. Go to the bottom layer of the mouse and double click into Blending Options > Drop Shadow and put in the following:
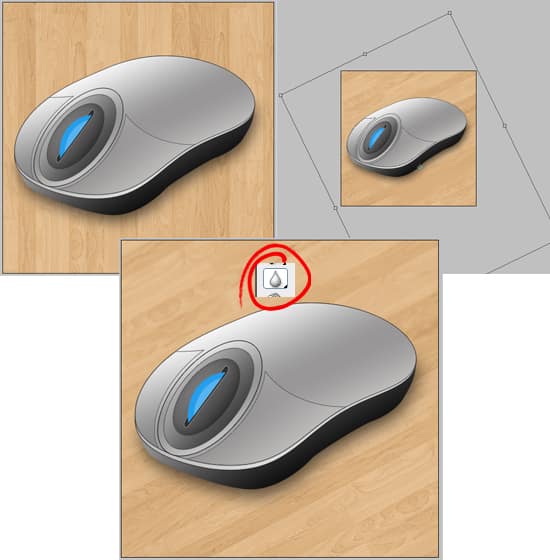
17. For a final effect, I’ve gotten this wooden background and copy/paste it onto the canvas. Rotate the image using the method we used earlier so the planks are going in the same direction as the mouse. Finally use the Blur Tool to blur around the top part of the wooden background.
Final Result
