Design a Professional Resume/CV Template in Photoshop
Learn how to design a clean & professional Resume/CV Template in Photoshop!
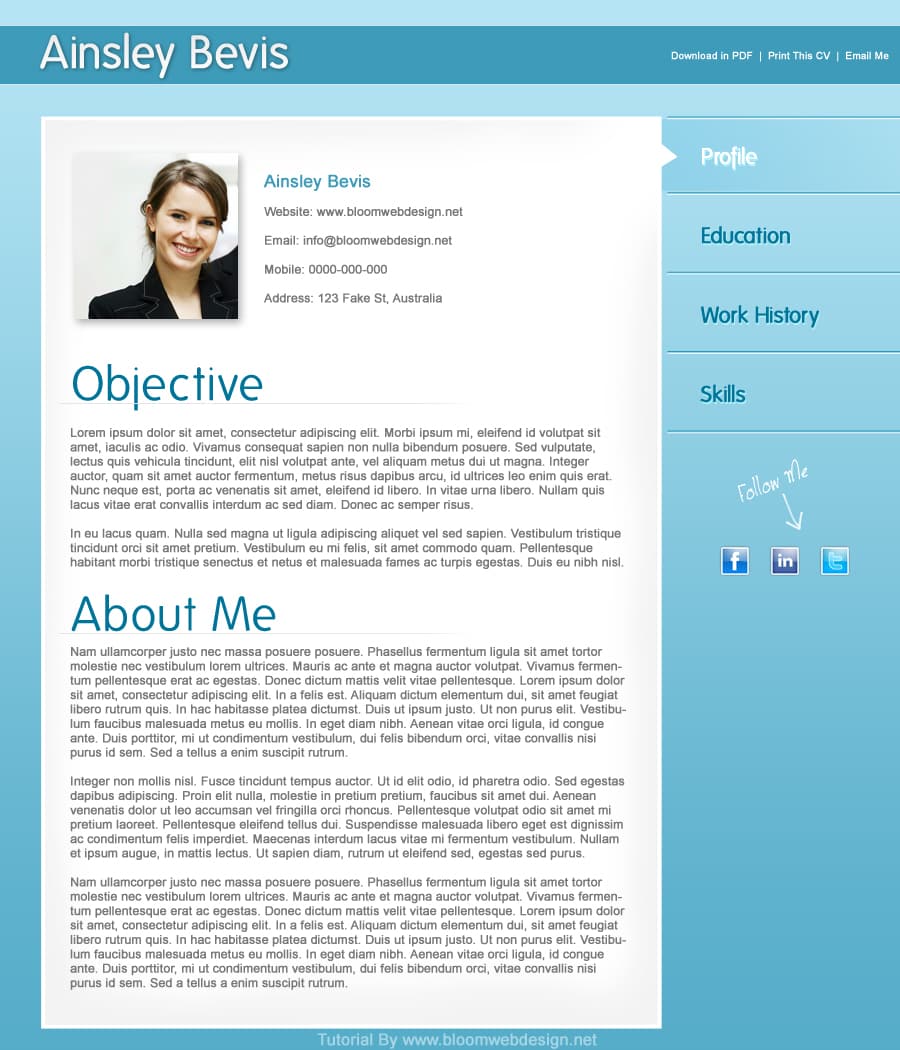
Final Result
1. Create a new document that’s 900×1050 pixels. Double click the background layer to unlock it, then again to go into Blending Options > Gradient Overlay. Put in the settings below:

2. Get the Rectangle Tool and draw a shape like below for the content area in the colour white. Go into the Custom Shape Tool and select the black triangle shape. Draw a white triangle, while holding down the shift key ( to keep the shape perfect). On the triangle layer press ctrl+t and rotate it so the top is pointing to the right.

3. Hold down the CTRL key and click on the layer thumbnail (circled below) on the content area. This will activate the shape.

4. Next go to Select > Modify & Contract the activated shape by 4 pixels. Create a new layer, get a soft edged brush and brush around the edges. Set the opacity to 5%, this will make a nice shadow effect around the content area.

5. Using the font Folks (or what font you want!), write out the menu. Double click into Blending Options and put in a Drop Shadow effect. Because the first menu name will be a hover example, I’ve made it white.

6. Using the Line Tool (1 px), draw a line across like below while holding down the shift key. Duplicate the layer by dragging it to the new layer icon, and place it just below the first line (make the colours below). Holding down the ctrl key select the 2 line layers and duplicate them. Place them in between each menu name as a divider.

7. Using the rectangle tool, draw a shape around the first menu name in the colour white (make sure it’s under the menu names layer). Set the Blending Mode to Multiply so it’s invisible, then double click into Blending Options and put in the setting below.
You’ll need to place the white triangle layer over the hover shape so it stays white!

8. Using the rectangle tool, draw a shape across the top of the resume like below using the colour #3e9bb9. Double click into Blending Options and put in the setting.

9. On the right side write out your name in the font Folks, double click into Blending Options and put in the following settings:

10. On the left side write out some resume options.

11. Now on the content  area draw a white square using the rectangle tool, double click into Blending Options and put in a Drop Shadow.

12. Next copy and paste your image for the resume onto the canvas. Place the image over the white square layer, right click and Create Clipping Mask. This will crop the image down to the size of the white square.

13. Next write out some personal details on the resume.

14. Write out a couple of headings using the font Folks, then some content using the font below.

15. Using the line tool (1px) draw a line underneath a heading, while holding down the shift key using the colour below. On the line layer click on the Add Layer Mask to add a mask over the layer. Grab a soft edged eraser tool and on the make layer erase part of the line so it fades out.

16. Next Download & select the social icons you want from this icon set and place them on the sidebar. Using the font Jellyka CuttyCupcakes write out Follow Me on the sidebar. Rotate the text by pressing ctrl+t and rotating.
For the arrow, download and install these Hand Drawn Arrow Brushes. To rotate an arrow the way you want, select the brush type, go to Window > Brush and rotate the arrow using the Angle Option.

Final Result


