How to Build a Simple Portfolio Template [Tutorial]
Follow this step by step tutorial to create a simple Portfolio Template, we’ll be coding this template using HTML and CSS. If you’re a beginner, learning html/css can be tricky, this tutorial will break down a simple portfolio template, helping you learn how to build each section starting from the menu, logo area, banner, gallery and footer.
Resources
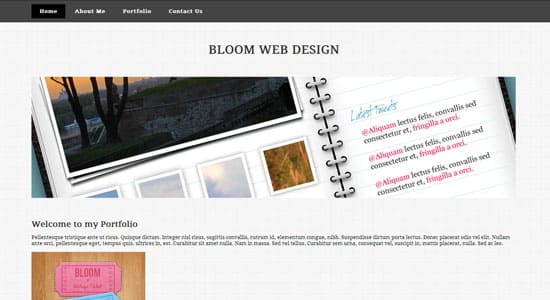
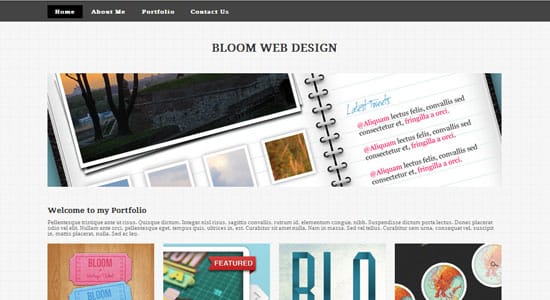
Final Result
The HTML Structure
<!DOCTYPE html>

<html>

  <head>

    <title>Clean Portfolio Template</title>


<link href='http://fonts.googleapis.com/css?family=Droid+Serif' rel='stylesheet' type='text/css'>
<link href='style.css' rel='stylesheet' type='text/css'>

  </head>

  <body>


  </body>

</html>
The HTML page begins with a document structure comprising on Doctype including  head, body tags and a link to a Style Sheet is added. We’ve also added in a Google Font – Droid Serif to make the font more interesting.
 <div id="header">

  <div id="menu" class="container">

   <ul>

 <li><a href="#">Home</a></li>

 <li><a href="#">About Me</a></li>

 <li><a href="#">Portfolio</a></li>

 <li><a href="#">Contact Us</a></li>

 </ul>

 </div>

</div>
The first component we’ll add between the body tags is our Navigation, we’ll be adding in a header which will be the dark menu background. Next is the Menu div id followed by a class named container. The Menu Navigation is constructed by an unordered list element while the container class will center the menu on the page.
<div id="logo" class="container">

<a href="#">

  <h1>Bloom Web Design</h1>

</a>

</div>
Next we’ll be adding in the logo, we’ve just added in a heading for the name of the template, but at this stage you can add in your Logo image instead.
<div id="banner" class="container"><a href="#"><img src="images/pic06.jpg" width="1200" height="300" alt="" /></a></div>
The banner comes next, with the container centering the image and a link placed around the banner. We’ve also added in the width and height of the banner size.
<div id="gallery" class="container">

 <div class="box">

 <div class="title"><h2>Welcome to my Portfolio</h2>

 </div>

 <p>Pellentesque tristique ante ut risus. Quisque dictum. Integer nisl risus, sagittis convallis, rutrum id,
elementum congue, nibh. Suspendisse dictum porta lectus. Donec placerat odio vel elit. Nullam ante orci, pellentesque eget,
tempus quis, ultrices in, est. Curabitur sit amet nulla. Nam in massa. Sed vel tellus. Curabitur sem urna, consequat vel,
suscipit in, mattis placerat, nulla. Sed ac leo.</p>

 </div>

 <div id="box1"> <a href="#"><img src="images/pic01.jpg" alt="" /></a>

 <h2 class="subtitle">Project Heading</h2>

 <p>Lorem ipsum dolor sit amet, consectetur adipiscing elit. Curabitur eu metus id sem laoreet vehicula vel ut felis.</p>


 </div>

 <div id="box2"> <a href="#"><img src="images/pic02.jpg" alt="" /></a>

 <h2 class="subtitle">Project Heading</h2>

 <p>Lorem ipsum dolor sit amet, consectetur adipiscing elit. Curabitur eu metus id sem laoreet vehicula vel ut felis.</p>


 </div>

 <div id="box3"> <a href="#"><img src="images/pic03.jpg" alt="" /></a>

 <h2 class="subtitle">Project Heading</h2>

 <p>Lorem ipsum dolor sit amet, consectetur adipiscing elit. Curabitur eu metus id sem laoreet vehicula vel ut felis.</p>


 </div>

 <div id="box4"> <a href="#"><img src="images/pic04.jpg" alt="" /></a>

 <h2 class="subtitle">Project Heading</h2>

 <p>Lorem ipsum dolor sit amet, consectetur adipiscing elit. Curabitur eu metus id sem laoreet vehicula vel ut felis.</p>


 </div>


 <div id="box1"> <a href="#"><img src="images/pic01.jpg" alt="" /></a>

 <h2 class="subtitle">Project Heading</h2>

 <p>Lorem ipsum dolor sit amet, consectetur adipiscing elit. Curabitur eu metus id sem laoreet vehicula vel ut felis.</p>


 </div>

 <div id="box2"> <a href="#"><img src="images/pic02.jpg" alt="" /></a>

 <h2 class="subtitle">Project Heading</h2>

 <p>Lorem ipsum dolor sit amet, consectetur adipiscing elit. Curabitur eu metus id sem laoreet vehicula vel ut felis.</p>


 </div>

 <div id="box3"> <a href="#"><img src="images/pic03.jpg" alt="" /></a>

 <h2 class="subtitle">Project Heading</h2>

 <p>Lorem ipsum dolor sit amet, consectetur adipiscing elit. Curabitur eu metus id sem laoreet vehicula vel ut felis.</p>


 </div>

 <div id="box4"> <a href="#"><img src="images/pic04.jpg" alt="" /></a>

 <h2 class="subtitle">Project Heading</h2>

 <p>Lorem ipsum dolor sit amet, consectetur adipiscing elit. Curabitur eu metus id sem laoreet vehicula vel ut felis.</p>


 </div>

   </div>
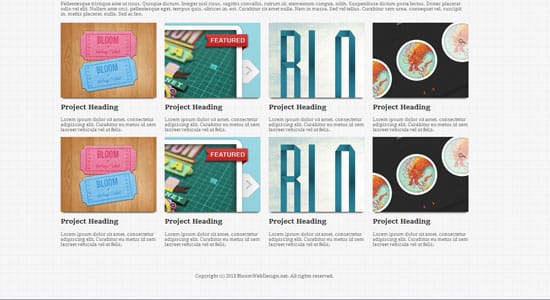
Now for the gallery, we’ve got some heading and paragraph text, followed by linked Portfolio thumbnails with their headings and descriptions. Each Portfolio item is wrapped in a special div id.
<div id="footer">

 <p>Copyright (c) 2013 BloomWebDesign.net. All rights reserved.</p>

</div>
Lastly we’ll be adding in the footer using a div id.
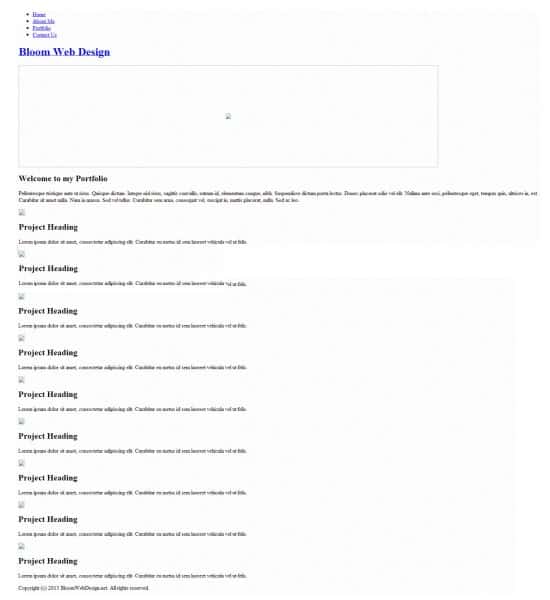
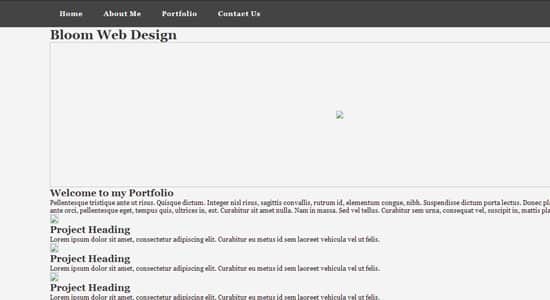
What we have so far
CSS Styling
<style type="text/css">


html {

height: 100%;

}


body {

 height: 100%;

 margin: 0px;

 padding: 0px;

 background: #f5f4f4 url(images/bg1.png) repeat;

 font-family: "Droid Serif", Georgia, Serif;

 font-size: 10pt;

 font-weight: 400;

 }


 h1, h2, h3 {

 margin: 0;

 padding: 0;

 color: #333;

 }


 a:link {

 text-decoration:none;

 }


a:hover {

 text-decoration:underline;

 }


.container
 {
 margin: 0px auto;
 width: 1200px;
	}
The file begins with a basic reset to remove the browser default. Next we’ll start adding in some global styling to the body. A Background texture is added and some general font styling. The container class is given a width of 1200px and centered using margin: 0px auto so everything is centered on the template.
  /* Header  */


  #header

  {

 background: #444444;

 border-top: 1px solid #232323;

 }

/* Menu  */


  #menu ul

  {

 margin: 0;

 padding: 10px 0px 10px 0px;

 list-style: none;

 line-height: normal;


 }


 #menu li

 {

 display: inline-block;

 }


 #menu a

 {

 display: block;

 padding: 10px 20px;

 letter-spacing: 1px;

 text-decoration: none;

 font-weight: 700;

 color: #FFF;


 }


 #menu a:hover

 {

 background: #000;

 text-decoration: none;

 color: #FFF;

 }
Now we’ll be styling the navigation menu. The header will be styling the menu background. The <ul> is adds padding to the links and sets the list styling with none to remove the list circles.The <li> is added in the place the text links inline so they’re not vertical. The styling is then added in with the <a> tag and a hover styling using <a:hover> tag.
/* Logo  */


  #logo

 {

 padding: 50px;

 text-transform: uppercase;


 }


 #logo h1

 {

 text-align: center;

 font-weight: 900;

 font-size: 30px;

text-decoration: none;

 }


 #logo a

 {

 color: #000;

 }
Next we’ll be adding in our logo with some font and link styling. If you plan to use an image, you can remove the logo h1 styling.
/* Banner  */

  #banner  {

margin-bottom: 50px;

}
We’ll be adding some styling to the banner next, with a margin-bottom of 50px to space out the banner from the content.
/* Gallery */


  #gallery

 {

 overflow: hidden;

 padding-bottom: 10px;

 color: #717171;

 }


 #gallery img

 {

 margin-bottom: 15px;

-webkit-box-shadow: 0 8px 6px -6px black;

    -moz-box-shadow: 0 8px 6px -6px black;

         box-shadow: 0 8px 6px -6px black;

 }


 #gallery .box

 {

 padding-bottom: 5px;

 }


 #gallery .title

 {

 margin-bottom: 5px;

 }


 #gallery .title h2

 {

 font-size: 20px;

 font-weight: 800;

 color: #333;

 }


 #gallery .subtitle

 {

 padding-bottom: 5px;

 font-size: 20px;

 font-weight: 700;

 color: #333;

 }


 #gallery #box1 {

 float: left;

 width: 282px;

 margin-right: 24px;

 }


 #gallery #box2 {

 float: left;

 width: 282px;

 margin-right: 24px;

 }


 #gallery #box3 {

 float: left;

 width: 282px;


 }


 #gallery #box4 {

 float: right;

 width: 282px;


 }
Next up is the main gallery area, overflow: hidden is added to the main #gallery div to make sure all floats contained within the div are cleared so they don’t break the layout. Basic styling is added to the gallery including font styling, gallery thumbnail styling (shadow) and separate box styling for each portfolio thumbnail.
/* Footer */

 #footer

 {
padding: 5px 0px 5px 0px;

 border-bottom: 1px solid #EDEDED;

 border-top: 1px solid #EDEDED;

 padding: 40px 0px;

 font-size: 12;

 text-align: center;

 color: #6A6A6A;

 }


 #footer a

 {

 color: #efefef;

 }
The bottom of the page is finished off with the footer div. Padding is used to push the footer content below the gallery, we’ve added a top and bottom border line and some font styling.
