How to Create, Install & Export your own Photoshop Action
In this tutorial we’ll learn how to Create, Use, Install & Export Adobe Photoshop Actions using this easy to learn step by step guide!
Creating an Action
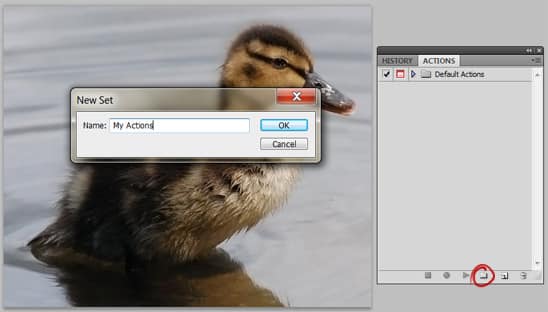
1. Open up the image you’re going to create the action on. Open up the Actions Palette (Window > Actions or ALT+F9).  If you want to create your own folder click on the Create New Set Icon in the Actions Window and create. Now to create a new Action click on the Create New Action Icon.

2. A new window will pop up giving you different options on how to set up your action. Name the action and place it in a Folder. For quick access you can create a Shortcut for the action using the Function Key settings.
After you’ve clicked on the Record Button the button will turn red & Photoshop will record your Actions.Try to keep your steps as generic as possible so it’s easy to use the action on other images.

3. For this example I’ve named a new action Black & White. I’ve then added a Black & White Effect and gone into Filter > Sharpen > Sharpen. After I’ve completed the effects I want to show in the Action click on the Stop button.


Using the Action
Method 1
With the image open, click the shortcut keys you chose when creating the New Action.
Method 2
With the image open, go into the Actions Palette > Click on the Action & hit the Play Button.

Installing an Action
Method 1
After downloading the Action place it in the Actions Folder enclosed in the Presets Folder in your Photoshop Application Folder. Your may need to restart Photoshop for the Action to appear.
Method 2
Go into Photoshop > Actions Palette. Click on the little arrow on the Right > Load Actions.

Exporting the Action
Click on the Actions Folder with the Action inside. Go into Photoshop > Actions Palette. Click on the little arrow on the Right > Save Actions. A window will open up, name the Action and choose where you want to save it. Because you can’t save individual Actions I’d place each action style you create in it’s own folder it make it easier.


