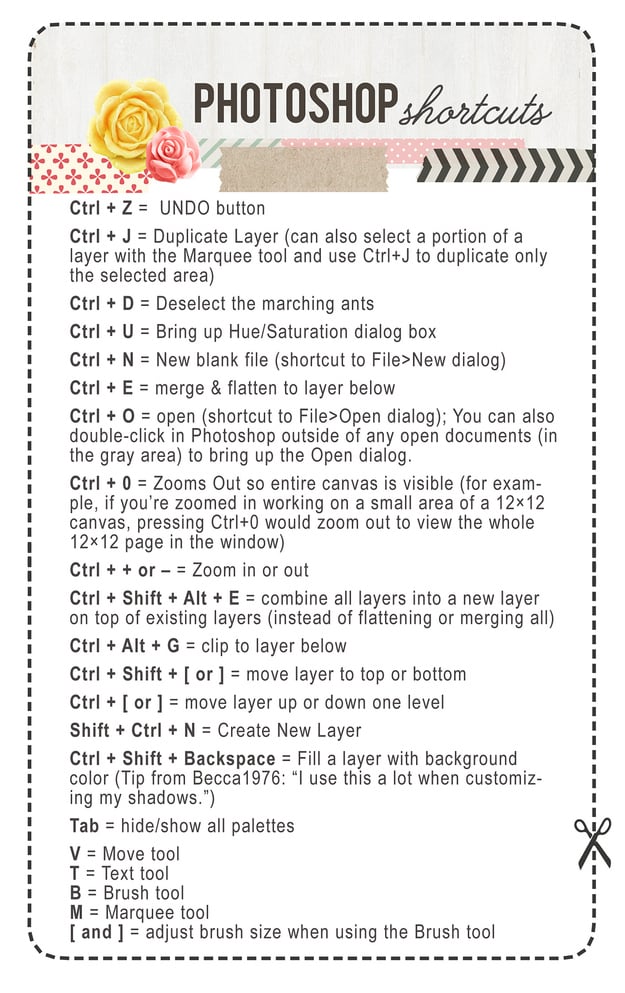
Photoshop is the go to application for graphic designers and web designers alike, sometimes we get into such a routine when using the software we forget about the basics and can get into some bad habits that waste time.
Whether you’re a newbie or advanced you might be interested in learning some of these time saving Photoshop tricks! With some great Photoshop hacks like installing Photoshop actions to create cool instagram-like filters, how to turn anything into a paint brush and some genius ways you can enhance your photos you not have known about!
Check out these 21 Time Saving Photoshop Tricks You Should Know!
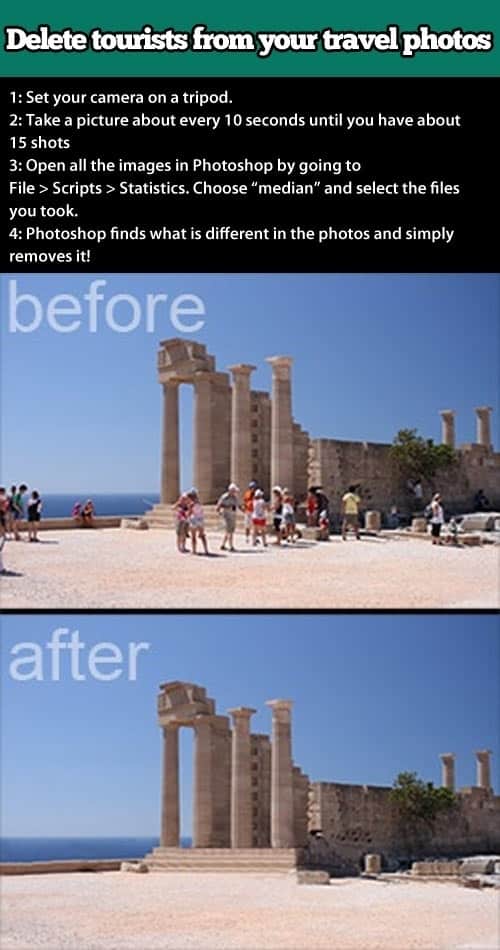
2. If you need to process a bunch of photos, use batch editing to resize and watermark all of them literally IN SECONDS.
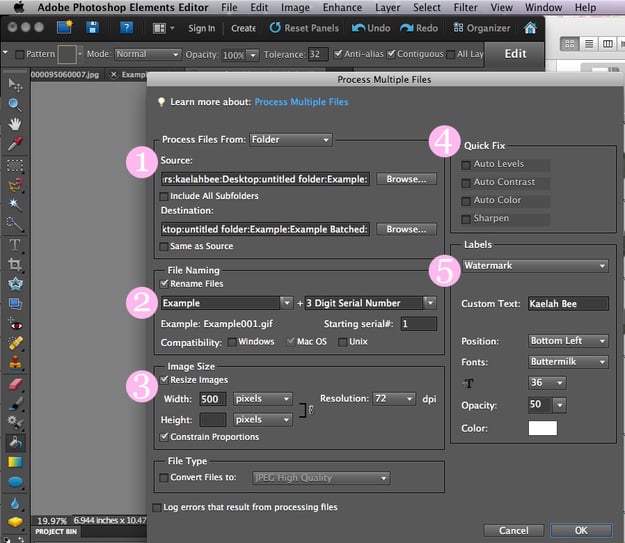
You don’t even need to open a single file in Photoshop. Just make sure all the photos are in the same folder on your computer, click File >> Process Multiple Files, and go to town.
More details here.
3. Use the Dodge and Burn tool to get sparkling eyes.
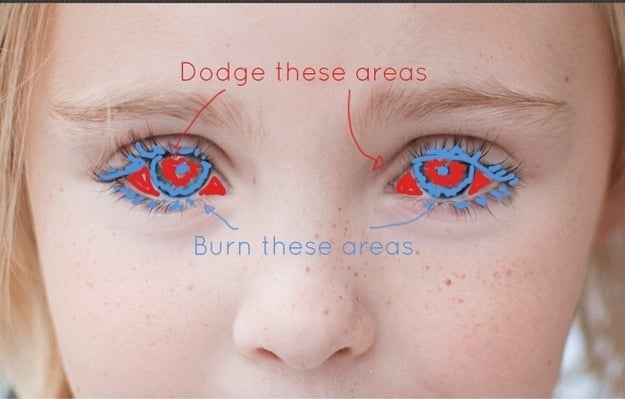
Dodge will lighten. Burn will darken. So zoom very close in there and follow this easy, three-step tutorial.
5. Enhance a photo by crossing it with another photo with a better color palette. You’ll get pleasantly interesting results.
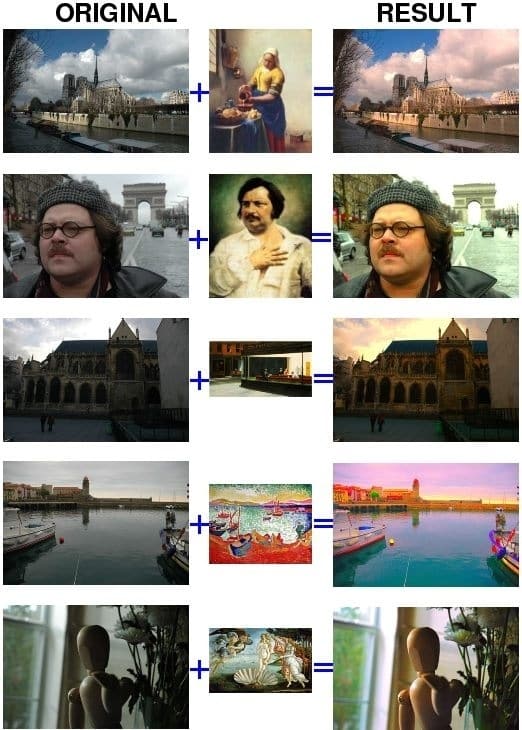
Open a photo with an interesting color palette, like a great work of art. Then open up your photo you wish to edit. Select Image >> Adjustments >> Match Color, and then select the photo of the famous art as the source. You can play with Luminance and Color Intensity if you want. Hit OK and there you go.
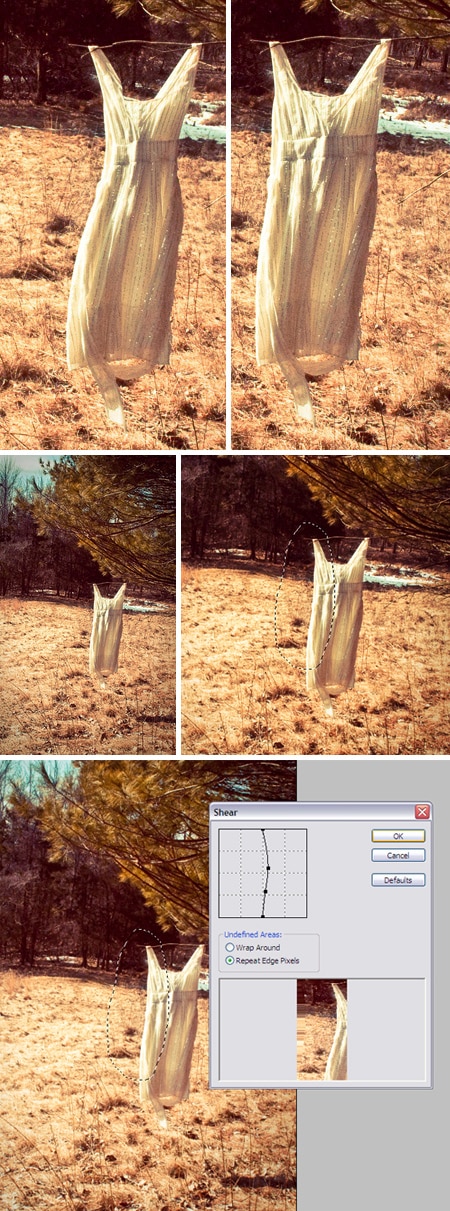
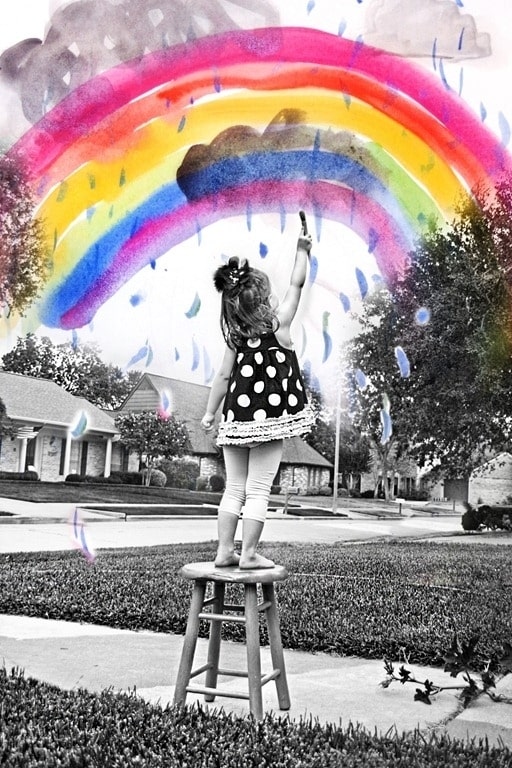
6. Get free frames for your photos and learn how to convert your images into shapes.

Believe me, this tutorial is super crazy easy, so you have to try it! And you’ll learn about the very useful Clipping Mask.
9. Hold down shift while using the paintbrush tool to draw straight lines.
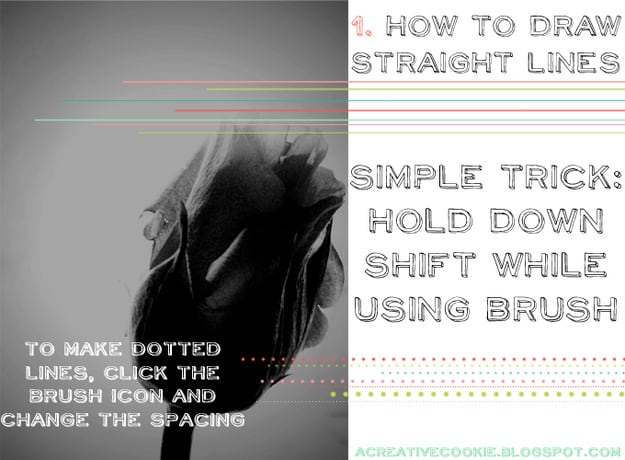
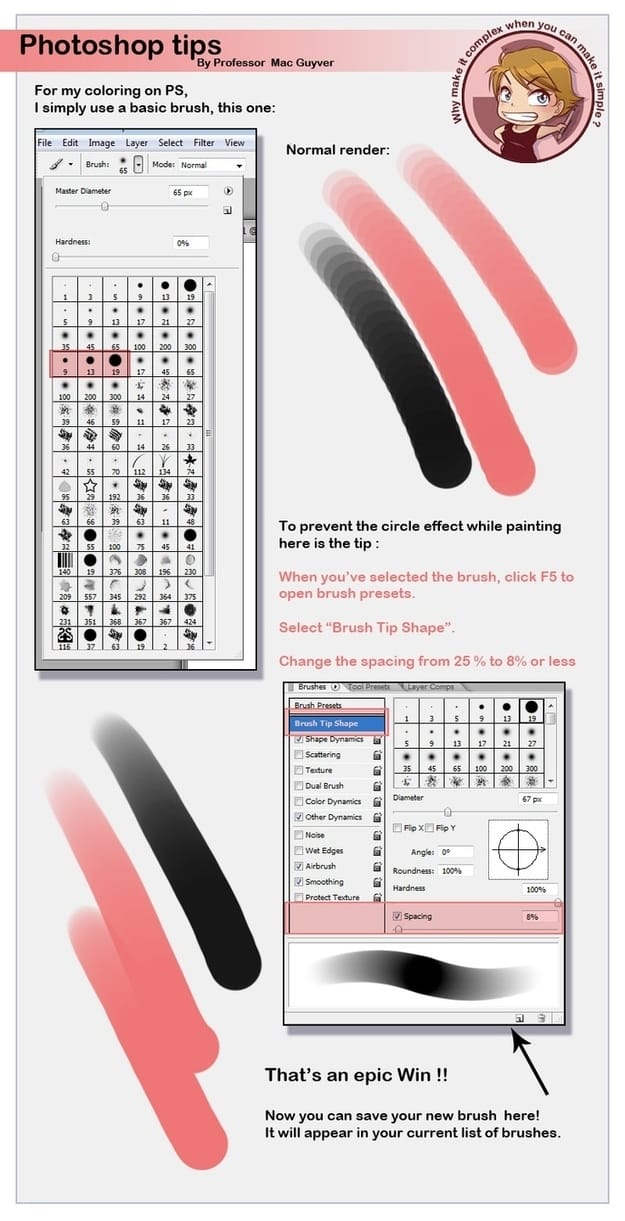
10. How to prevent that weird circle trail effect when using the paintbrush tool.
11. Have a logo or watermark that you use often? Turn it into a brush preset.
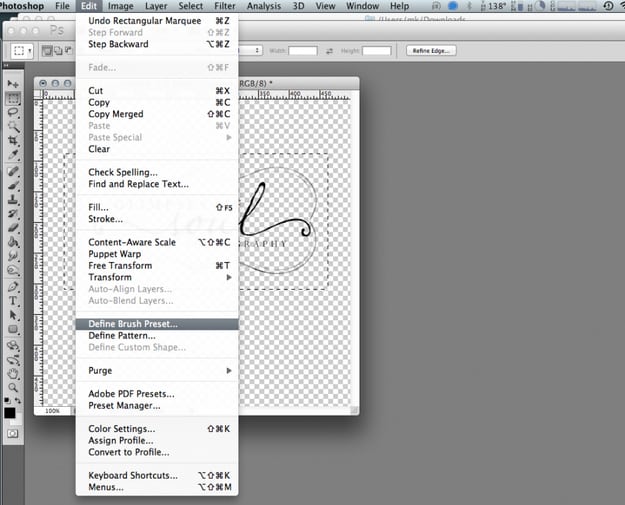
Just make sure your logo is on a transparent background. Go to Edit >> Define Brush Preset and voilà ! When you go to use your paintbrush tool, open up your brushes and you should see your logo, ready to stamp onto whatever your heart desires.
Still confused? Check out the tutorial here.
13. Activate a layer just by clicking on it with the Move Tool.
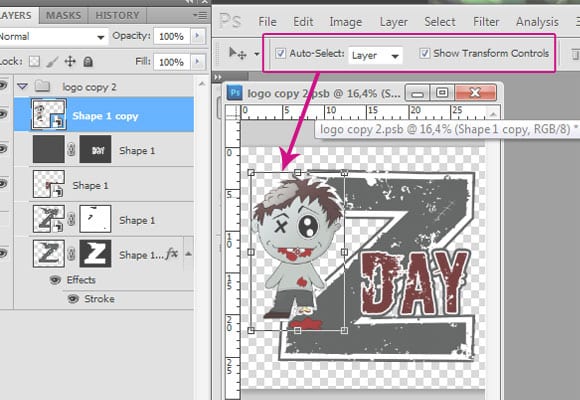
This is actually how the Move Tool works in Adobe Illustrator and Photoshop Elements, but in Photoshop, it can be a pain to select a layer if you a) have a bunch of them, and b) didn’t take the time to name all of them. By checking the Auto-Select box and selecting Layer, your move tool will activate any layer it clicks on.
Get a more full-fledged explanation here.
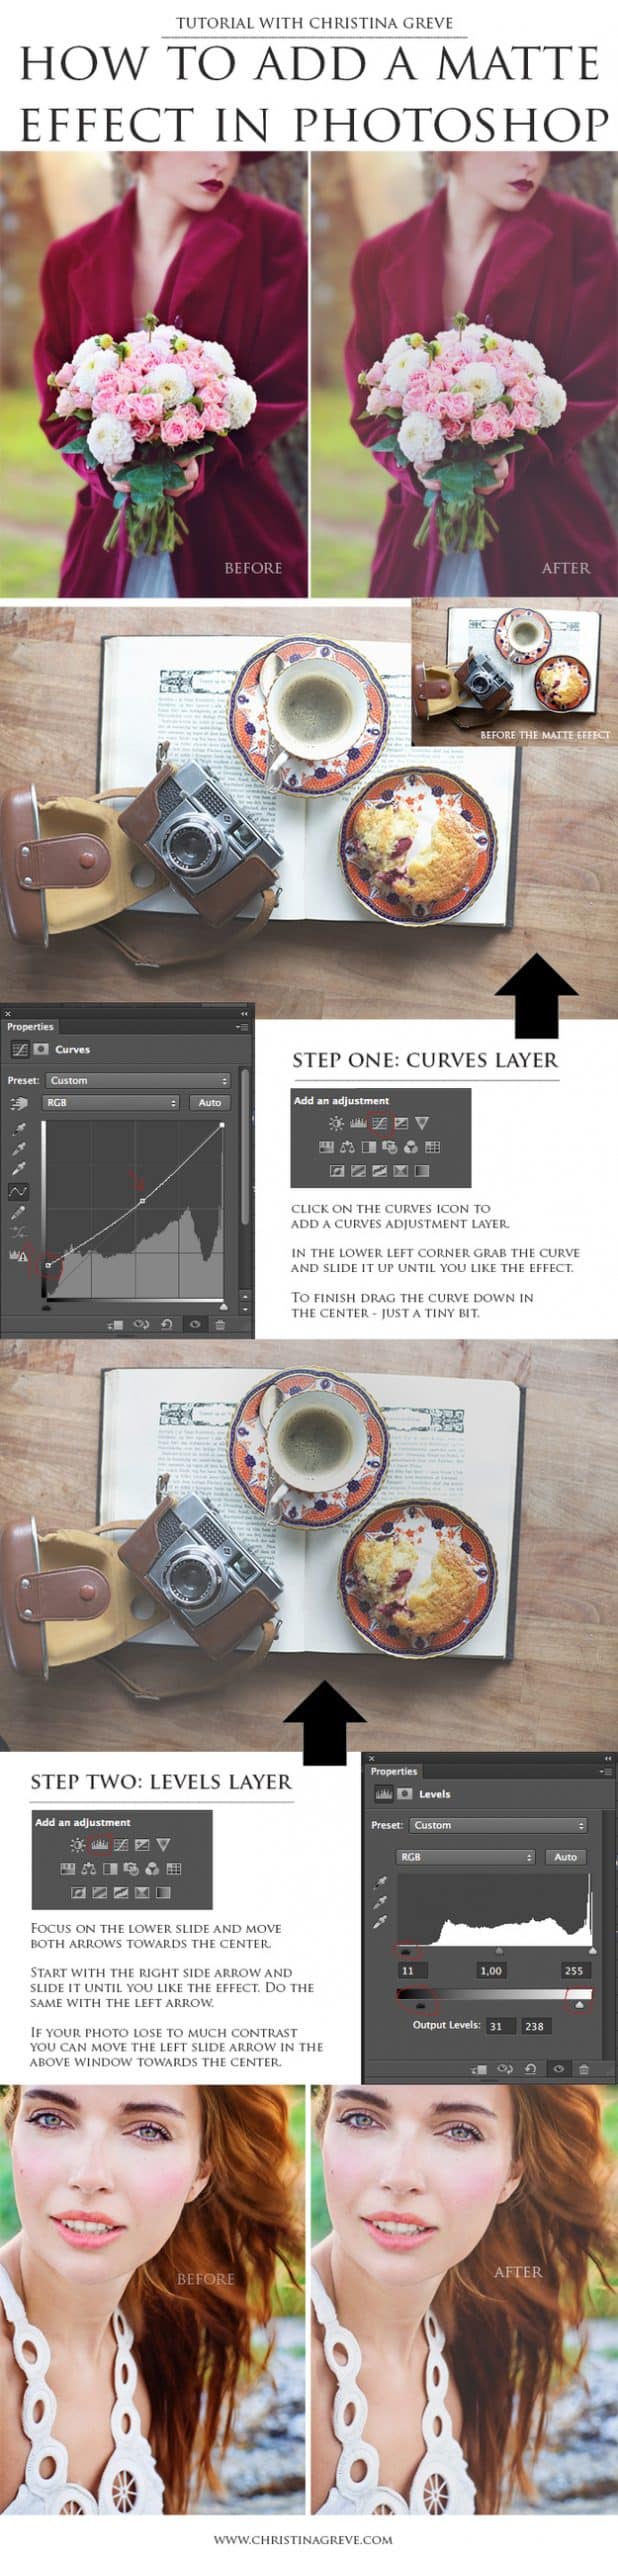
14. Learn how to punch up vibrancy and saturation in seconds with TWO EASY STEPS.
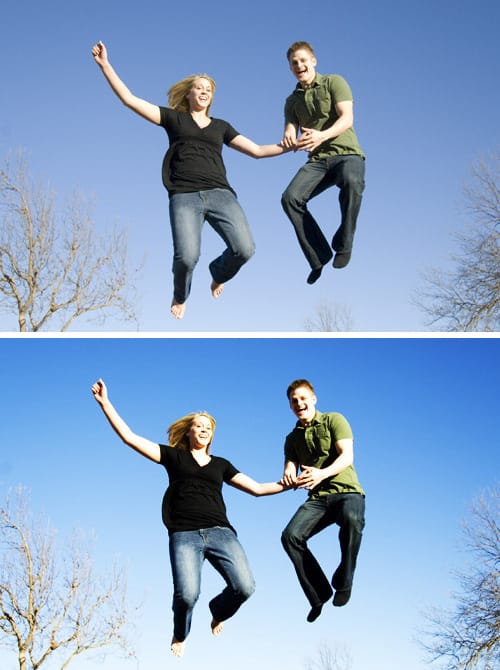
1. Open the photo in Photoshop.
2. Duplicate the layer that the photo is on (Command + J in the Layers window).
3. Set the new layer’s blending mode to Hard Light. And there you have it. INSTA-DIFFERENCE.
4. If the result is TOO punchy, turn down the opacity of the new layer.
Get the full details here.
15. Once you’ve mastered that, learn how to use a high pass filter to sharpen your images.
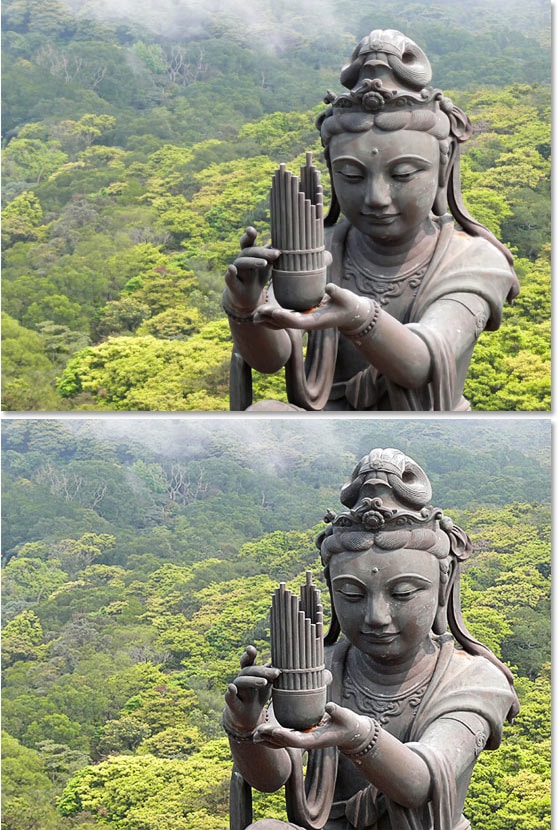
This is easier than using Unsharp Mask or Smart Sharpen!
1. Open the photo in Photoshop.
2. Duplicate the layer that the photo is on (Command + J in the Layers window).
3. Set the new layer’s blending mode to Overlay.
4. Put a high pass filter on the new layer by going to Filter >> Other >> High Pass.
5. Drag the slider according to how much sharpening you need. A smaller radius means less sharpening, a larger radius gives you more.
For more details, visit the full tutorial here.
16. The Align tools are great little shortcuts that usually go unnoticed.
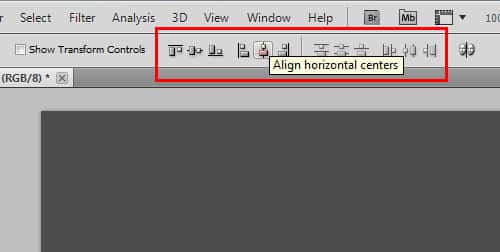
They show up when the Move Tool is activated. Select multiple layers and click on one of the alignment options. It’ll automatically align your objects, and your layout will be perfect.
17. How to create glitter.
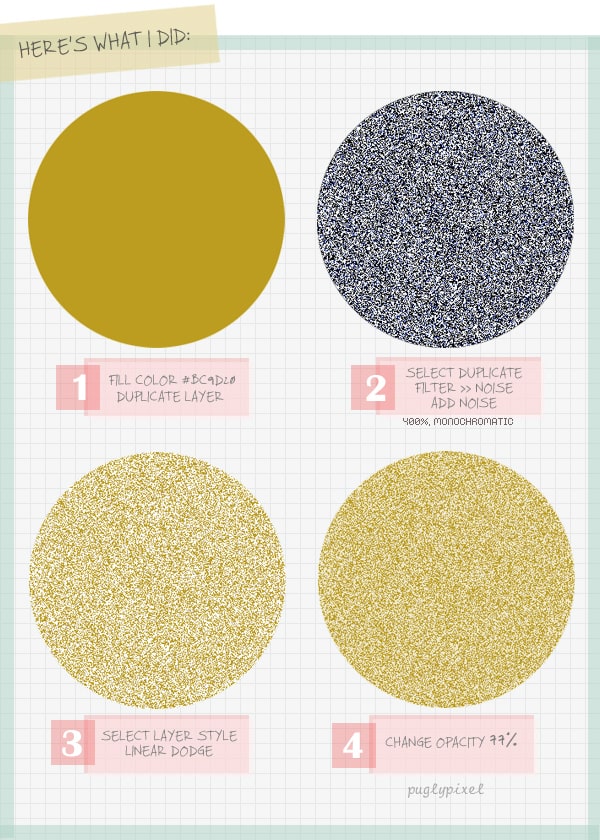
OK maybe this isn’t absolutely essential, but it’s cool. Get the full tutorial here.
20. Use the Orton Effect to get a dramatic lighting effect.

1. Open the photo in Photoshop.
2. Duplicate the layer that the photo is on (Command + J in the Layers window).
3. Set the new layer’s blending mode to Screen.
4. Duplicate the layer again.
5. Apply a Gaussian Blur by going to Filter >> Blur >> Gaussian Blur. Play around with the value. Set the blending mode for this layer to Multiply.

This is a no-brainer, but print these out and keep them near your desk. The more you use them, the more they’ll feel like second nature.
via buzzFeed