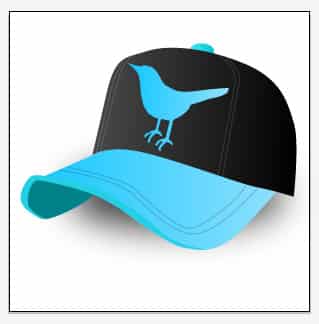
Create Baseball Cap Social Icons
Learn how to design Baseball Cap Social Icons in Illustrator and Photoshop!
Illustrator
1. Get a picture of a Baseball Cap and copy/paste it onto a new illustrator document that’s 500x500px. Using the pen tool trace around the cap using a fill of none and a stroke of black. ![]() 2. Next grab the social icon logos from here. Now select each part of the cap and fill it with color. Since I’m making a Twitter Social Icon I’m using light blue colors.
2. Next grab the social icon logos from here. Now select each part of the cap and fill it with color. Since I’m making a Twitter Social Icon I’m using light blue colors. ![]() 3. Next put in a rim using the color below and a button on the top of the hat using the same blue gradient. To do this have the button selected > click on the gradient fill > click one of the gradient sliders in the gradient tool box > get the eye dropper and click on the already made blue gradient.
3. Next put in a rim using the color below and a button on the top of the hat using the same blue gradient. To do this have the button selected > click on the gradient fill > click one of the gradient sliders in the gradient tool box > get the eye dropper and click on the already made blue gradient. ![]()
![]() 4. Next get the pen tool, set the fill to none and stroke to white, draw some stitching on the cap. Make the opacity 20%.
4. Next get the pen tool, set the fill to none and stroke to white, draw some stitching on the cap. Make the opacity 20%. ![]()
![]() 5. Open up the social icons you previously downloaded, select the twitter bird or ‘T’ and copy/paste it into the cap. Click on the icon with the selection tool to make it bigger, rotate it and fill it with a light blue color.
5. Open up the social icons you previously downloaded, select the twitter bird or ‘T’ and copy/paste it into the cap. Click on the icon with the selection tool to make it bigger, rotate it and fill it with a light blue color. ![]() 6. Create a new layer and place it on the bottom. Get a dark grey color and place an oval like below. With the oval selected go to Effect > Blur > Gaussian Blur and make it 17.0 pixels.
6. Create a new layer and place it on the bottom. Get a dark grey color and place an oval like below. With the oval selected go to Effect > Blur > Gaussian Blur and make it 17.0 pixels. ![]()
![]() 7. Here’s what the final result should look like:
7. Here’s what the final result should look like: ![]()
Photoshop
1. Open up the document in Photoshop. ![]() 2. Create a new document with the icon size of your choice, I’m using 50×50. Copy and paste the cap onto the new document and scale it down to fit, remove the background color so it’s see through. Finally save the image in .PNG format.
2. Create a new document with the icon size of your choice, I’m using 50×50. Copy and paste the cap onto the new document and scale it down to fit, remove the background color so it’s see through. Finally save the image in .PNG format. ![]()


