Create a 3D Open or Filled Wooden Box in Photoshop
Learn how to create a 3D open or filled wooden box in Photoshop.
Final Result

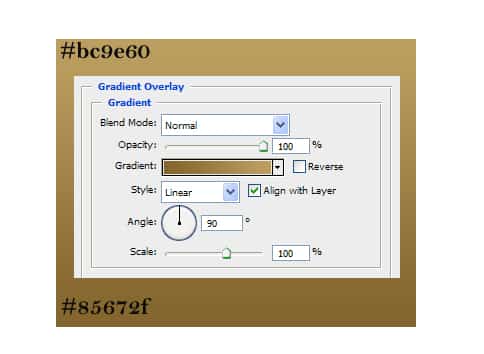
1. Create a new document that’s 550×400 pixels, using the rectangle tool draw a box shape. Double click the layer to go into Blending Options > gradient Overlay and put in the following colours:
2. While holding down the ctrl key click on the rectangles layer thumbnail (i have circled below) to highlight the shape. Create a new layer and fill the highlighted shape white & set the Blending Mode to Multiply. Next go to Filter > Noise > Add Noise.

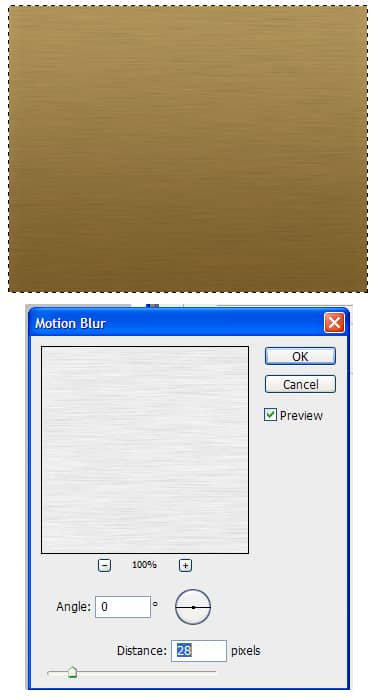
3. Next go to Filter > Blur > Motion Blur & put in 28 pixels. This will add a nice wooden effect.
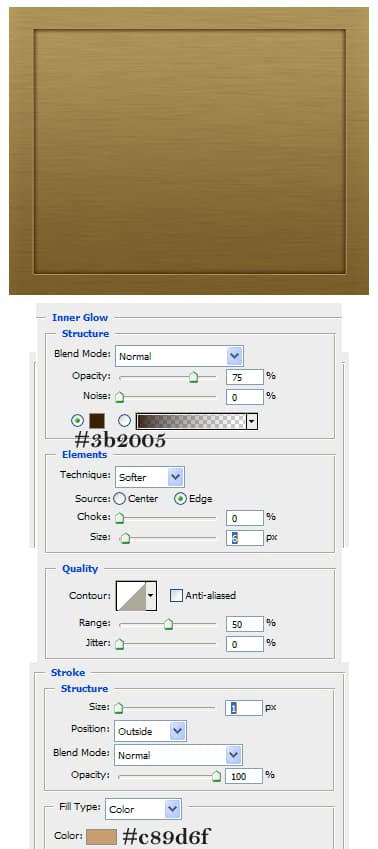
4. Next drag the coloured box to the new layer icon to duplicate. Press ctrl+t to make the shape transformable. Drag a corner down while holding down the shift key to keep the shape perfect. Double click on the layer to go into Blending Options and put in the following options:
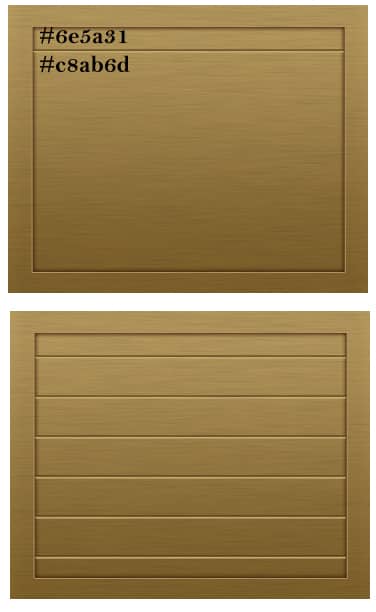
5. Using the line tool draw two 2px lines like below while holding down the shift key. Press the two line layers while holding down to ctrl key to select them both, drag the 2 layers to the new layer icon to duplicate & space them out. Do this step until you get planks of wood effect.
Tip: To move the shape a large space press down the shift key + any arrow key, to move the shape a little press down the ctrl key+ any arrow key.
6. Again using the line tool draw 2 diagonal lines on each corner of the box. You may need to change the colours of some of the lines as the main box colour can vary from corner to corner.
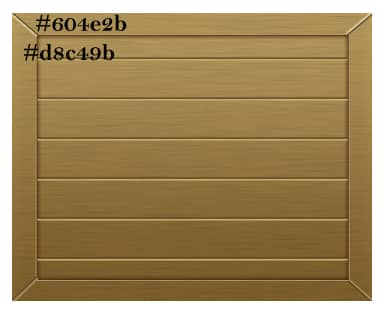
7. Go to the top layer and press the bottom layer (except the background) while holding down the shift key to select all of the layers, drag all the layers to the new folder icon to put them in the folder. Duplicate the folder & move the duplicated box to the top, press + t & squash the box like below:
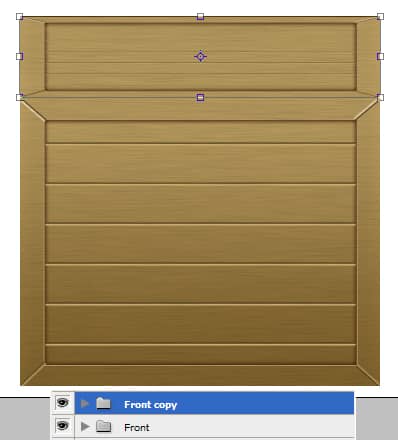
8. Press ctrl+r to bring up the rulers around the canvas, drag out 2 lines and place them like below on the box, these lines will be our guides. Press ctrl+t on the top box folder, press down the ctrl key and move each top corner to the guide line like below:
Do remove the blue lines, select the Move Tool (V) and drag the lines off the canvas.

9. Go inside of the top box folder and delete the wooden lines by dragging them to the delete icon. Double click on the smaller top shape and change the gradient to below.
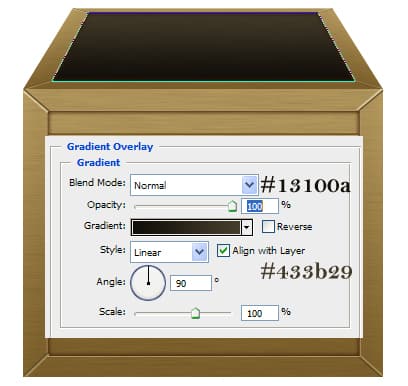
If you would like to learn how to fill up the box following the steps below:
Filling the Box
10. Get the Ellipse tool and draw a circle while holding down the shift key. Double click on the layer to go into Blending Options and put in the following options:

11. Create another smaller circle, double click into blending options and put in the following settings:
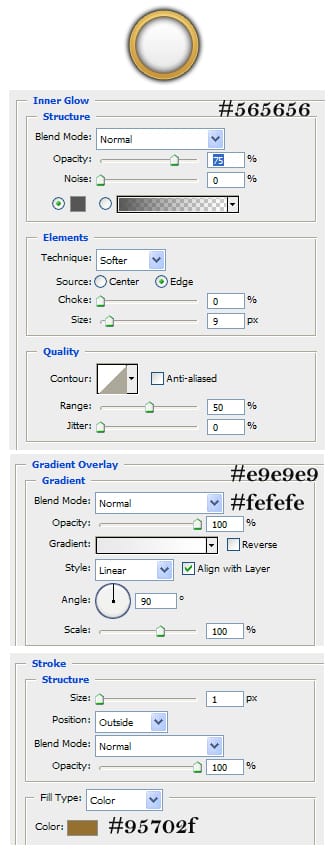
12. Next write a dollar symbol, double click into Blending Options and put in a Inner Shadow. Using the previous method put the coin layers into a folder. Duplicate the coin folder and arrange & rotate them (ctrl+t and rotate).
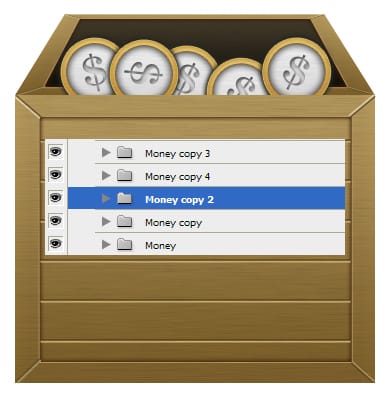
13. Do this many times, then using the previous method select all of the money layers and put them into a folder, then duplicate the folder.
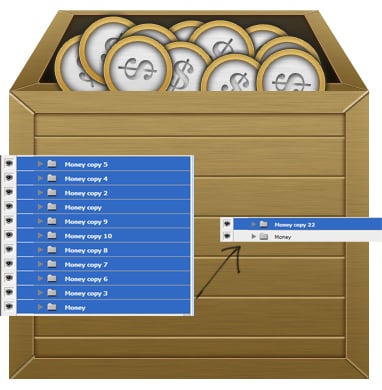
14. Right click the duplicated layer & press Rasterize Layer.
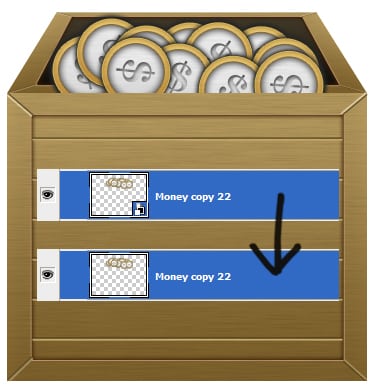
15. Go into the top box folder and click on the layer thumbnail to highlight the inner box shape, go back to the money layer, press ctrl+x (to cut) and ctrl+v (to paste) back onto the canvas. Delete the left over money layer you cut from.
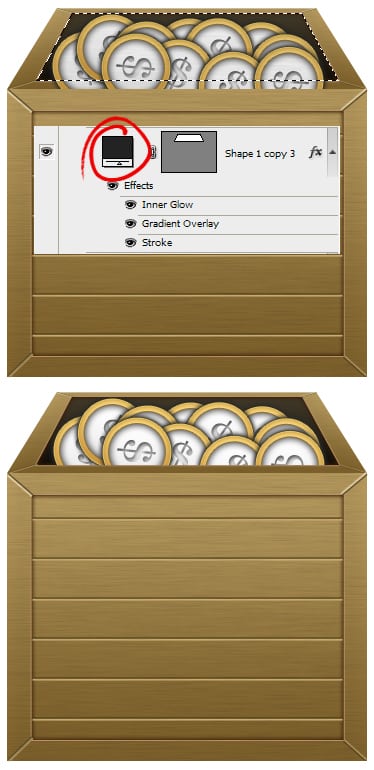
16. Double click on the coins layer to go into Blending Options > Gradient Overlay & put in the following setting: Next press ctrl+t & make the coins layer smaller, duplicate the coins layer and place them around in the box.
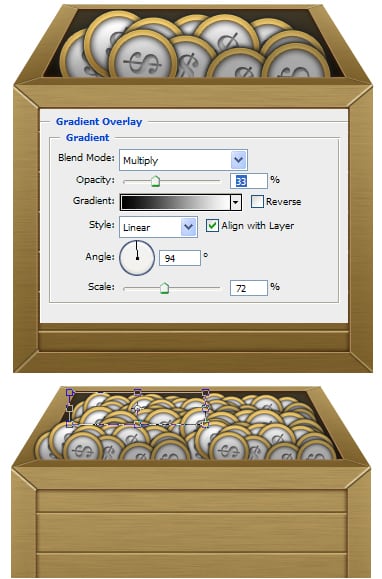
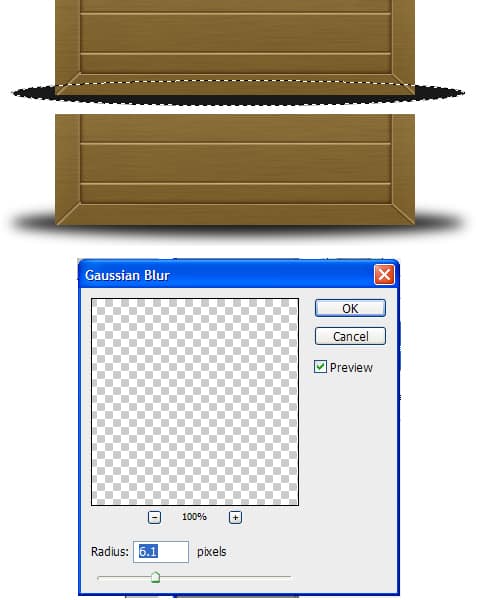
17. Create a new layer under all the box, using the Elliptical Marquee tool draw a thin oval shape and fill it with back. Go to Filter > Blur > Gaussian Blur & put in 6.1. This will create a nice shadow effect.
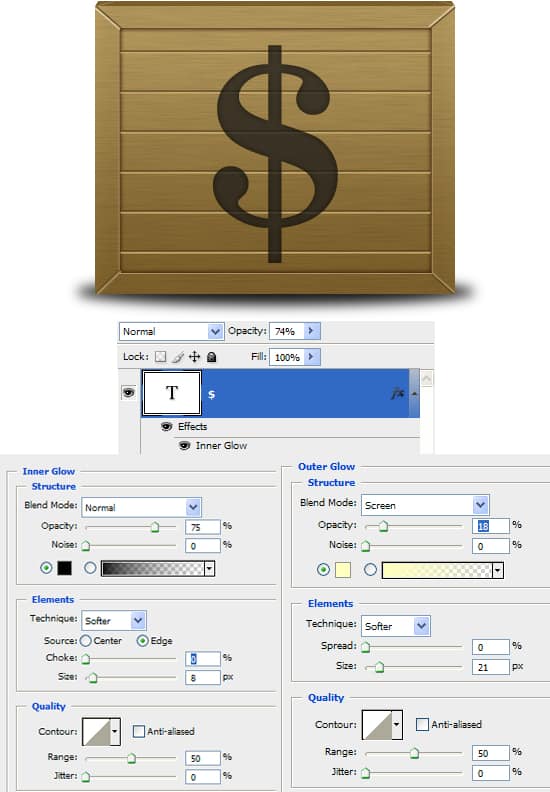
18. Lastly draw a dollar symbol in the colour black, go into Blending Options & put in the following options. Lastly set the opacity to 74%.
Final Result
