Design an Android Phone in Photoshop
Learn how to create a Android Mobile/Cell Phone in Photoshop!
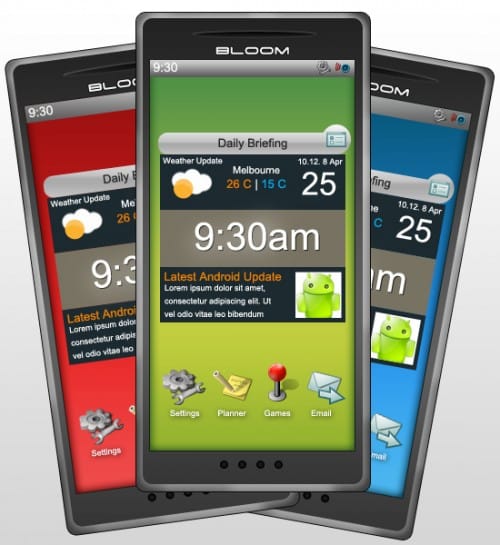
Final Result
1. Create a new document that’s 550×600. Get the rounded rectangle tool & draw a phone shape. Double click into Blending Options and put in the options below: 
2. Hold down the ctrl key click on the layers thumbnail to highlight the shape & create a new layer. Using a medium soft edged brush, with an opacity of 10% & a white colour, draw some highlights on the edges of the phone on the new layer you created.
Using the rounded rectangle tool draw a new shape smaller then the previous shape. Double click into Blending Options & put in the options below:

3. Next get the rectangle tool and draw the screen. Go into Blending Options and put in the options below:

4. With the rectangle tool draw the toolbar, go into blending options > Gradient Overlay and put in the colours below. Next get the rounded rectangle tool and draw a shape like below, then get the ellipse tool & draw a shape while holding down the shift key (this will keep the shape stay perfect). Move the circle to the end of the rectangle shape so it blends in.

5. Now hold down the shift key and select the 2 shapes, right click & Convert to Smart Object. Double click into blending options and put in the gradient overlay colours below:

6. Now using the font Arial write out some information. On some text go double click into Blending Options and put in a drop down shadow if you like.
Choose the colour white then get the rectangle tool. Holding down the shift key draw a small rectangle shape.

7. Create a new layer, set the colour to white & draw a cloud with a hard edged brush. Create another new layer & draw a sun with a hard edged brush with the colour #fbb030. Holding down the ctrl key click on the sun’s layer thumbnail to highlight it. Choosing on the elliptical marquee tool hold down the alt key & remove part of the highlighted shape. Create a new layer (again) and fill the highlighted shape white & set the opacity to 21%.
 8. Next copy & paste this Android image onto the canvas on top of the white box. Press ctrl+t, holding down the shift key and scale the image down to the size of the white box. Right click the Android Layer and Create Clipping Mask.
Next download this Android Icon Set and fill up the screen with icons of your choice.

9. Next with the Ellipse tool draw a thin oval tool, double click into Blending Options & put in the Options below:

10. With the ellipse tool again, hold down the shift key & draw a small circle. Duplicate the circle by dragging it to the new layer icon do until you get 4 circles. To nudge each circle across press ctrl+right or left arrow key. To make a big nudge hold down the shift key instead of the ctrl key.

11. Holding down the shift key select all the of circles, right click & Convert to Smart Object. Double click into blending options & put in the following options:

12. now put in the name of your phone using Space Age Font, double click into blending options and put a drop down shadow if you want. Holding down the shift key click on the first layer, then on the last layer to highlight everything & drag the layers to the folder icon. Create a new layer for the background & fill it white, then double click into Blending Options >Gradient overlay and put in the settings below.
Lastly I’ve duplicated the mobile phone 2 times and have changed the colours to the other 2 phones. I have rotated them slightly by clicking on the layer, pressing ctrl+t & rotate.

Final Result


