Design a Custom Facebook Button in Photoshop
Learn how to create a Facebook Like button in Photoshop from scratch!
Final Result
![]()
1. Depending on how big you want the button create a new document, I’m using a size of 550×550 pixels.

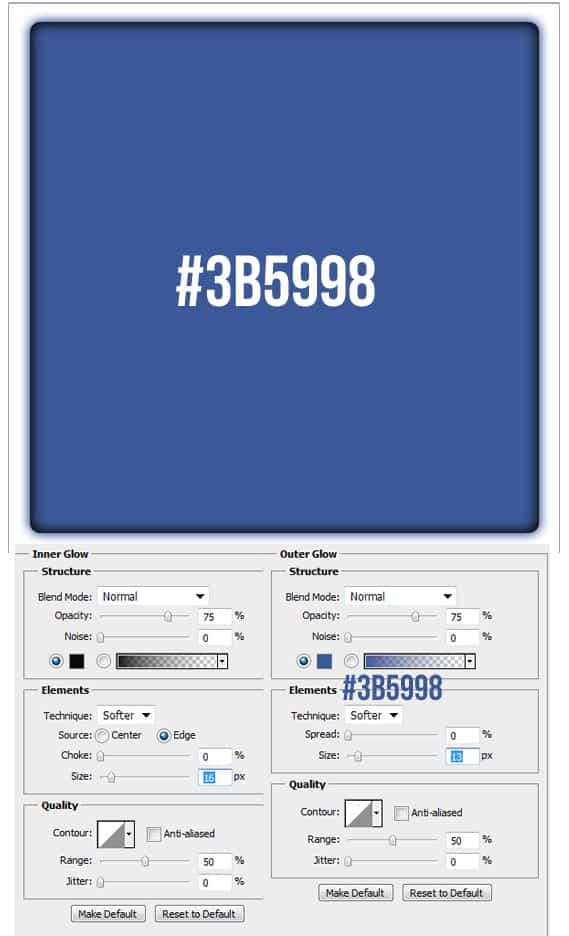
2. Using thecolour below & the rounded rectangle tool draw a square button shape while holding down the shift key (to keep the shape perfect). Double click on the layer to go into Blending Options and put in the settings below.
Please Note: Depending on the size of the button the Blending Option sizes will be different to what I have in this tutorial if you’re creating it a different size.
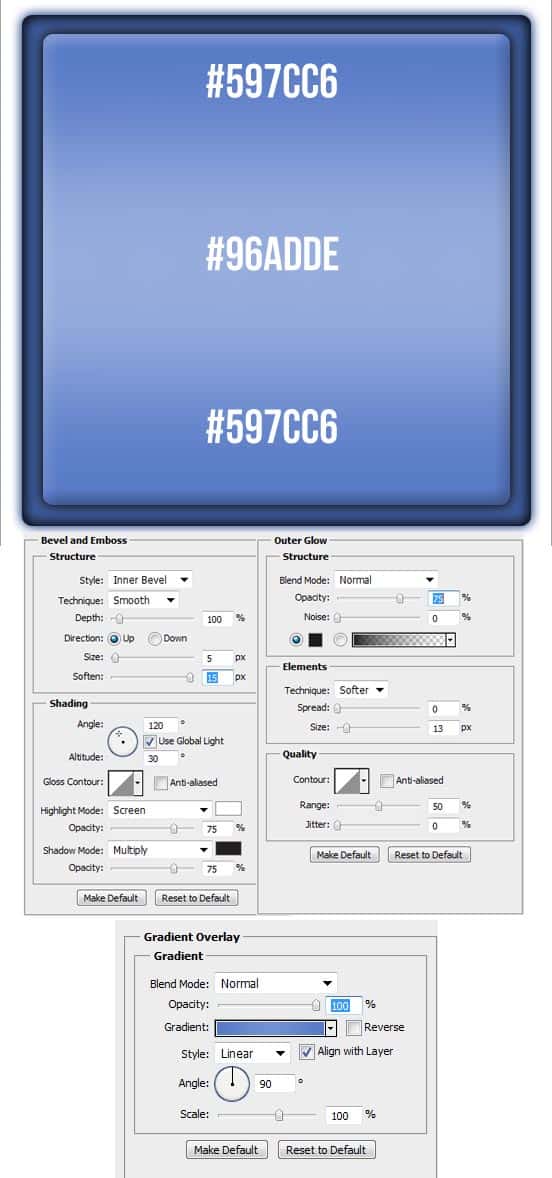
3. Using the same method create another rounded rectangle, double click into blending options and put in the settings below:
4. In the layers window hold down the shift/ctrl key select both of the rectangle layer & drag them to the Folder icon to put them in a folder. Click on the eye icon to remove the button from view for now.
![]()
5. Now go to View > Show > Grid (or ctrl + ‘) to bring up the grid, using the rounded rectangle tool draw the shape below using the grid as a guide. Next get the pen tool and draw a ‘thumbs up’ hand again using the grid as a guide.
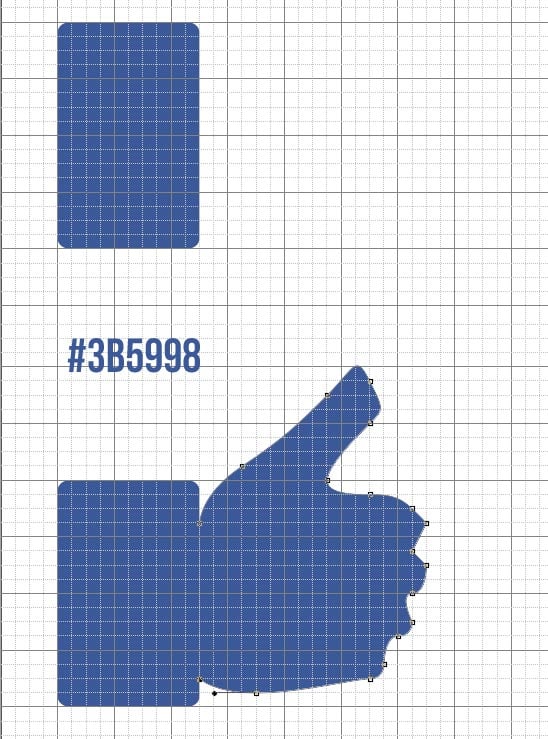
6. Double click on the ‘sleeve’ and go into Blending Options, put in the settings below:
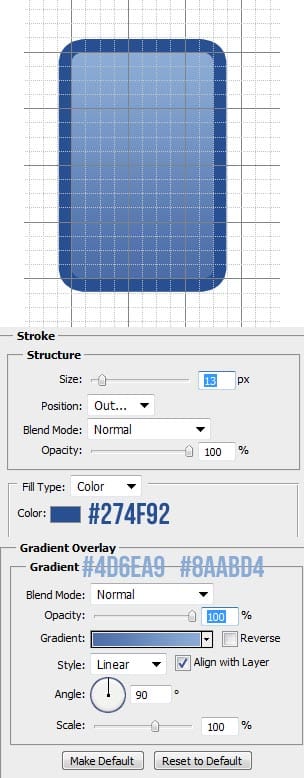
7. Go into the Custom Shape tool and select the diamond shape, while holding down the shift key draw a small white diamond and place it on the sleeve. Next double click on the hand layer to go into Blending Options and put in the settings below:
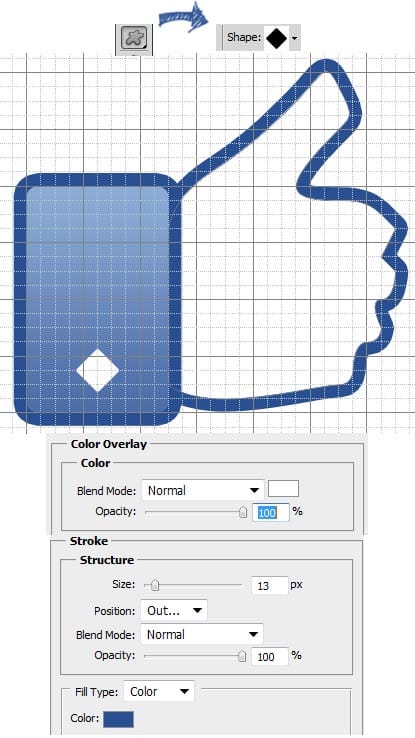
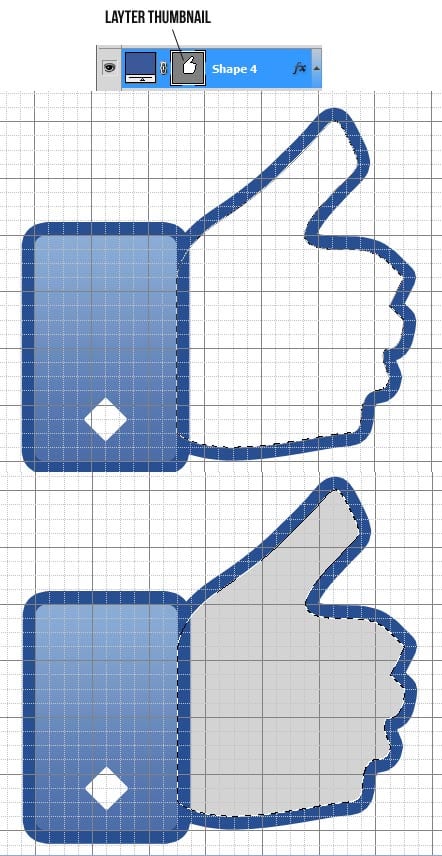
8. Next hold down the ctrl key and click on the hand’s layer thumbnail to select the shape, create a new layer and fill the highlighted shape a light grey.
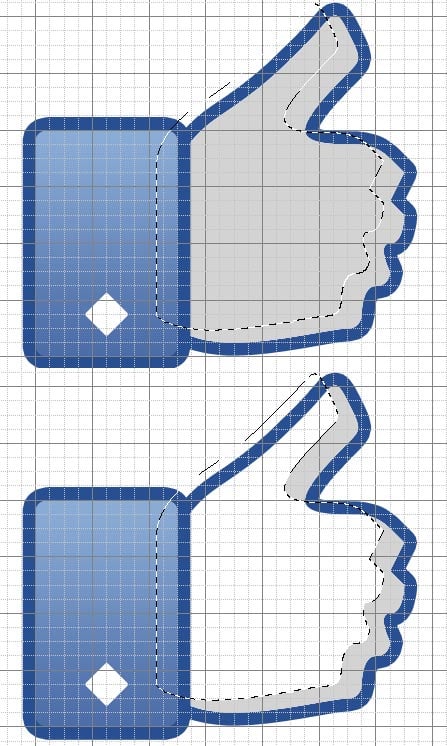
9. With the shape still selected click on the up and right arrows to move the highlighted shape & press on the delete key to remove part of the grey colour to give the hand some shading.
10. Click on the eye icon of the blue button to bring it back into view. Using the previous method put all the thumbs up layers into a folder and duplicate it (for backup reasons). Remove one of the thumbs up folders from view.

11. Click ctrl+t to make the thumbs up folder transformable and drag a corner down while holding down the shift key to shrink it down a bit. Place it on the top left corner on the button. Using the font Bebas Neue write out what you like. Rotate the first word by pressing ctrl+t and rotating.

12. On the text layers double click into Blending Options > Drop Shadow and put in the settings below:
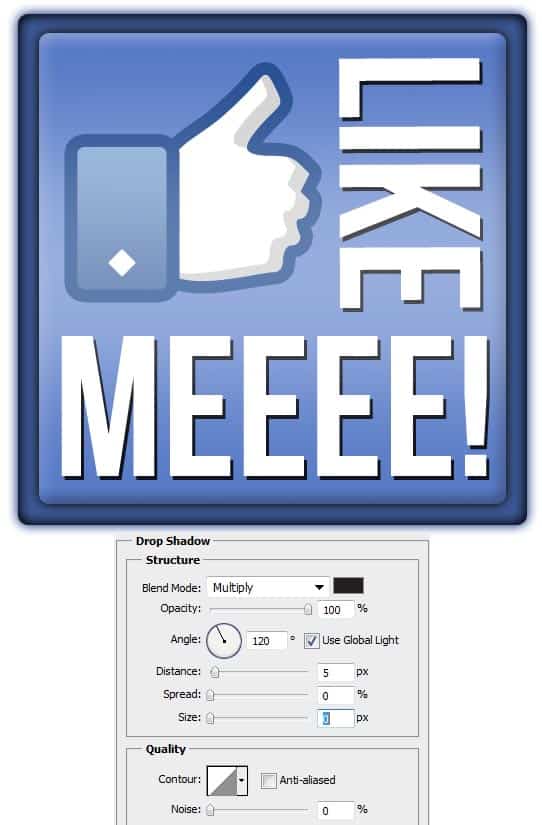
13. Lastly to turn it into a button remove the white background layer from view so it’s transparent and save it in PNG format.

Final Result
![]()


