Design a Fun Professional WordPress Layout in Photoshop
In this tutorial we’ll design a Fun, Professional WordPress Layout in Photoshop.
1. Firstly open a new document that’s 900×1150, create a rough of where you want the menu/s, banner, content, footer and sidebar will be in Photoshop.

2. Put the rough placements into a seperate folder, click on the eye to make it not viewable. Create a new layer, go into Blending Options > Gradient Overlay and out in the colors of your choice. Here’s the colors I’m using:

3. Next put in your menu on the top bar, and place your logo in the banner area on the left side. I’m using the font Verdana, size 12 and coor #8eb2dc.

4. Since this layout will be turned into a WordPress Theme for my Tutorial website, I’ve placed Adobe icons and put a dark outer glow around them.

5. Next I want to create a glow on top of logo. Get the circle tool and create a oval shape. Go into Blending Options on the layer and create an outer glow with these settings. Then move the circle so it’s out of view and the glow is only seen.

6. Now put in your heading and Slogan, I’ve gotten some social icons and placed them on the banner so people can subscribe and get updates. The font I’ve used are (they can be found on Dafont.com: Heading: TypoLatinserif-Bold Slogan: Nilland Subscribe: Jellyka CuttyCup…
 7. Next create the 2nd Menu. Using the Rectangle Shape I’ve put a bar using a gradient with the colors: #b9f24c and #70a902. To make a stitch pattern I’ve made a new layer, gotten a size 1 brush and made 4 straight lines by holding down the shift key and drawing. I’ve then duplicated the lines. When you’ve finished press ctrl+e to merge the stitches, go into Blending Options and Bevel & Emboss and put in these settings…

8. Now add in the text, I’m using Verdana again.

9. Next I’ve created the post box. For the box I’ve using the colors: #b4b4b4 and #ffffff, with a 1px white stroke. I’ve added the text with the font Verdana and placed the featured picture.
 10. Using the same colors and stitching as the menu I’ve placed a footer on the bottom on the page. I’ve also placed some headings using the font Verdana and the color #1b1b1b.

11. I’ve added more info on the footer and created another shape using the color #bced5e to put the copyright etc. Next put in a square shape where you want the sidebar to be.

12. For the Categories box I’ve put in the same design as the menu for the heading, I’ve put the colors #ebebeb and #ffffff for the background of the box and placed a dark outer glow.

13. Next I’ve adding the heading and Categories using the font Verdana. To help seperate the categories I’ve put lines in between them with the color #c5c5c5.

14. Now for the search bar I’ve drawn a box using the gradient colors #ececec and #ffffff and added a dark outer glow. I’ve copied and pasted the stitches onto the search box, added a search button with the gradient colors #54beeb and #1078a4. For the font I’ve used Nilland and added a drop shadow in Blending Options.

15. Finally I’ve placed an Ad box so using the color #c5c5c5 and the stroke color #515151.

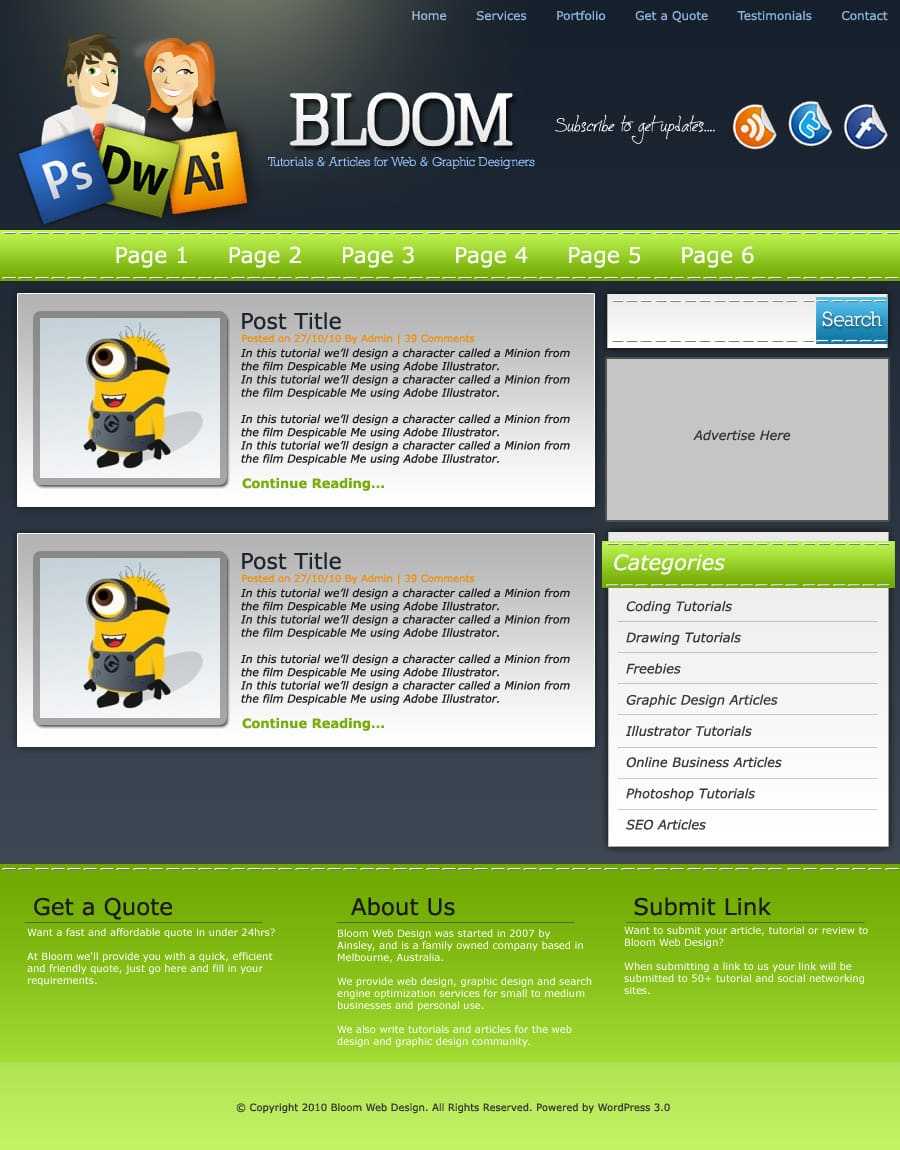
Final Result
Please subscribe via RSS & Twitter (or Facebook if you prefer). I’ll see you next time! Peace ! 🙂


