Design a Sleek Facebook Fan Page in Photoshop
In this tutorial I’ll teach you how to create a sleek & stylish Facebook Fan Page! We’ll be using the Shape Tool, Filters, Custom Brush, Text Tool & Blending Options to create this cool layout!
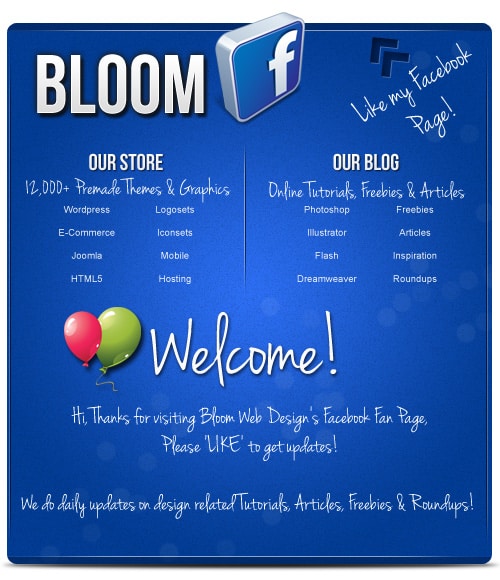
Final Result
1. Create a new document with the settings below:

2. Using the Rectangle Tool, draw the main box of the Facebook Fan Page. Double click on the layer to go into Blending Options & put in the Gradient Overlay below:

3. Create a new layer and place it below the box. Using the Elliptical Marquee Tool, draw a thin oval on the bottom of the box & fill it a dark grey. Next go into Filter > Blur > Gaussian Blur and put in 2.4 to create a nice shadow effect.

4. Click on the Brush Tool & go into Window > Brush (F5) and put in the settings below to create a new brush. Once you’ve got the brush, create a new. While holding down the CTRL Key click on the Box’s Layer thumbnail to highlight the shape. Go to the new layer and using the brush you just created (in the colour white), brush across the box. Set the Opacity to 6% on the brush layer.

5. Activate the box shape again (like in step 4), create a new layer and fill the shape white. Set the Blending Mode to Multiply so it’s invisible & go to Filter > Noise > Add Noise and put in 7.16%. This will add a nice subtle texture.

6. Activate the box shape again, select the Rectangular Marquee Tool and drag over the middle of the activated shape while holding down the CTRL Key. This will remove the part you drag over. With the leftover highlighted areas, create a new layer and fill it Black. Set the Opacity to 50%.

7. Using the Line Tool (1px), draw a white line (while holding down the Shift Key, to keep the line straight) on the top of the box like below. Right click the line layer & Rasterize Layer. Grab a soft edged eraser tool, and erase the edges of the line so it fades out & set the Blending Mode to 54%. Duplicate the layer and drag it to the bottom of the box.

8. Next on the side, draw 2 lines (#001739 & #FFFFF) placing them like below. Rasterize both of the layers & erase the edges like before. Set the Blending Mode to the White Line layer 25%. This will give the edges of the box a 3D effect line. Duplicate the 2 lines and place them on the opposite side.

9. Next write out your Facebook Fan Page name, I’m using the font Bebas Neue. You can double click into Blending Options and put in the following options below on the text if you wish.

10. Grab this cool 3D Facebook Icon, and place it beside the name. To make the icon smaller press CTRL+T and drag a corner down while holding the Shift Key.

11. .Download & Install these Arrow Photoshop Shapes. Next go into the Custom Shape Tool, select an arrow & draw it on the canvas. You can rotate the shape by pressing CTRL+T and rotating a corner. Double click on the arrow layer to go into Blending Options and put in the options below.
Using the font Jenna Sue, write out “Like out Facebook Page!’.

12. Using the font Bebas Neue, write out some headings on the content area. Double click into Blending Options and put in the following…

13. Follow step 8 to create a content divider.

14. Using the font below, write out the content.

15, Next write out ‘Welcome!’ using the font below and place a Drop down Shadow in Blending Options. Grab the balloon icon from Party Elements (I’ve also used a drop down shadow on the balloon icon).

16. Lastly write out some more information using the font below!

Final Result


