Design a Vintage Camera in Photoshop
Learn how to create a Vintage Camera in Photoshop!
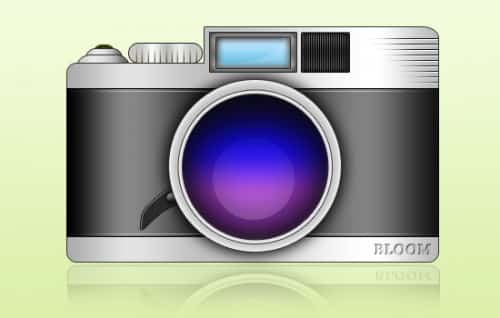
Final Result
1. Using any colour draw one shape using the rounded rectangle shape tool, then draw a second smaller shape like below.

2. Next get the Rectangle tool (the one with sharpe edges) and draw a shape on the left side of the top rounded rectangle. Hold down the shift key and click on all the shape layers, right click & Covert to Smart Object.

3. Right click the shape & go into Blending Options, put in the following options:

4. Get the the rectangle shape tool and draw a shape like below, right click and go into Blending Options & put in the following options:

5. Next get the line tool, hold down the shift key (to keep the line straight) and draw a white 1px line like below, duplicate the line and and move it to the bottom. Right click the 2 line shapes and Rasterize the layer, get a soft rounded eraser tool and erase the edges of the lines so it slowly fades out.

6. Next get the Circle Shape tool, hold down the shift key and draw a large circle like below. Right click the layer and go into blending options & put in the following options:

7. Duplicate the circle layer, press ctrl+t (to make the shape transformable), hold down the shift key and pull the top edges down to make the circle slightly smaller then the behind circle. Remove the eye icon from the Outer Glow Effect, or Right Click into Blending Options and remove the tick from Outer Glow. Duplicate the circle again and make it smaller then the second circle.

8. On the top circle shape go into Blending Options & put in the following options:

9. Again using the circle shape tool, hold down shift and draw a small circle shape in the colour white. Set the Blending Mode to Multiply (this will make it invisible). Right click into Blending Options > Gradient Overlay & choose a white to none gradient.

10. Now draw a shape using the Rectangle tool like below, right click into Blending Options & put in the following settings:

11. Duplicate the layer, using the previous method make the shape smaller. Right click into Blending Options & change the following gradient colours:

12. Next get the rounded rectangle tool and draw a shape like below. Go into Blending Options & put in the following settings:
 13. Click on the Zoom Tool (magnifying glass icon) and zoom in to the camera. Get the line tool and draw a small line like below in a dark grey colour. Right click the layer and Rasterize. With a soft edged eraser, erase the top part of the line. Now duplicate the shape and move each shape by holding down the ctrl key and moving the arrows. To make out to the normal again, click on the zoom icon 2 times.

14. Using the rounded rectangle tool again, draw a shape like below, put the shape behind the camera layer so the bottom part in not visible. Right click into Blending Options and put in the following settings:
 15. Duplicate the layer 2 times, move each shape up and make each layer smaller (using the previous method). On the smaller, top shape go into Blending Options > Color Overlay and put in the following colour:

16. Get the rectangle tool and draw a shape like below, right click into Blending Options & put in the following options:

17. Zoom in to the shape using the previous method. Get the line tool, hold down shift and draw a line from top to bottom in black. Duplicate the lines and move each line to the right (hold down ctrl+click on the arrow).

18. Next holding down the shift key draw a line using the line tool, right click & rasterize the layer. using a soft eraser tool erase the left part of the line. Duplicate the line and move each line down and across to the right. Get the rectangular marquee tool and remove the part of the lines that are off the camera. Click on the top line, holding down the shift key click on the bottom layer (this will select all the line layers). Right click and Convert to Smart Object. Duplicate the layer.
Right Click the new layer and go into Blending Options > Color Overlay and change the colour to white. Move the white lines down.

19. Using the font Chaparral Pro type in the name of your camera in white & set the Blending Mode to Multiply. Go into blending options and put in the following settings:

20. Behind the camera lens layers draw a shape like below with the pen tool. Right click into Blending Options and put in the following settings:

21. Holding down the alt key click on the shape layer to highlight it. Create a new layer and fill in the highlighted shape white. With the shape still highlighted, press the down arrow and press the delete key so only a bit of the white is left. Set the white shape to 33%.

22. Using the circle shape tool, holding down the shift key and draw a shape like below. Right click into blending options and put in the following settings:

23. Go to the top layer & holding down the shift key click on the very bottom layer to highlight on of the camera layers. Drag the layers to the Folder icon and name the folder camera. Next drag the folder to the new layer icon to duplicate. Right click the duplicated folder and Convert to Smart Object. Create a new layer and fill it with white, this will be for the background.

24. On the duplicated camera press ctrl+t to make it transformable and pull the top down to the bottom, this will be for a reflection.

25. On the bottom white layer right click into Blending Options > Gradient Overlay and put in the following colours:

26. Now go into the camera folder, go to the blue shape below, hold down the ctrl key and click on the layers thumbnail to highlight it.

27. Get the Elliptical Marquee Tool, hold down the alt key pull over part of the highlighted shape to remove it.

28. Create a new layer and fill the highlighted shape white. Set the Opacity to 18%.

Final Result


