Design an ‘Action’ 3D Font in Photoshop
Learn how to design a 3D font in Photoshop!
Final Result
 1. Create a new document that’s 550×300. Double click on the lock on the background layer to unlock it. Right click (or double click the right side of the layer) to go into Blending Options. Put in the followings settings for Gradient Overlay:
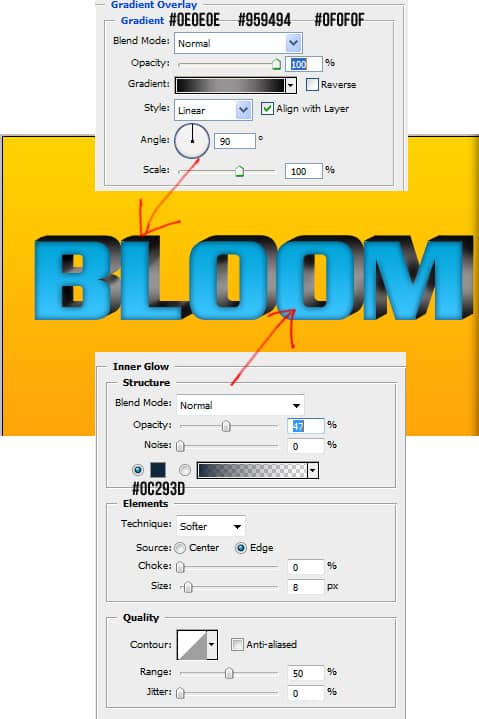
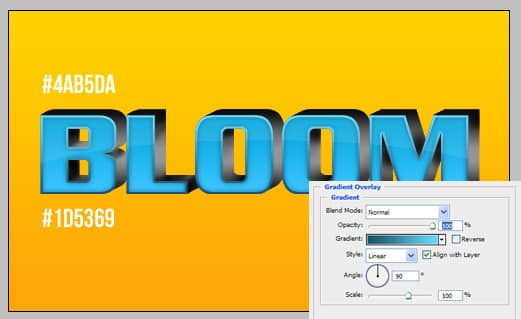
 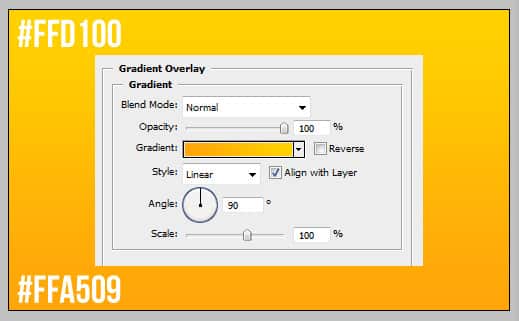 2. Using the font Enter Sansman type in the word you want. Go into Blending Options on the layer and put in the following Gradient Overlay using the colours below:
  3. Duplicate the text layer by dragging it to the new layer icon, on the bottom text layer remove the blending option effect by dragging the FX to the delete icon. Highlight the text and change it to black. Hold down ctrl and press the right & top arrows to move the bottom text. Do this three more times so it looks like below.
 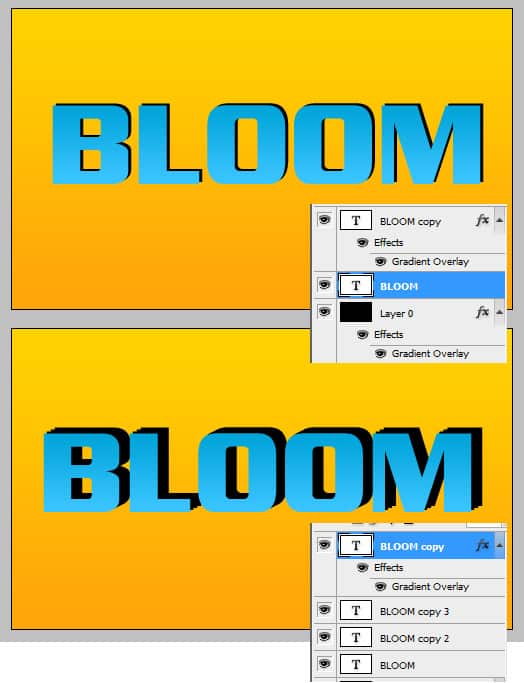 4. Get the Magnifying Glass tool (Zoom Tool) and zoom up to the text. With the pen tool go to the corner where it’s uneven, click on each of the corners to make it smooth.
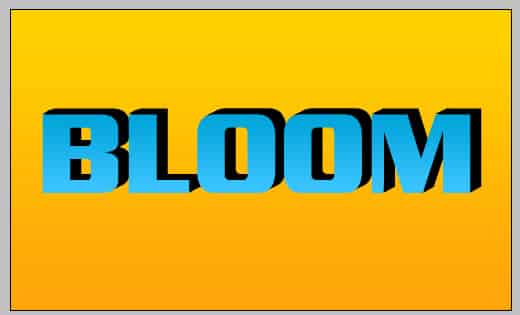
  5. Do this to all of the corners until it looks like below:
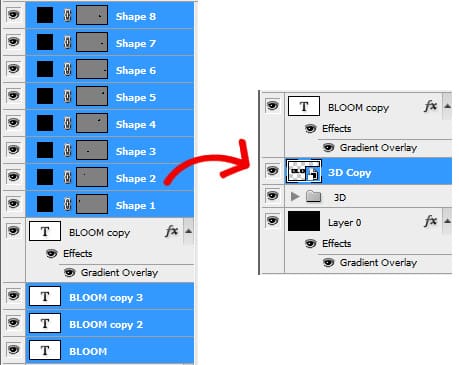
  6. Holding down ctrl select all of the black 3D layers and put them into a folder. Duplicate the folder, remove the eye icon from one of the folders (so it’s not viewable). Right click the new folder and convert to smart object.
  7. Go into blending options on the 3D behind and put in the Gradient Overlay below. Next on the blue text layer go into Blending Options and put in the inner glow below.
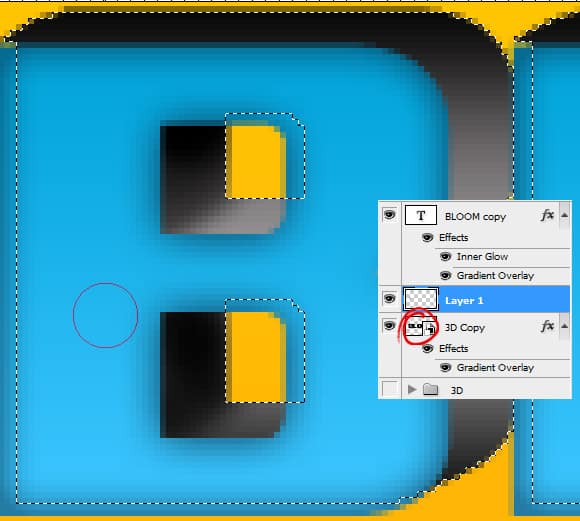
  8. Holding down ctrl click on the layer thumbnail to the black 3d behind. With it selected create a new layer, get a soft edged brush with an opacity of 70% and brush on the shadowed areas on the text.
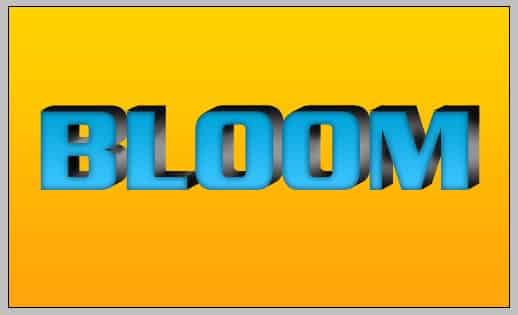 9. Hold down ctrl and press on the Layer Thumbnail for the blue text. Select the Elliptical Marquee Tool, hold down the ALT key and remove part of the highlighted text like below. Create a new layer and fill the highlighted area white. Set the opacity to 17%.
 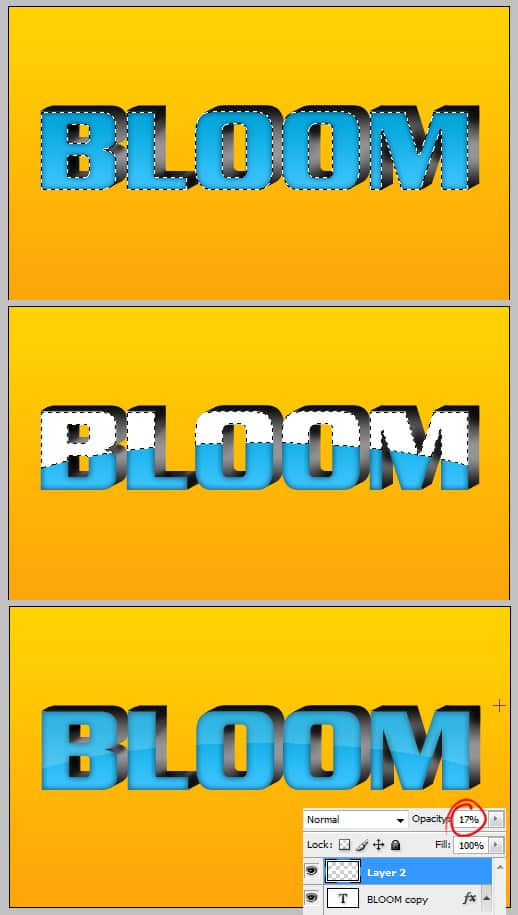 10. Next highlight the blue text again, go to Select > Modify > and Contract by 2 Pixels. Create another new layer and fill it white.
  11. On the layer go into Blending Options > Gradient Overlay and put in the following settings:
  12. Create a new layer, set the opacity to 70%. Get a large soft edged brush tool and brush on some highlights around the top and bottom of the font using white.
 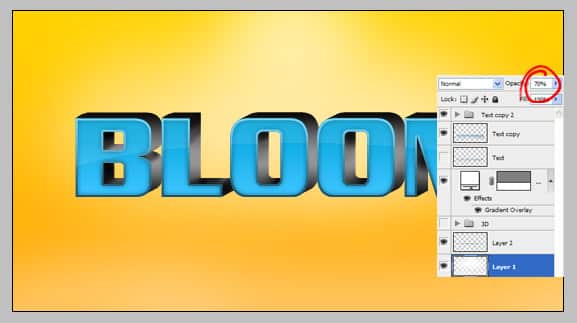 13. Next get the Rectangle Tool and draw a rectangle behind the text like below in the colour white. Set the Blending Mode to the shape to Multiply (so it’s transparent). Go into Blending Options > Gradient Overlay and put in the following settings:
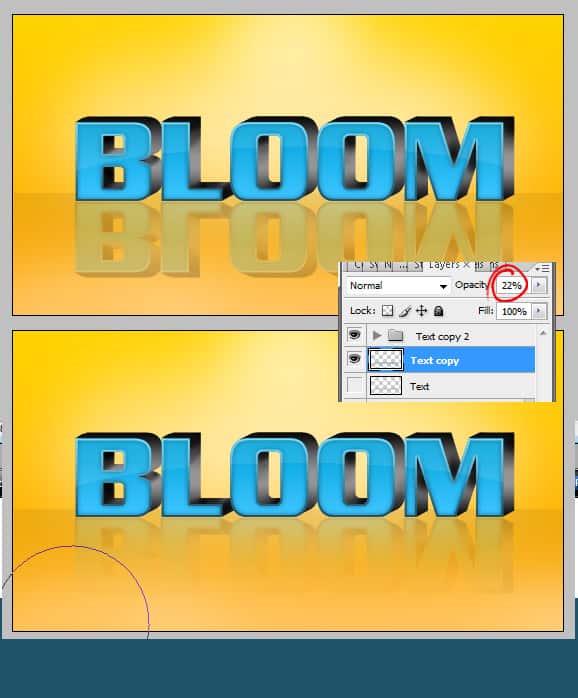
  14. Next put all the text layers into a folder and duplicate it. Right click on the bottom folder and Convert to Smart Object then Right Click and Rasterize the layer. Pres ctrl+t to make it transformable, click on the top part of the text and drag it down, put the text underneath to make a reflection. Set the Opacity to 22%, get a soft edged medium-large eraser too and erase the bottom part of the text.
  15. Next go to Filter > Blur > Gaussian Blur and put in 1.3 pixels.
 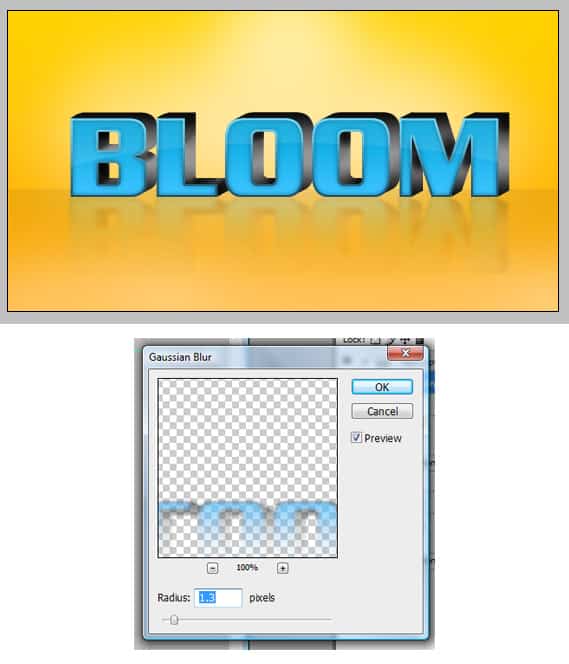 16. Next create a new layer, get the Elliptical Marquee Tool and draw a thin oval shape under the text, fill it with black. Go into Filter > Blur > Gaussian Blur and make it 3.8.


