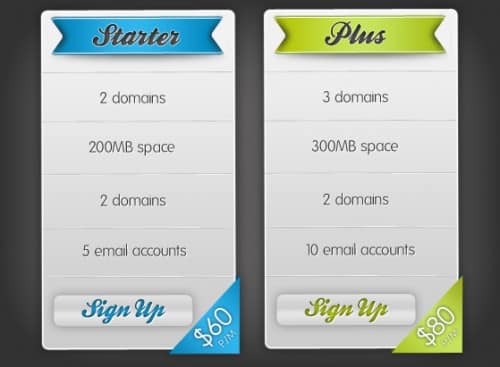
Design Pricing Plan Boxes in Photoshop [Tutorial]
Photoshop can be used to create elements perfect for website design. In today’s tutorial we’ll teach you how to create trendy Pricing Plan Boxes in Photoshop, there’s no excuse for having a bum pricing page, clean and easy to read pricing table designs with various color theme.You can now learn how to create your own Pricing Boxes in Photoshop and work them into your website designs. These Pricing Plan Boxes are especially designed for the websites which are indeed of web 2.0 style — yes it a modern and trend lately yet common uses in many graphical user interface GUI website.
This Design Pricing Plan Boxes in Photoshop [Tutorial] is perfect for hosting companies which need a neatly designed pricing plan display.  Pricing tables play an important role for every company that offers premium both services and products to lure the sign-up process. They are a dare from both a design and usability standpoint. Pricing Design must be unsophisticated at the same time clearly differentiate between features and prices of different products and services.
We hope you find this Design Pricing Plan Boxes in Photoshop [Tutorial] useful for your future projects! Enjoy!
Final Results
![Pricing-Plan-Hosting-Design-Photoshop Design Pricing Plan Boxes in Photoshop [Tutorial]](https://cdn.designbump.com/wp-content/uploads/2014/01/Pricing-Plan-Hosting-Design-Photoshop-500x367.jpg)
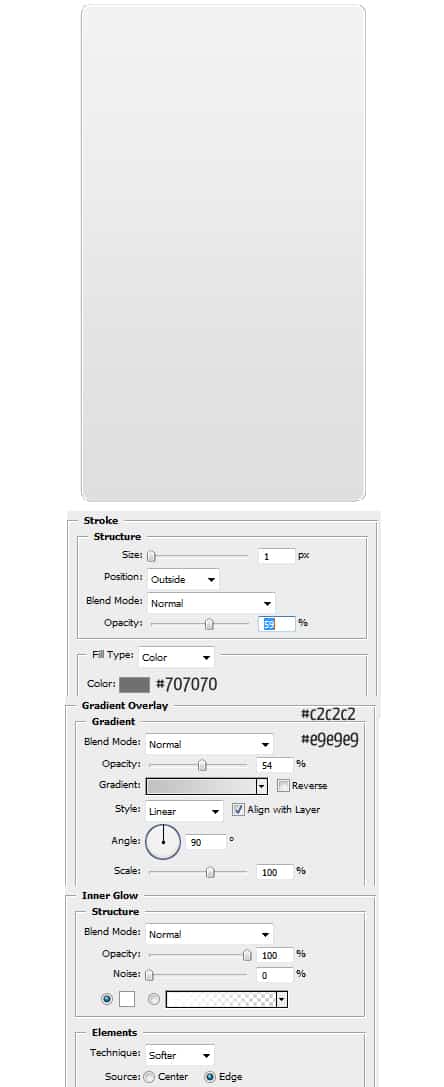
1. Create a new document that’s 500px x 600px. Get the rounded rectangle shape tool & draw a shape like below. Double click on the layer to go into Blending Options and put in the options below.
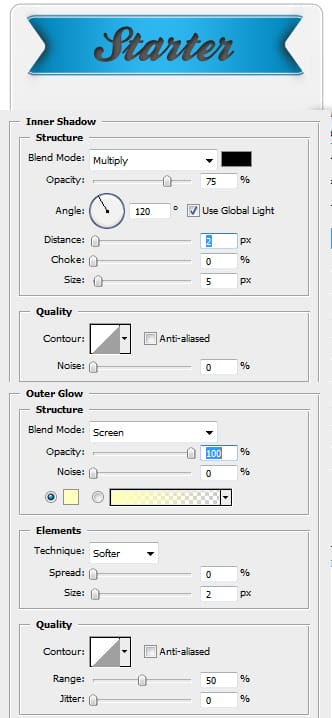
2. Now using the rounded rectangle tool again create another shape for the heading, double click into blending options and put in the options below:

3. Now click down on the rounded shape icon until more options appear and go into Custom Shape Tool. Select the upside down triangle shape and draw a shape on the canvas. Press ctrl+t to make the shape transformable & rotate the shape sideways. Holding down the ctrl key click on the triangle’s layer thumbnail to make the shape highlighted. Create a new layer by click on the new layer icon and fill in the highlighted shape black. Next go into Filter > Blur > Gaussian Blur & put in 5.3.

4. Hold down the shift key and select the triangle & triagle shadow layers, pull them to the new layer icon to duplicate. Next with the duplicated layers selected press ctrl+t and pull the right side over to the left to flip it. Place the triangle layers on the other side of the blue title banner. Using the font Ballpark type in the package name. Double click into Blending Options and put in the settings below:
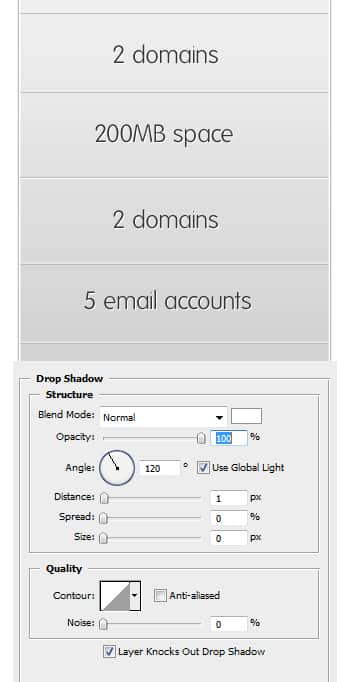
5. Next get the line tool draw a line from each end of the box while holding down shift (so the line stays straight). Duplicate the line, hold down the ctrl key and press the down arrow to nudge the duplicated line down a bit. Make the lines the colours below.

6. Next using the font Folks write out the package features. On the text layer double click onto blending options and put in the settings below:
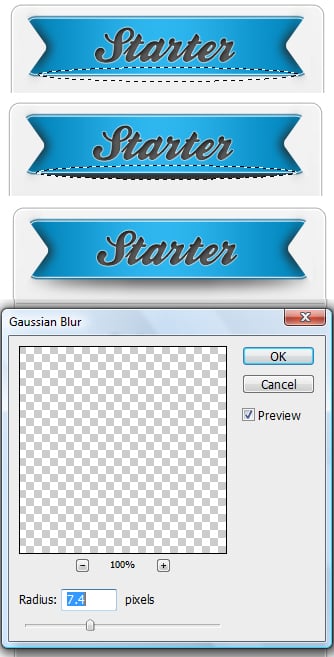
7. Next get the Ellipse Marquee Tool and draw a very thin oval underneath the blue box, create a new layer under the blue box and fill it with a dark grey. Next go to Filter > Blur > Gassian Blur and put in 7.4.
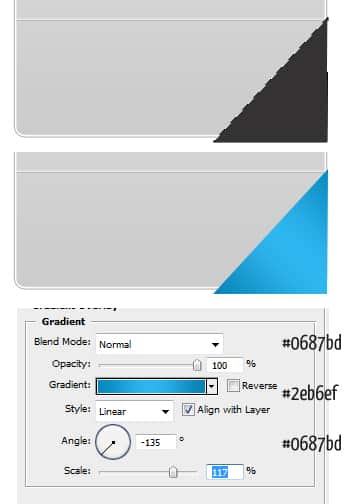
8. Get the pen tool and draw a shape like below on the corner of the box, double click into blending options and put in the settings below:
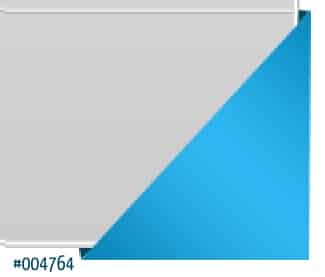
9. Using the colour below draw edges with the pen tool to make it look 3D.
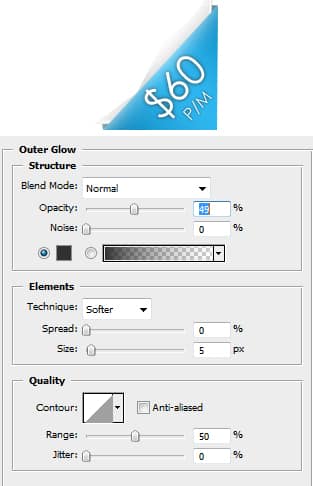
10. Using the font Century Goth write out the price in white, next click on another layer, then click back onto the text layer and press ctrl+t to rotate it. Double click into Blending Options and put in the settings below.
11. Get the rounded rectangle tool & draw a shape for the button, double click into Blending Options and put in the settings below:
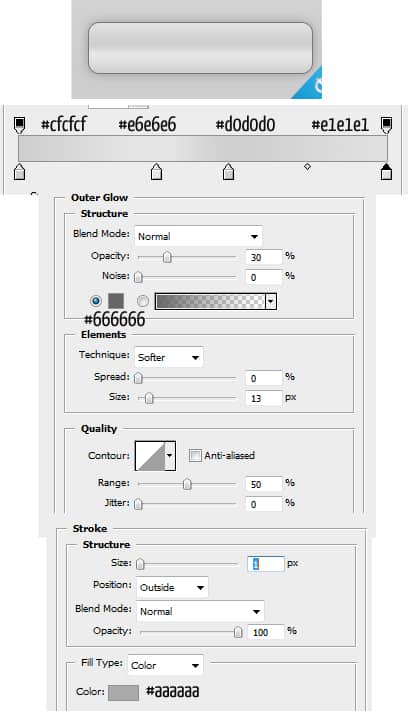
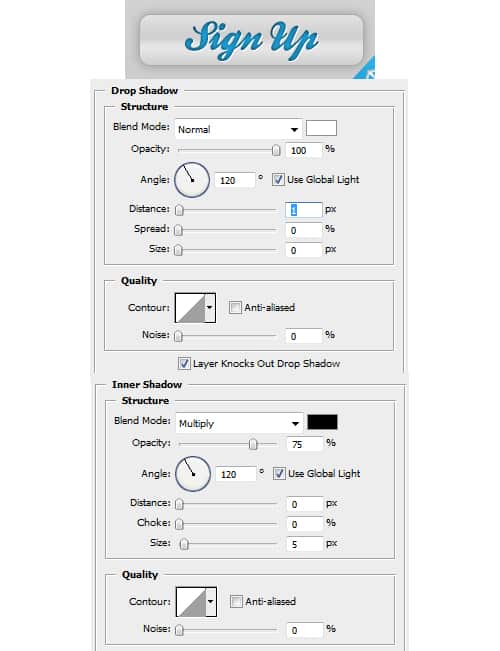
12. Lastly write out Sign Up (or whatever you want) with the Ballpark font in the colour #2790bc, double click into Blending Options and put in the settings below:
Final Results
