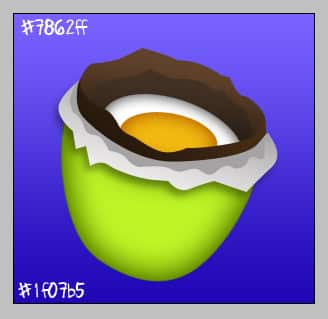
Create a Yummy Chocolate Cream Egg in Photoshop
Learn how to create a yummy chocolate cream egg in photoshop!
Final Result
1. Create a new document that’s 300×290 pixels. Using the pen tool and the colour I have below drawn a bottom egg shape. Right click on the layer and go into Blending Options > Inner Glow & Stroke and put in the settings below: 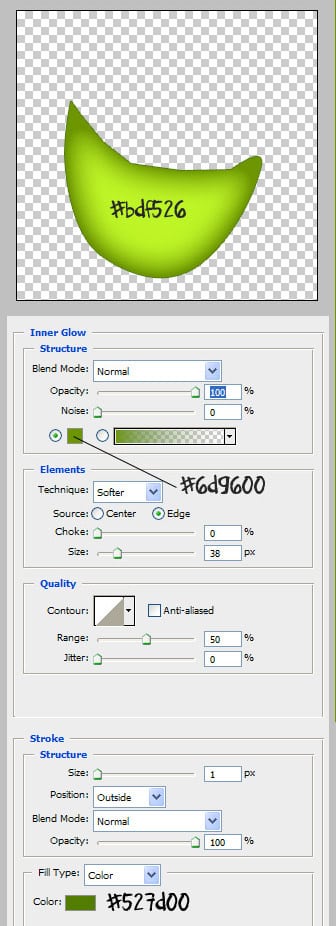
2. Next with the pen tool draw the egg foil wrapping using the colour below and blending options. 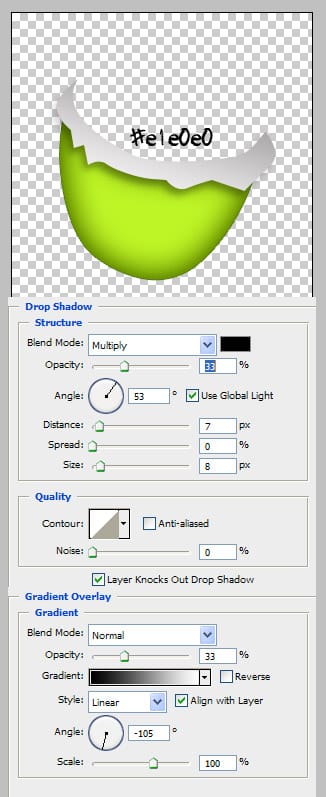
3. Now draw a part of the chocolate with the pen tool in the colour and blending options below: 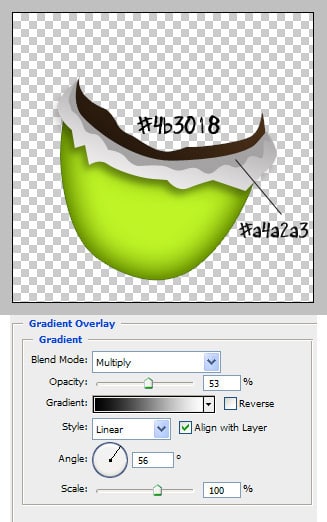
4. Now draw the inside chocolate, to make it easier place the inside choc layer the bottom layer underneath the wrapping layers. 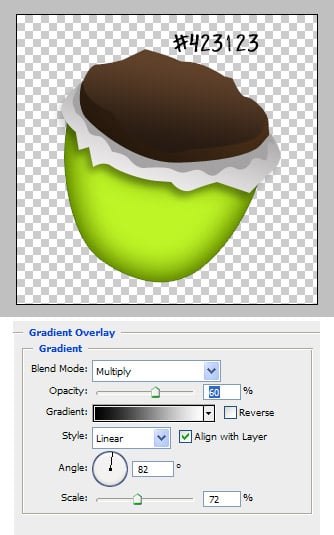
5. Draw the insides again using the pen tool, the colour and blending options are below. This will give the egg a 3d effect. 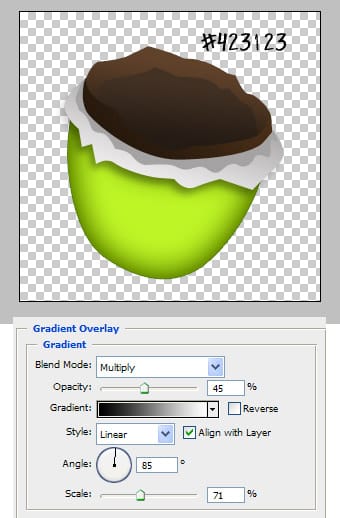
6. Next draw the ‘egg white’ in white with the pen tool, go into blending options and put in the setting below: 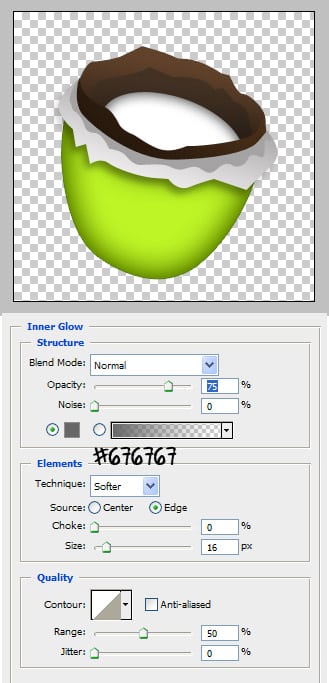
7. Next draw the yolk using with the pen tool and blending options below: 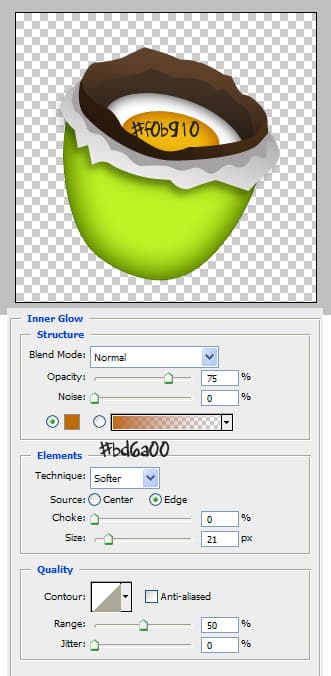
8. Create a new layer and place it on the bottom, fill the layer with white, go into blending options > Gradient Overlay and place it this Linear Gradient Colours:
9. Next download this Paint Splatter, Strokes & Drips Brushes, create a new layer and put on some white splatters and drips to convey the egg white.
10. Go to the green egg shape layer, press ctrl and click on the layer to highlight it. Create a new layer, get a hard rounded brush and using the colour below draw some spots. Set the opacity to the layer to 70%. 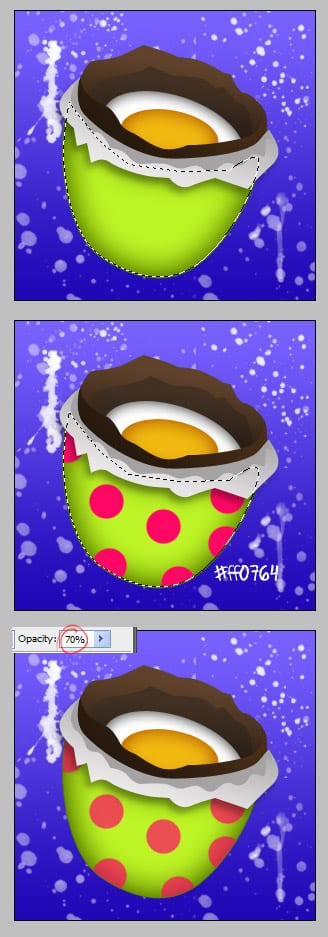
If you are having trouble with arranging the layers here is how I’ve arranged them: 
