Panoramic Landscape Photography: Capturing the Beauty of Nature 2023
Photographs are undoubtedly beautiful. These pieces can take you to a different realm of peace and tranquility where your mind can appreciate what life offers.
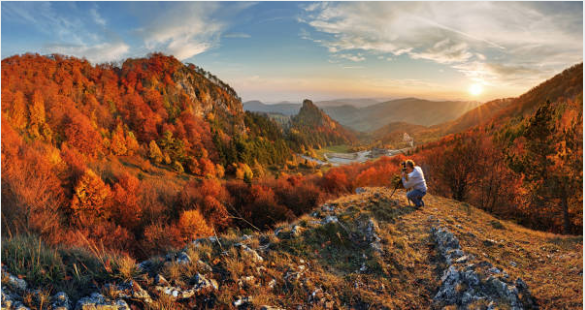
One particular type of photograph that will always leave you marveling is landscape photographs, especially panoramic ones. Compared to typical landscape photography, panoramic photos offer photographers the chance to showcase nature’s immense and vast beauty, such as glaciers, cliffs, deserts, and mountains, in a better way.
And while panoramic pieces are breathtaking, taking them can be a big challenge. It would help to have specific panorama equipment and a suitable place to photograph. Often, these places can be at the top of peaks or other areas that are difficult to reach.
In addition to that, most of the photos necessitate a lot of planning. This piece will guide you on the intrigues of panoramic photographs from the history to what you need band everything in between.
Brief History of Panoramic Photography
Photography was invented in 1826, and the desire to show landscapes and city overviews prompted the creation of panoramas. From 1840 onward, many panoramic format prints were created, including calotype prints and daguerreotypes.
As many as eleven full-size (8 1/2” x 61/2”) daguerreotype plates were utilized to produce a picture in some shots from the 1850s. Panoramas were printed onto paper later in the 1860s using big glass plate negatives, which were occasionally as large as 20 “x 24.”
H.H. Bennett was one of the later masters of the panoramic print. He could print three or four negatives measuring 20” x 24” onto a massive sheet of paper with almost any sign of where the negative edges met.
A customized revolving lens camera and a curved daguerreotype plate created the initial “true” photographic panoramas in the 1840s. Such a camera has an Austrian patent from 1843, but no plates produced with it are known to have survived.
Additionally, 11 enormous panoramic daguerreotype plates of Paris that were taken with Frederick Martens’ revolutionary panoramic camera in 1845 are still in existence.
Today, photographers can create wide-angle images encompassing vast stretches to showcase the grandeur of the natural world. And in 2023, panoramic landscape photography continues to be a rewarding and popular pursuit for professionals and amateur photographers alike.
What Is the Relationship Between Panoramic Pictures and Landscape Photography?
When people hear about panoramic photography, the first thought that comes to mind is landscape shots framed on trekking adventures. Landscape shots are daylight scenes of the sky, water, and land at a distance.
On the other hand, panoramic landscape photography is when you apply panorama techniques to landscape photographs, creating more dynamic images for your subject. As stated earlier, this will often involve hiking out to places that may be untouched by humans.
What should be the appropriate aspect ratio?
You can begin with a height-to-width ratio of 1/2. This means a shot must have at least twice as many sides as another to be considered a panoramic image. And it holds for both the horizontal and vertical sides.
There are no restrictions on the field angle because it is not required in panorama photography. In fact, many photographers simply crop the image in half after taking a standard shot with a wide-angle lens (114°, for example, using a 14mm Sigma Art lens).
But this might not be the best strategy. One of the best approaches is stitching additional frames together until you achieve the desired ratio.
In 360° panoramas, one of the best formats is 1/3, which results in a width side that is much longer than the height side. Many have created panoramas using this format inherited from movie cameras like the Fuji 617.
How Do You Shoot the Perfect Landscape Panoramic Photos?
While shooting panoramic landscape photos is not complex, you need certain things and considerations for excellent results. These include:
- A tripod – It will ensure you get excellent results because you will take photos aligned with at least one axis.
- Shoot RAW – It is best to shoot RAW rather than in JPEG format. Unlike in JPEG, there aren’t adjustments to the image and no image compression. Furthermore, when you use RAW, you get more options for working with images in post-editing.
- Take an Aperture Priority Mode test – While you are going to take photos with the Manual Mode, switch to Aperture Priority Mode first to help you identify the correct exposure settings.
- Set a focal distance – It is vital to keep the same focal distance for each photo you take.
- Choose the right white balance mode – You should not let the camera decide how cool or warm the colors are since it chooses a different value for your photos.
- Position your camera vertically – Shoot your horizontal panoramic photos with the camera positioned vertically. This will provide more wriggle room for the software that will merge the photos to work with.
- Overlap your photos by a minimum of 30% and take multiple images – The merging software will need a generous overlap for all your photos. So, ensure that you aim for an overlap of at least 30% or one-third.
Closure
It is quite satisfying to capture landscapes and sceneries in great detail. And the enormous resolution of the resultant image files means you can print your project at large sizes for hanging on a wall.
Last, don’t wait until you locate the ideal scene. When you put the tips from this article into practice, you can take panoramic images everywhere!